Table of contents
- About the theme
- Requirements
- Installation
- Updates
- Using Toolset Starter with Layouts Plugin
- Using the theme without Layouts
- Using Font Awesome Icons
- Using Toolset Starter with WooCommerce
- Using helper CSS classes
- Adding custom CSS
- Disabling Toolset Starter stylesheets
About the theme
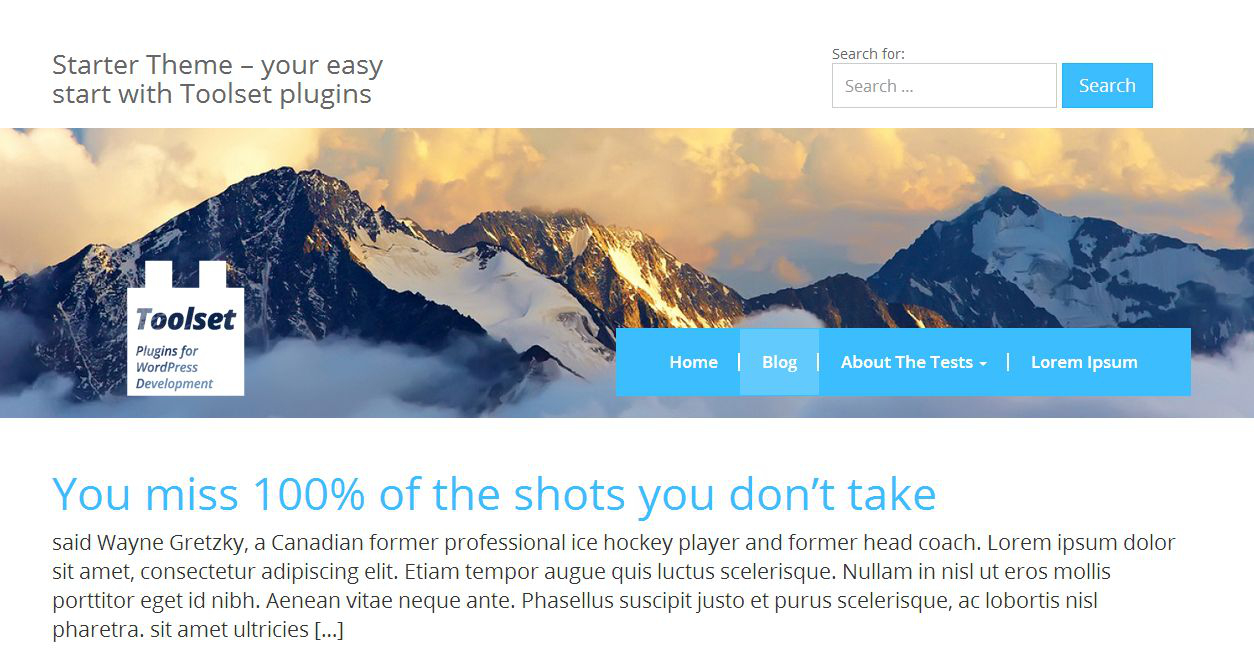
Toolset Starter is a clean and modern Bootstrap-based theme designed to help you get started using Toolset plugins.
The Toolset Starter theme includes the absolute minimal page elements, so you can easily add the rest using Toolset plugins.
Toolset Starter is also fully integrated with the WooCommerce plugin. You can create e-shops without having to worry about WooCommerce styling or template integration.
Requirements
The Toolset Starter theme is based on Bootstrap 3.3.0 (already integrated). It works with:
- WordPress 4.2+,
- the latest versions of our Toolset plugins (Views 1.8.1+ and Layouts 1.1+),
- the WooCommerce plugin (2.3.8+),
You can use it with the Layouts plugin (in this case no manual integration is required) or without Layouts.
For most users, we recommend using a theme such as GeneratePress or OceanWP which gives you the benefits of using Layouts to design your content but leaves the job of rendering recurring elements such as the header and footer to your theme.
Installation
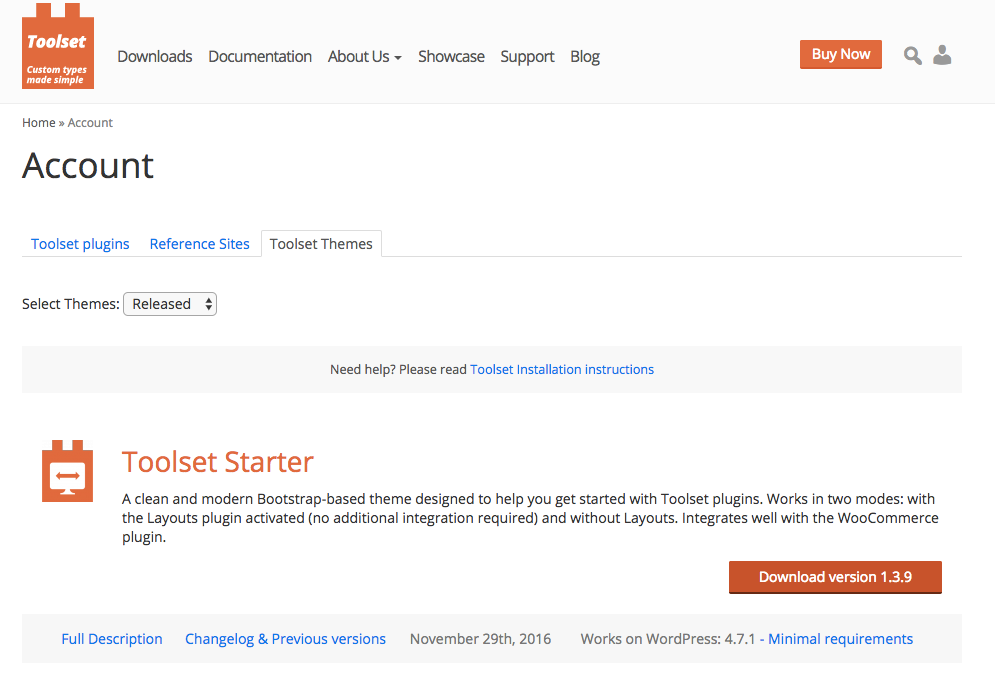
- Log into your wp-types.com account
- Go to the Downloads section
- Choose the ‘Toolset themes’ tab
- Locate the Download link for Toolset Starter and download the zip file
- Upload the zip file to your WordPress and activate the theme
Running the Installer
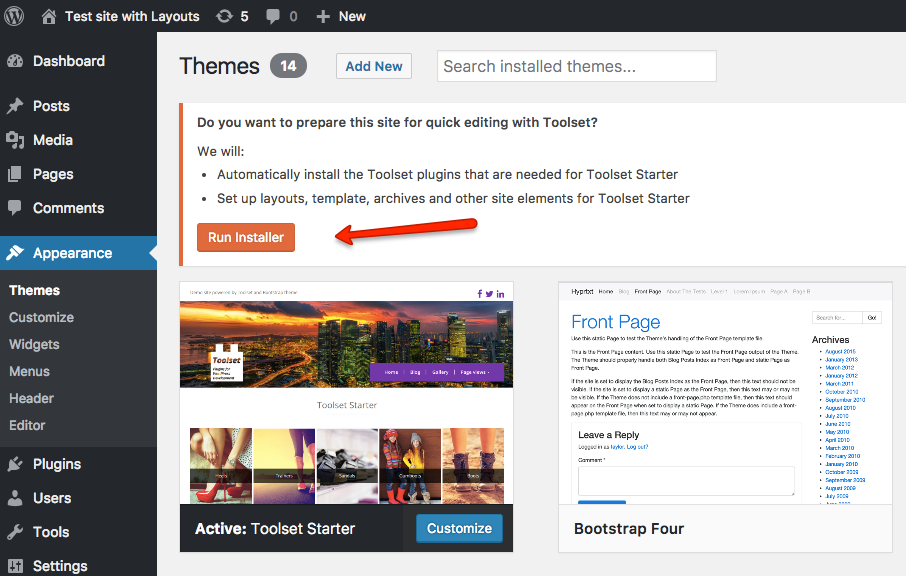
Since version 1.4, Toolset Starter comes with a built-in Installer, which you can launch after activating the Toolset Starter theme (see the screenshot on the left).
Please note that the Installer message appears only if there are no Toolset elements in your sites such as Content Templates, Views, Layouts and WordPress Archives.
Running the Installer is optional. It allows you to:
- automatically install Toolset plugins
- set up default layouts, templates and archives
Default Layouts created by the Installer
The Installer creates seven default layouts as shown on the following picture:
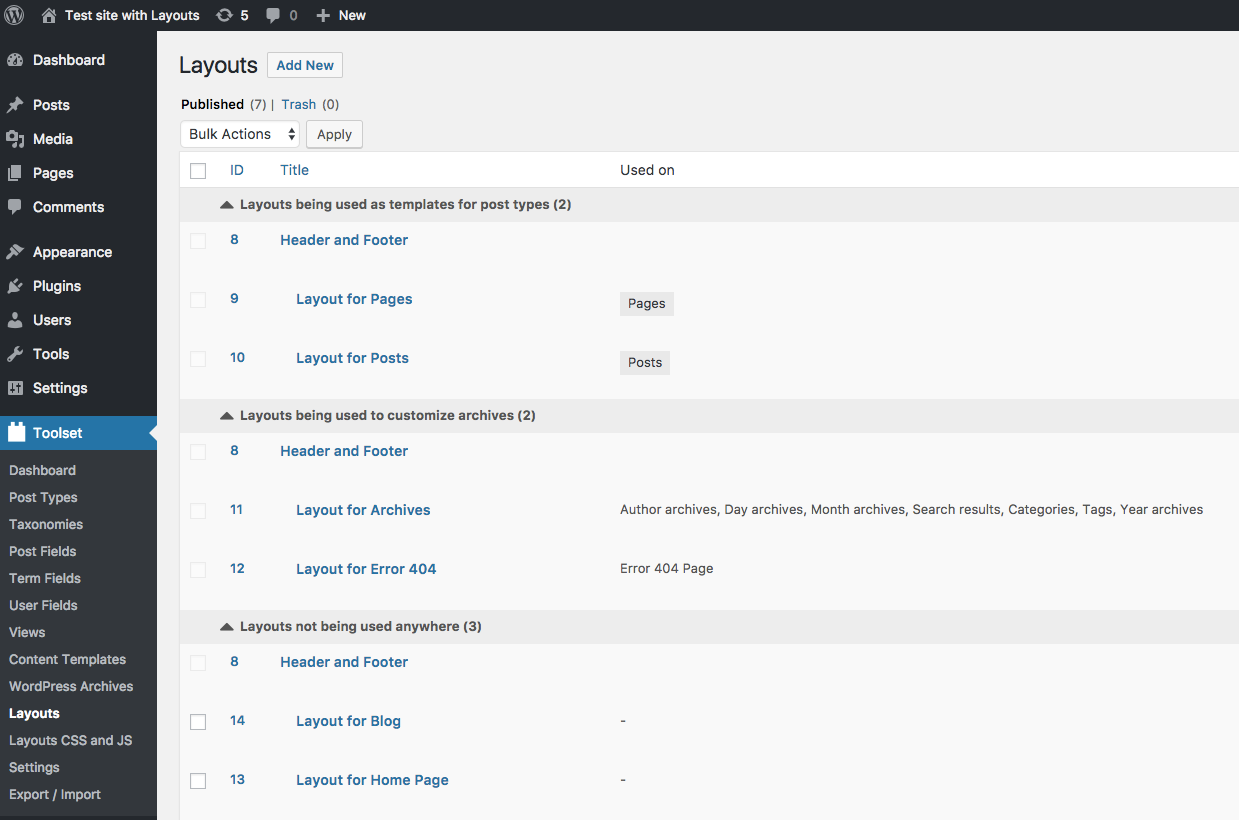
Feel free to customize these default layouts to meet your needs.
Compare the images below to see how your Toolset Starter-based site looks on the front-end when used with (#1) and without (#2) default Layouts.

Updates
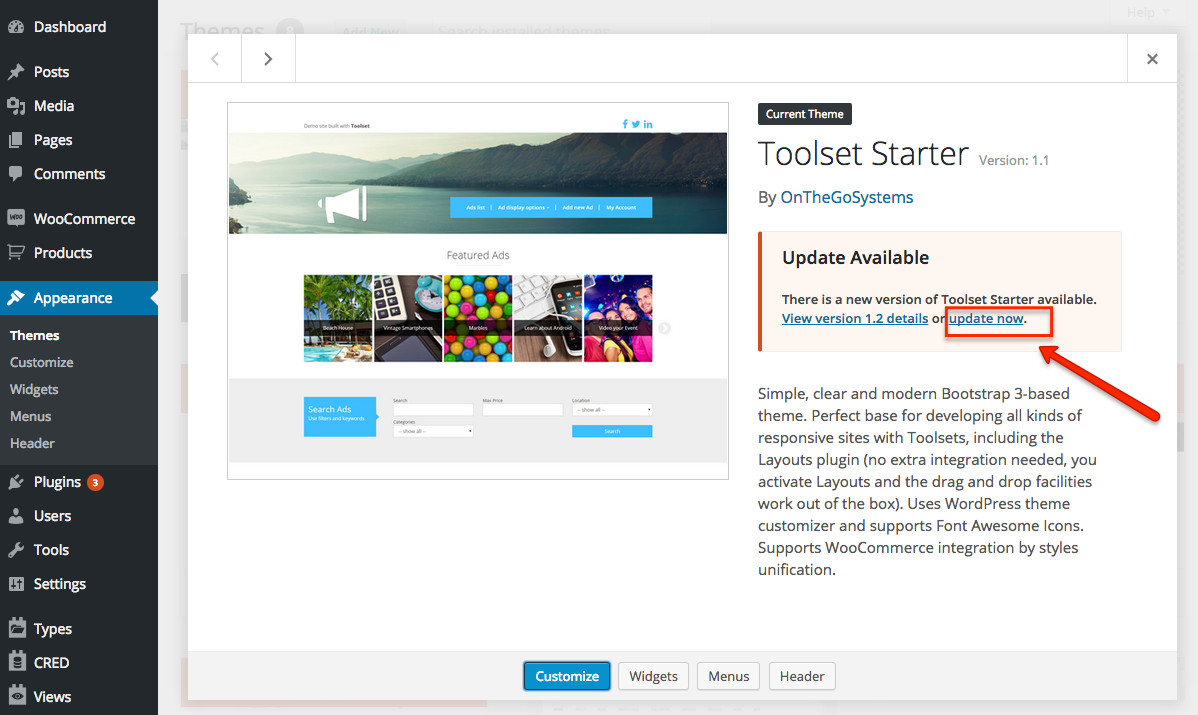
To update the theme to a new version, in your WordPress dashboard, go to Appearance > Themes. If the Toolset Starter theme has updates available will display an alert banner. Click on the Toolset Starter theme and click on “update now.”
Using Toolset Starter with Layouts Plugin
The theme will automatically detect whether you have the Layouts plugin activated. If the plugin is activated, your site will look somewhat different when you begin compared to when using it without Layouts activated or installed.
By using this theme with Layouts, you obtain full control of your design. You design all site elements with ease, including a custom header, logo, footer, multiple columns, etc.
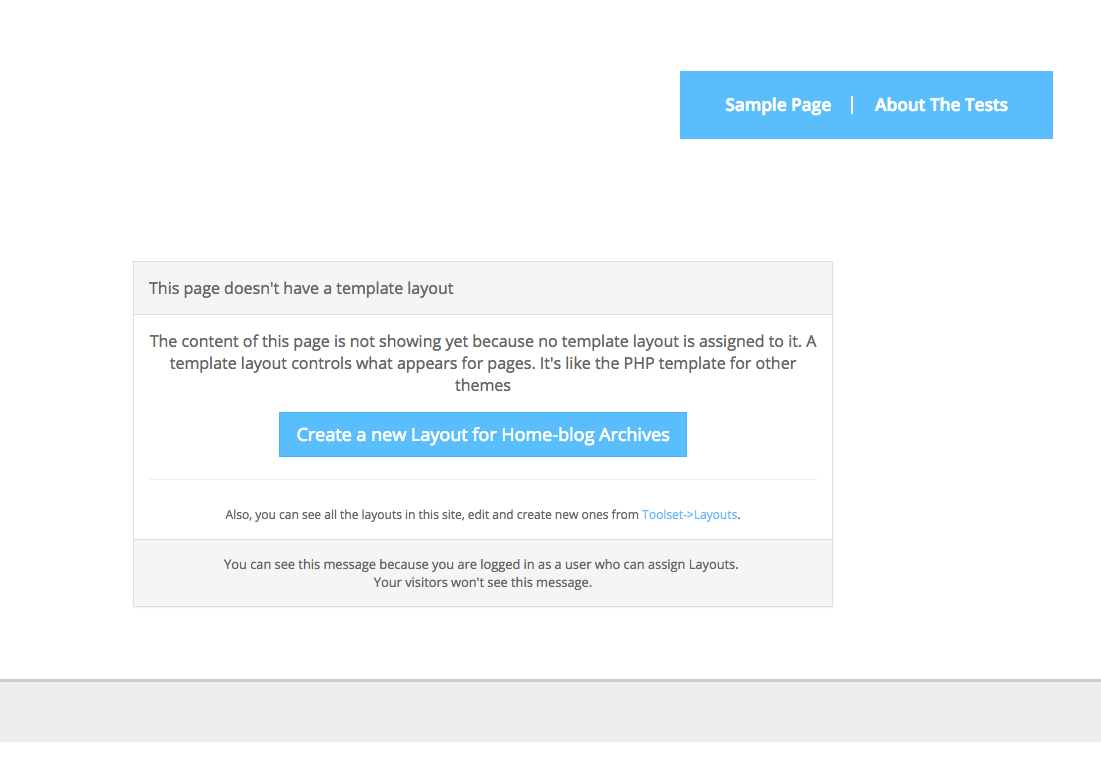
Helpful Context-Dependent Messages

Unless you install the default Layouts by running the Installer, if you view your WordPress page, posts, and archives as the admin, the Toolset Starter will display a context-dependent message. The message will prompt you to perform an action depending on the context.
For example, if you preview an archive page for a specific category, a message such as in the picture on the left will appear.
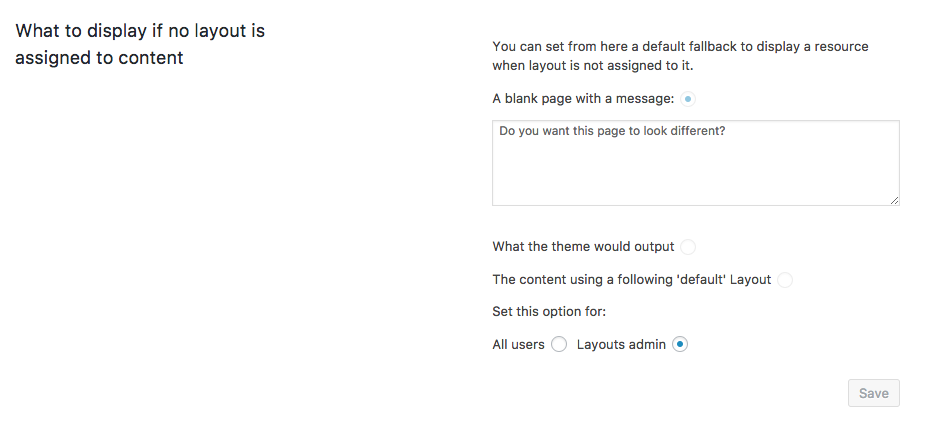
You can also customize the message shown on the front-end when there is no layout assigned to content. To do this, go to the Toolset -> Settings page, click the Layouts tab and enter the custom message in the What to display if no layout is assigned to content section. You can select if the custom message is displayed for all visitors or only for the site administrators.
Best approach to start using Theme with Layouts
The best approach for beginning to build Layouts-based sites is to use the parent-child layouts. The default layouts installed by the Installer use this method.
To learn more about the parent-child layouts refer to the guide entitled Using layout hierarchy for quick development.
Using the theme without Layouts
If you are not using Layouts, the Toolset Starter theme will include sections regarding custom headers, logos, and widgets to help you customize your site.
These elements can be easily changed through the Theme Customization admin screen (“Appearance” → “Customize” or accessed directly from your WordPress upper bar). See the example below.
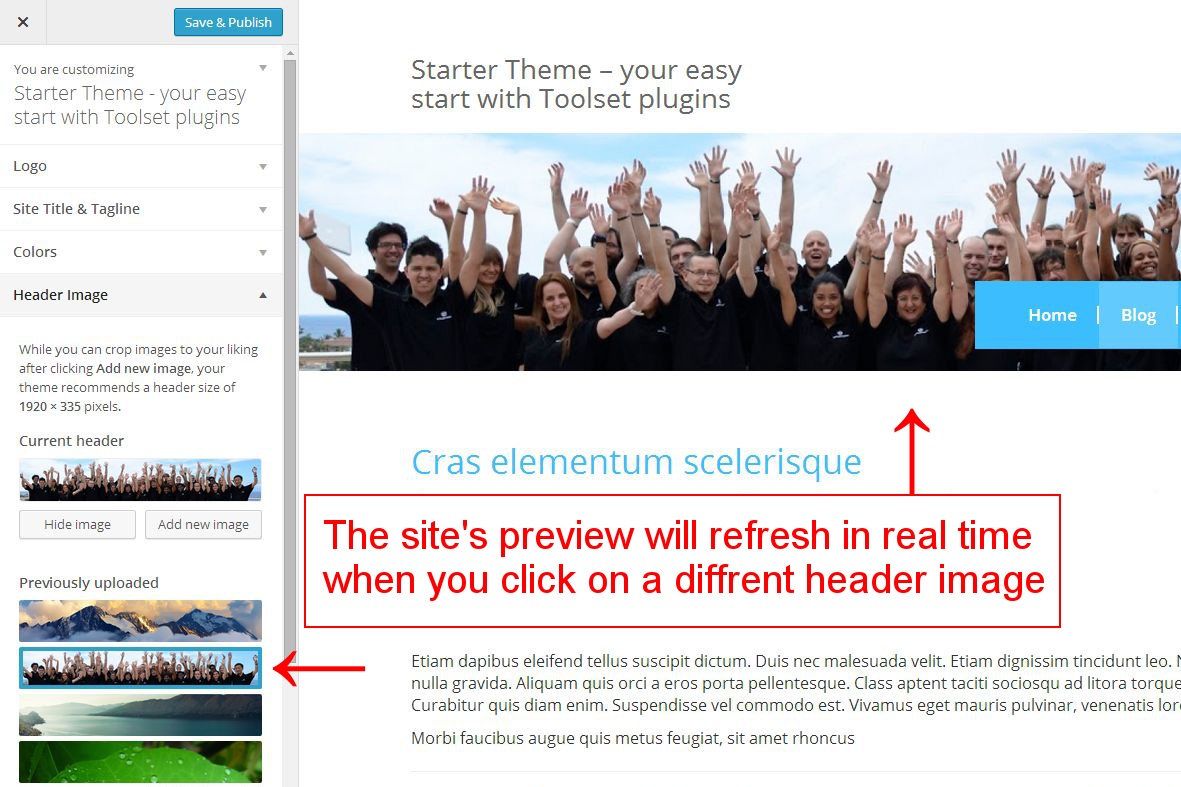
Adding a Custom Header Image
To change your Header Image, first go to “Appearance” → “Customize” and locate the Header Image section. Then choose your image.
You can choose a Header Image from the previously uploaded Header Images, upload a new one, or hide it.
![]()
Adding a Custom Logo
To change the logo, locate the Logo section and upload an image. However, a logo is not required as the theme allows you to exclude it.
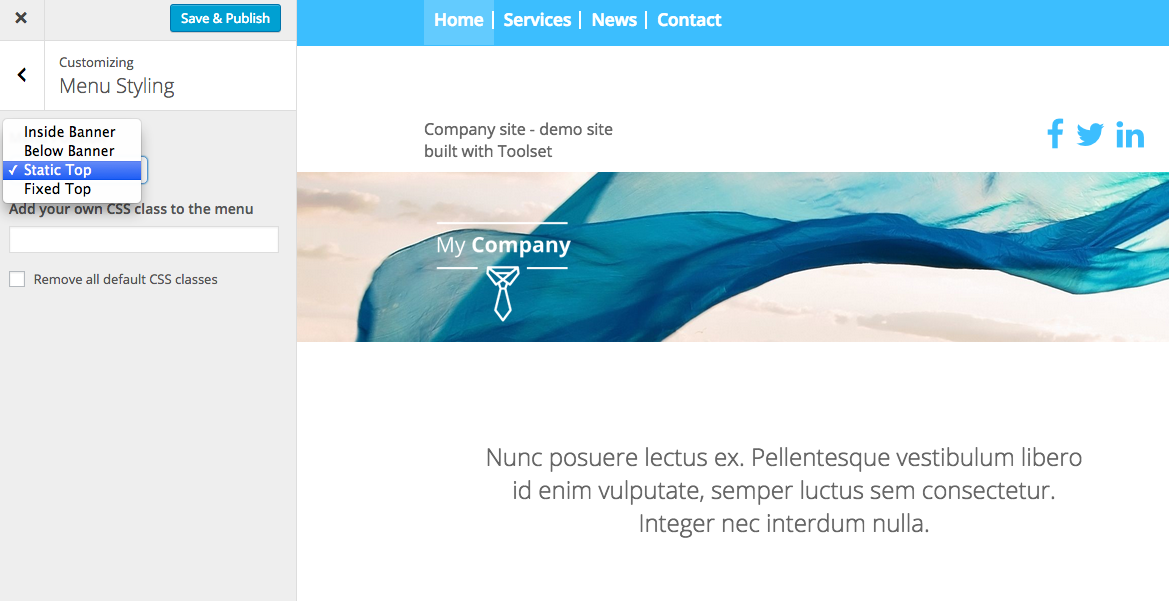
Changing the menu position
You can easily change the position of your menu. To change the position of your main navigation, locate the “Menu styling” section and pick the option that works best for you.
Please note that these options are only available when the Layouts plugin is de-activated.
The following options are available:
- Inside Banner
- Outside Banner
- Static Top
- Fixed Top
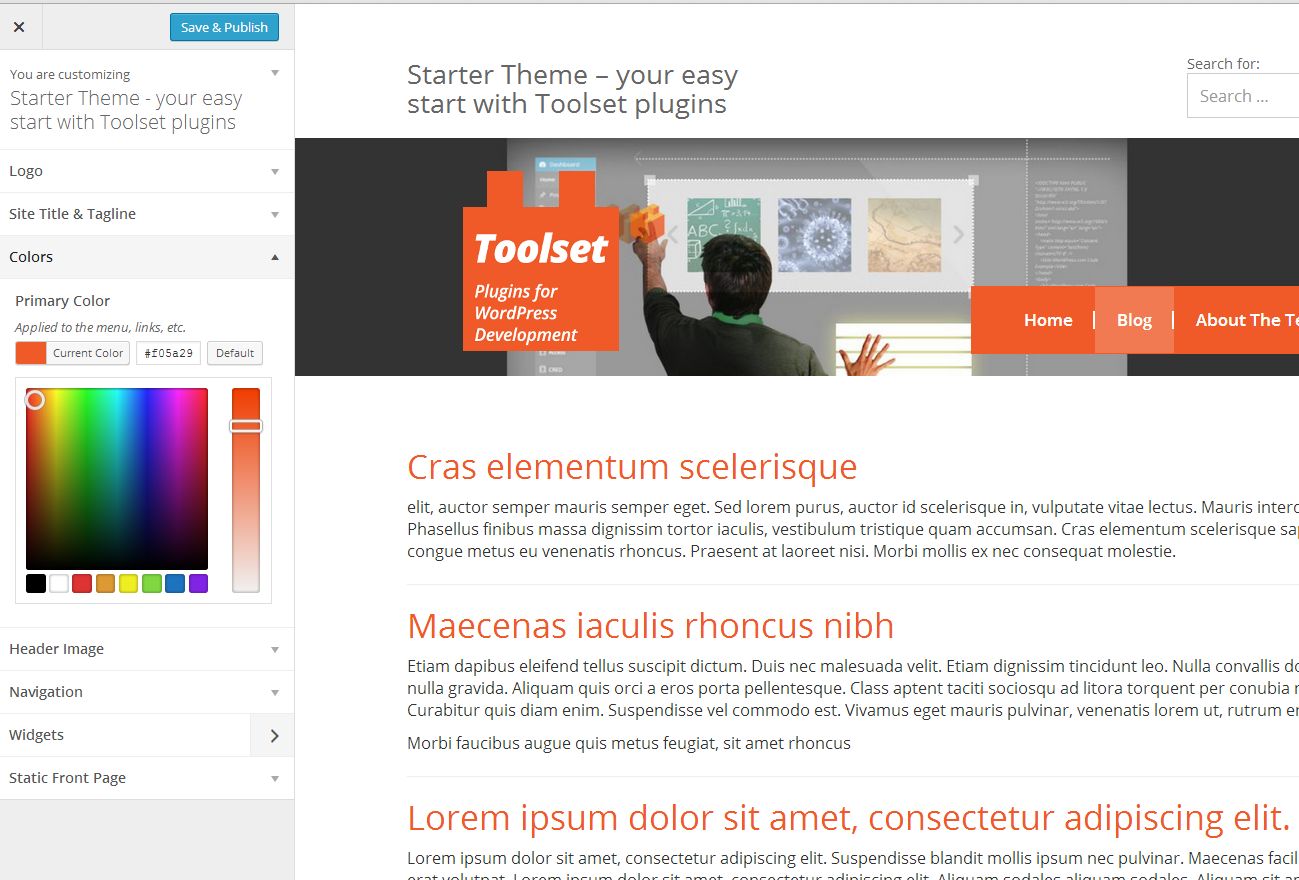
Changing Colors with the Color Picker
You can quickly identify the primary color that best suits your site. From your WordPress Dashboard, go to “Appearance” → “Customize” and locate the Colors section. Play around with the Color Picker. Once you are happy with your choice, you simply Save and Publish.
Note that you can also change colors using the Color Picker while in Layouts mode.
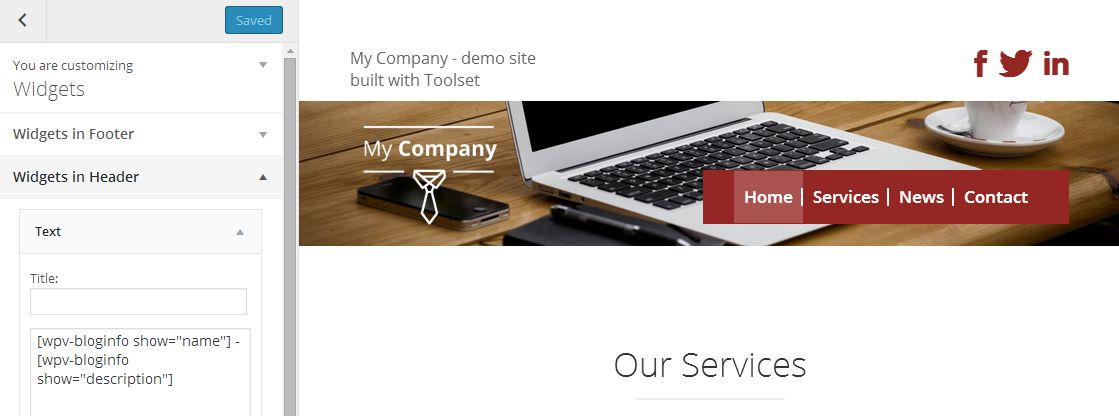
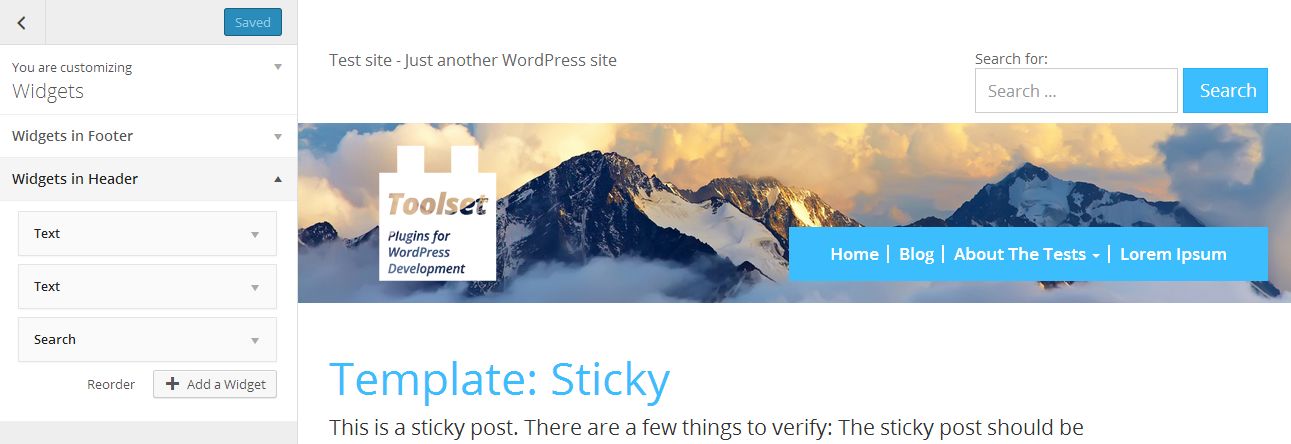
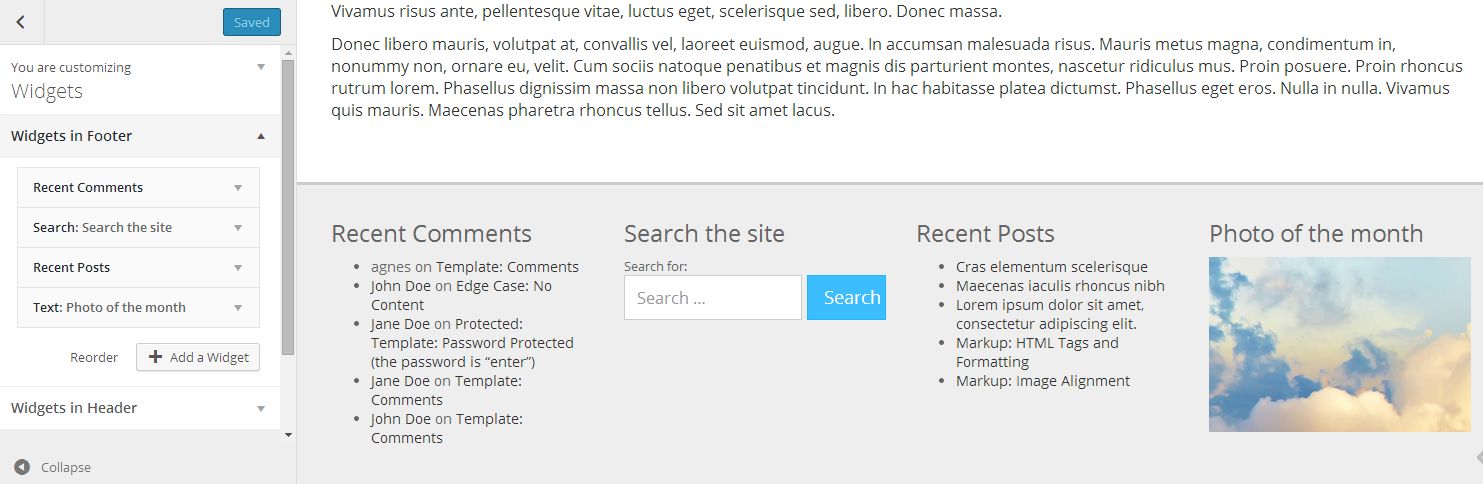
Adding widgets to the Header and Footer
A widgetized Header allows you to adapt the upper part of your site easily, whether the site name, search feature, or social icons, you name it. Simply drag and drop a relevant widget to the proper location and you are finished.
The same rule applies to your footer. See some examples:
Using Font Awesome Icons
![]()
The theme includes support for Font Awesome out of the box. Font Awesome gives you scalable vector icons and function like fonts. This means that you can style them in the same manner as you style your regular text. You can easily change the color and size using a little CSS.
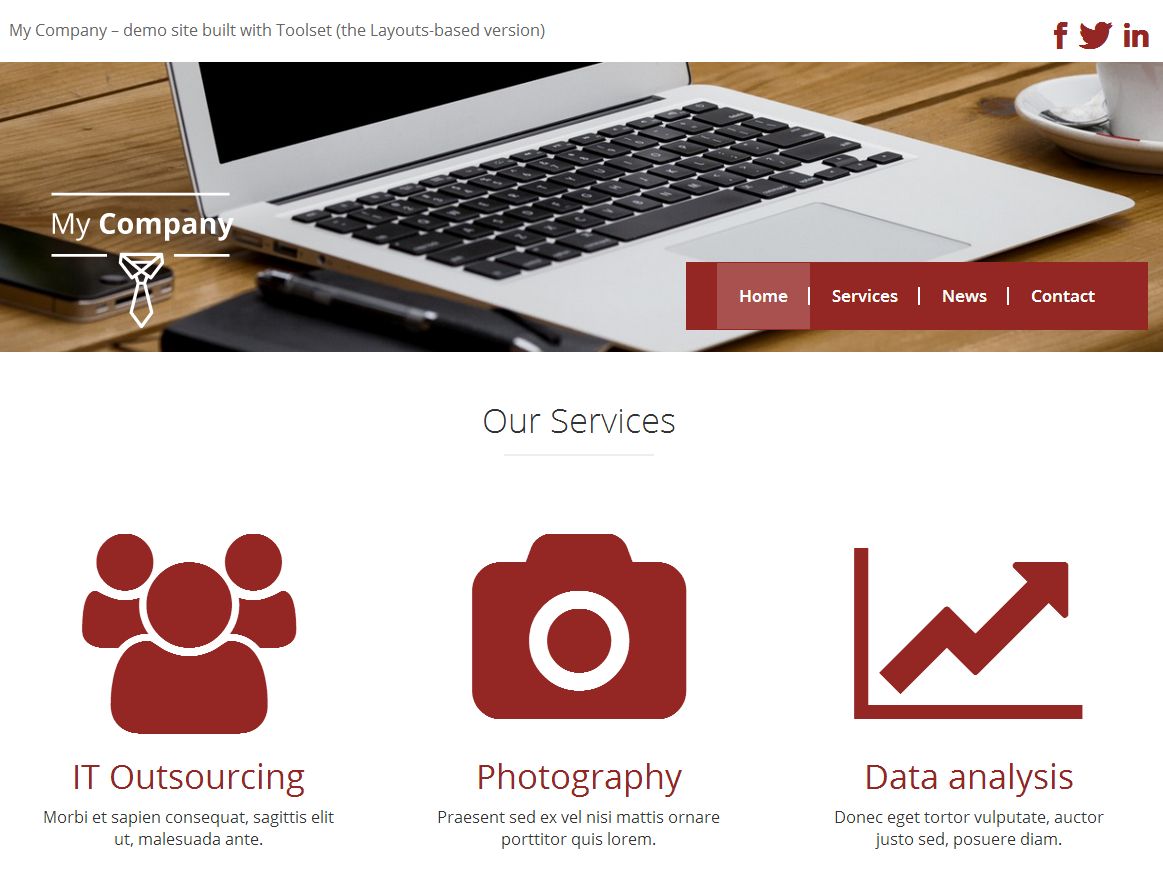
Consider the example that follows. The screenshot is from a “My Company” site built using Toolset. The Services (implemented as Custom Posts) are rendered by Font Awesome icons.
To use Font Awesome icons together with the Toolset Starter theme, knowing a class name representing the desired icon is all that is required. You can find the class name at fortawesome.github.io/Font-Awesome/icons/. Add the relevant class and the Toolset Starter theme will take care of the rest
Using Toolset Starter with WooCommerce
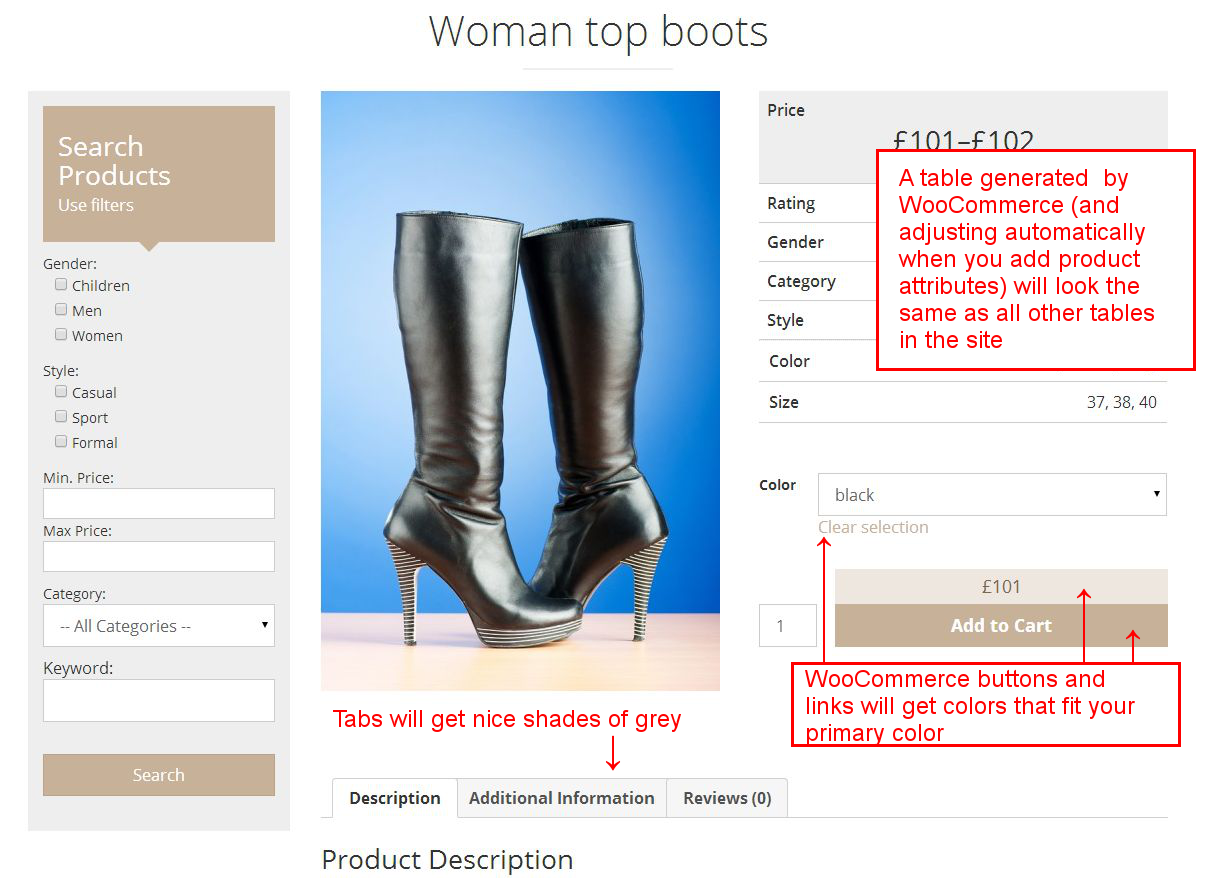
Toolset Starter integrates well with WooCommerce styles. If the WooCommerce plugins are activated, it is not necessary to add styles manually to enable the WooCommerce styles to fit the styles of your theme. The Toolset Starter will add them for you.
Toolset Starter comes with two pre-built layouts specifically designed for use with WooCommerce. One is a template for displaying single Products, while the other is used for all Product Listings archive page, like your main “Shop” page, for example. You can read more about this on our page about using theme integrations with WooCommerce.
We also built a WooCommerce-based demo site using Toolset and the Toolset Starter theme.
Using helper CSS classes
You can quickly tune your design using some helpful classes provided with the theme.
Support for Bootstrap standard classes
The theme is based on Bootstrap. All classes from this framework are included in the Toolset Starter theme. Just refer to Boostrap documentation, locate a relevant class name and use it. The theme will automatically apply the styles provided by this Bootstrap class.
Custom classes introduced by the Toolset Starter
| Class name | Description | Example |
|---|---|---|
| page-title, post-title, archive-title | center the element, add margins and light grey underline |  |
| bg-gray-base | new base for grey colors; grey (#333) background, white text color | |
| bg-gray-darker | extra dark grey (#555) background, white text color | |
| bg-gray | grey (#666) background | |
| bg-gray-light | light grey (#ccc) background | |
| bg-gray-lighter | extra light grey (#eee) background | |
| bolder | super bold | |
| lighter | super light | |
| border-top | add top border | |
| border-primary border-top | add top border with blue color | |
| border-left | add left border | |
| border-right | add right border | |
| border-bottom | add bottom border | |
| btn-xxl btn | make the buttons extra large |  |
| bg-transparent | reset current background | |
| clear | Apply the clear: both; CSS rule – no floating elements allowed on either the left or the right side of a specified element. | |
| bg-transparent | reset current background |
Browse the css/theme.scss source file to find more useful classes.
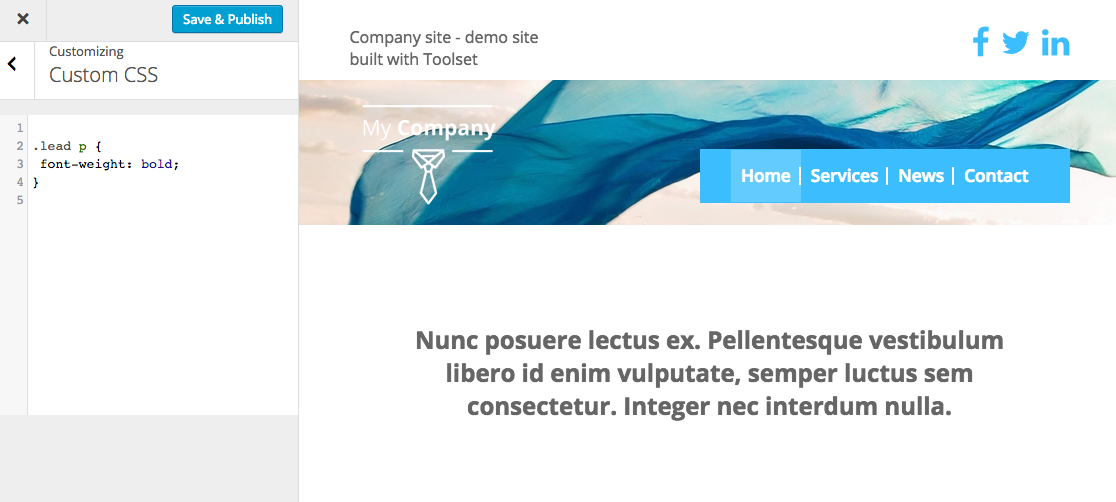
Adding custom CSS
The best way to add custom CSS styles is to use the Customizer and the “Custom CSS” section:
Also the following options are possible:
- create a Child Theme with your custom CSS style sheet. You will find a ready to use Toolset Starter Child theme in your Toolset account, under Downloads -> Toolset themes.
- use the CSS section of the Views or Layouts plugins
- modify the source files provided with the theme. (Note that this is not recommended if you want this theme to be up-to-date with future releases)
In addition, you can easily change the primary color of your site using the Color Picker.
Disabling Toolset Starter stylesheets
Stylesheets in Toolset Starter are divided into smaller files. You can disable them using the Customizer.
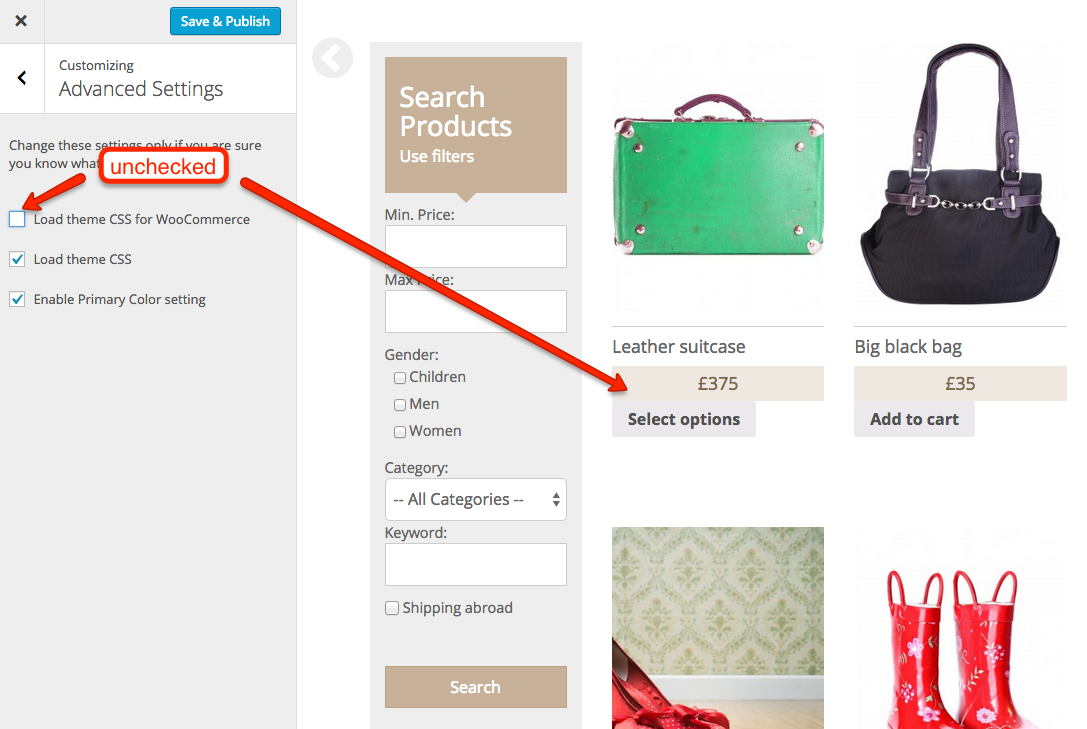
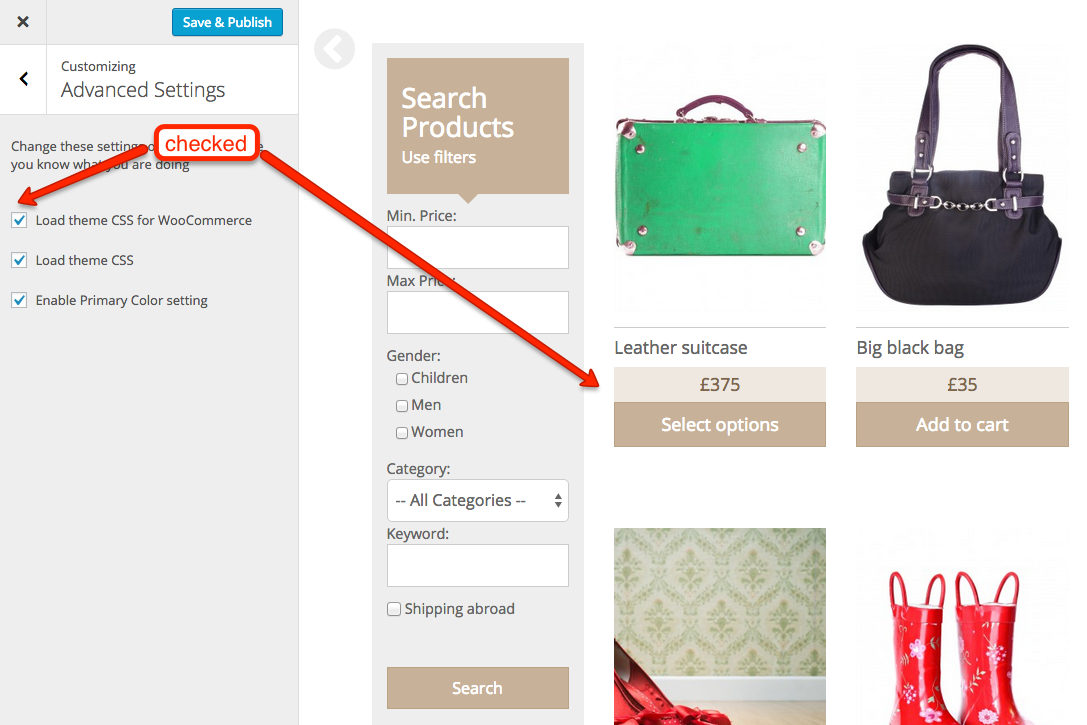
Go to “Appearance” → “Customize” and locate the “Advanced settings” section:
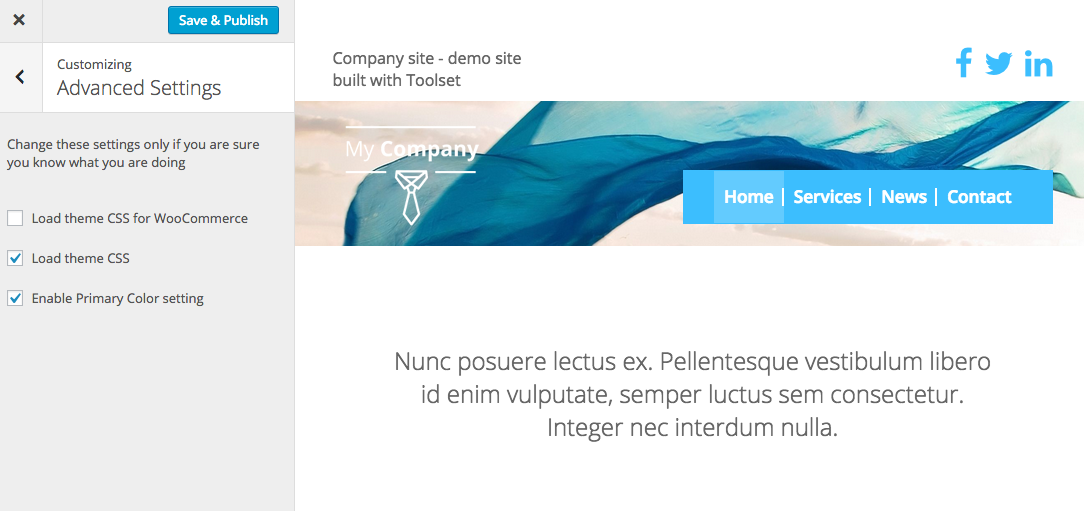
Advanced Settings
The following options are possible:
- Load theme CSS for WooCommerce – unchecking this option will remove Toolset Starter styles used for WooCommerce sites – compare the images below.

“Load theme CSS for WooCommerce” option unchecked 
“Load theme CSS for WooCommerce” option checked - Load theme CSS – unchecking this option will switch off the Toolset Starter theme styles – your theme will use pure Bootstrap.
- Enable Primary Color setting – unchecking this option will prevent Custom Color styles from loading, and it will also disable the Color Picker of the Custom Color section