Views let you create unique sliders, with the exact content and behavior that you choose.
Why Build Sliders with Views
There are many ways to build sliders. A lot of themes have their own sliders and there are plenty of plugins that do the job. So, why should you consider building your sliders with Views?
- Content selection – You can display any content type, with your custom fields and taxonomy in Views sliders.
- Query filters – The powerful query filters in Views let you display the exact content that you need in sliders.
- Design options – You can style Views sliders exactly how you like. Use HTML, CSS and shortcodes to make the sliders look exactly like you need them.
- Server efficiency – Views loads slides as needed. If visitors don’t watch a slide, its content is not loaded from the server.
When you build sliders with Views, you have complete control over what the sliders display, how slides look and how they transition. In this tutorial, we’ll teach you the principles and help with useful CSS, which can help you save time and build better sliders.
Creating a View for a Slider
Views load content from the database. The View that we’ll create for a slider will load the content that we’ll display as slides.
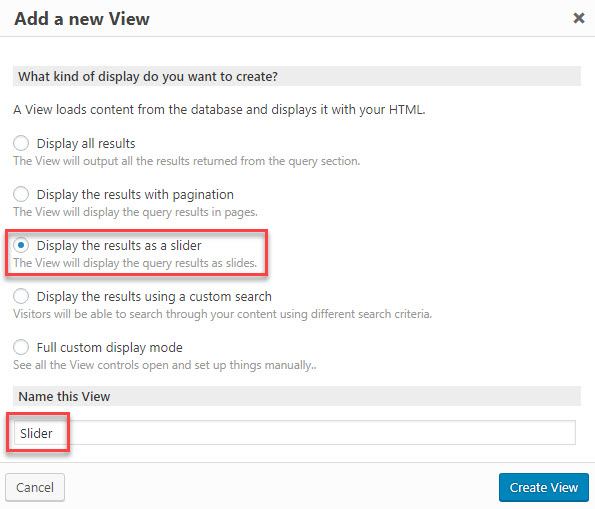
Go to the Views page and click the Add New button. In the dialog that appears, select to Display the results as a slider and give it a name.
The first thing that you will see is the View Query section. This tells the View what content to load from the database.
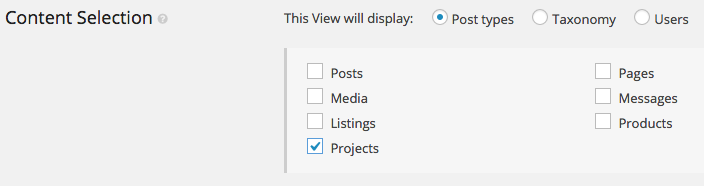
To make things really simple, I’ll create slides from WooCommerce products. Later, you can change the query to load pages or any custom post type that appears in your site.
You might not want all content of the selected type to show up as slides. To select exactly which items to include in the slider, use the filter section. We’ll talk more about that towards the end of this tutorial.
Designing the Slider
The slider includes two parts:
- Each of the slides
- Slide transition controls
Views lets us build each of these elements using shortcodes and HTML.
Let’s start from the bottom and first design the individual slides.
Slider – Content Template to a create a slide
When we selected to Display the results as a slider, Views has already created a Content Template for us and added the shortcode to our Loop Editor.
[wpv-post-body view_template="Slider - slide"]
If you scroll down, you’ll see that the Content Template Slider – slide has been linked to your View. You can add the fields for your slider directly to the Content Template.

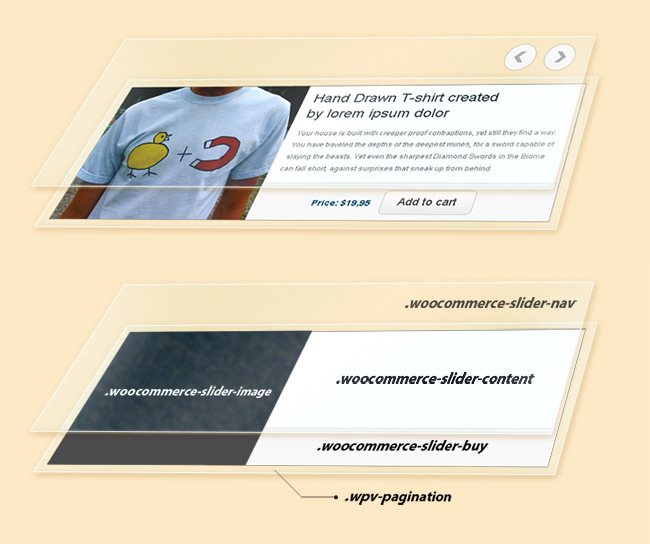
Each of our reference sliders uses a Content Template to control the appearance of individual slides. For example, the Content Template of our WooCommerce slider will include:
- the featured image,
- post title with a link,
- post excerpt,
- WooCommerce buy button
To keep things simple, we put all the CSS, for both the individual slide, the transition controls and slider frame in the CSS section of the Content Template. This is the part of the CSS for the individual the slides.
You can add any custom fields or static text, links and other HTML to the slides by editing the Content Template.
Slide Transition Controls
Now that we have the individual slides, we want to allow visitors to switch between them.
These are the options we want for slide transition:
- Slides switch automatically every few seconds
- Visitors click on next and previous buttons to switch slides
- Visitors select specific slides and switch to them
You can combine these slide transition methods and have both automatic transition and allow visitors to move forward and back or select a specific slide.
Scroll up to the pagination settings and Views has already set some defaults for our Slider.
For our slider, we only want to display one item per page. The other options are fine, but you can fine tune your slider setting the Advanced options, you can read about these in more detail in Views Pagination – Split Content into Pages.
The pagination settings are saved automatically as you change them, so head down to the Filter section and click the Pagination controls button to add them.
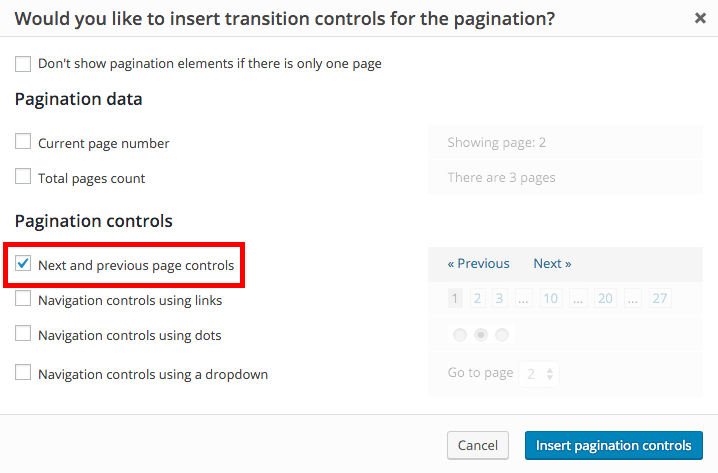
The only control we need is the Next and previous page controls. Deselect the other options and click the button to Insert pagination.
Your Filter section with the slider controls should look like this:
[wpv-filter-start hide="false"]
[wpv-filter-controls][/wpv-filter-controls]
[wpv-pagination]
	[wpv-pager-prev-page]
		[wpml-string context="wpv-views"]Previous[/wpml-string]
	[/wpv-pager-prev-page]
	[wpv-pager-next-page]
		[wpml-string context="wpv-views"]Next[/wpml-string]
	[/wpv-pager-next-page]
[/wpv-pagination]
[wpv-filter-end]
To design the appearance, add HTML around these control elements, like in our example:
<div class="woocommerce-slider-nav">
[wpv-filter-start hide="false"]
  [wpv-pagination]
      <p>
        [wpv-pager-prev-page]
        [wpml-string context="wpv-views"]<< previous post[/wpml-string][/wpv-pager-prev-page]
        [wpv-pager-next-page]
        [wpml-string context="wpv-views"]next post >>[/wpml-string][/wpv-pager-next-page]
      </p>
  [/wpv-pagination]
[wpv-filter-end]
</div>
Then, style them using the CSS in the View.
Adding the slider to your page
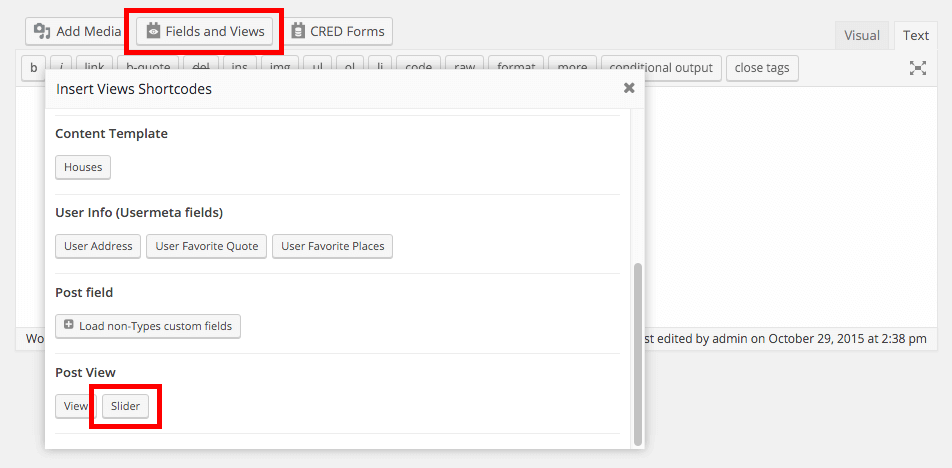
Edit the page where you want your slider to appear. Click on the Fields and Views button, and select your View, in our case Slider, to insert it into your page.
Related topic

How to create thumbnail sliders
Learn how to create a thumbnail slider based on your custom post type which uses custom fields. A thumbnail contains a series of images on the main slider and a set of thumbnails of all of the available images below.
If you click on the thumbnail, it navigates you to that image’s main slide.