Toolset lets you build custom searches for any custom post type. Toolset custom searches can include inputs by custom fields, taxonomy, and text searches.
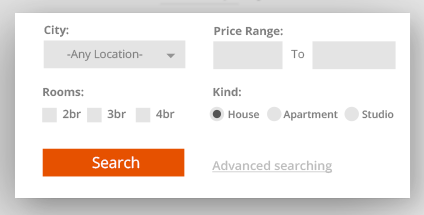 A custom search allows visitors to find what they need. The search can include text, numbers, checkboxes, radio inputs and more. Results will have your custom design and can even appear on maps.
Using the full Toolset package, you can build even the most advanced custom searches without writing PHP. All you need is basic HTML skills, to design the search form and search results. Our 30-days refunds for Toolset allows you to try it, risk free.
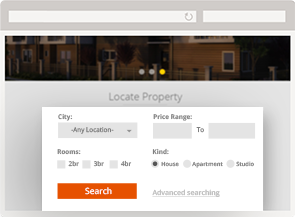
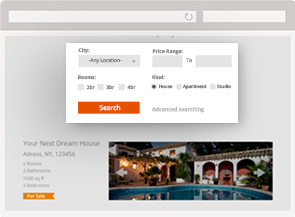
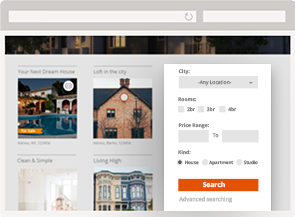
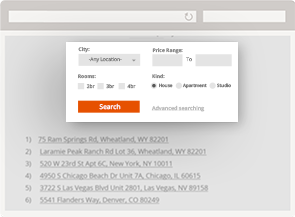
Custom searches built using Toolset


Creating your own custom searches is easy and simple. You can set up a custom search for any content type in a matter of minutes, including your unique design for the search box and the results.
Toolset custom searches give you powerful features, but without making it hard to set-up a custom search.
 Search by any kind of field
  Full control over the appearance of the search box and search results
  Display search results as a list, table, grid, and Google Map
  Include pagination in results
  Visitors can sort the results how you want
  AJAX updates allowing you to show results on-the-fly
  Automatically disable input combinations that do not return results
 Custom search is one of the features of Toolset. Toolset lets you build custom WordPress sites without programming. Toolset works on any WordPress theme and plays great with other plugins.
Steps for Creating a Custom Search
- Choose the custom search page
- Set-up the custom search form
- Design the custom search results
- Display the custom search on the site
Before you create the custom search, you should create the custom post types, custom fields and taxonomy to search on. It is also a good idea to create some test content so that you can see how your search works.
1. Choosing the custom search page
Different websites need to have a custom search in different places. Toolset lets you turn any kind of page into a custom search page. There is a slightly different workflow for adding custom searches to different pages, so you should first choose the kind of page where you want to display your custom search.
Custom search for the site’s homepage
Many listing sites revolve around a custom search, so it makes sense to display the search on the site’s homepage. If your homepage is a “static WordPress page”, you should create a Custom Search View. If your homepage is the “blog”, you should create a Custom Search WordPress Archive.
Custom search inside a page
You can add a custom search inside any page. For this, you will create a Custom Search View. Then, insert that View into the page.
Custom search in a widget (sidebar)
Almost any theme has sidebars, allowing to display widgets. You will need to create a Custom Search View and display it as a widget in a sidebar.
Custom search in an archive
When you create a custom post type, WordPress automatically sets up an archive for it (the custom post archive). This archive shows all the items that belong to that custom post type. To show a search in the archive, you should set up a Custom Search WordPress Archive.
1.1.A. Setting up a Custom Search View
To create a custom search inside of any WordPress page or as a widget, you need to create a View.
If you are using Layouts plugin, simply insert a View cell . Otherwise (without Layouts), click on Toolset -> Views and create a new View.
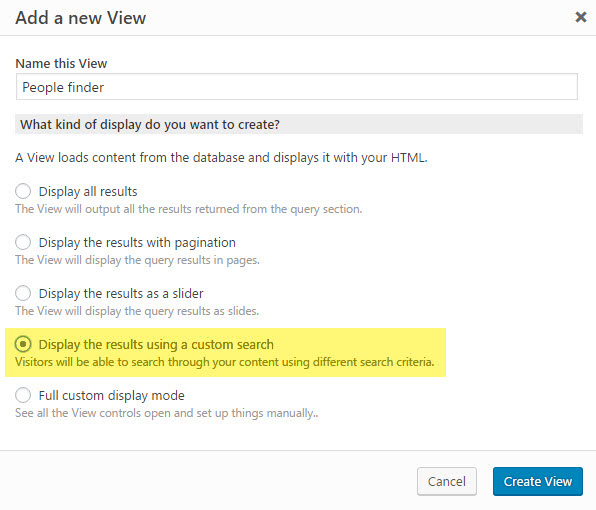
If you are creating a new View, choose the Display the results using a custom search option. If you want to add a custom search to an existing View, make sure that the Custom Search Settings and Filter Editor sections are being displayed.

Once your custom search View is created, continue to setup the custom search form (skip the section on setting up a custom search WordPress Archive).
1.1.B. Setting up a Custom Search WordPress Archive
There are two ways to enable filtering functionality in a WordPress Archive:
1. You can select Display the items using a custom search at the creation dialog of a new WordPress Archive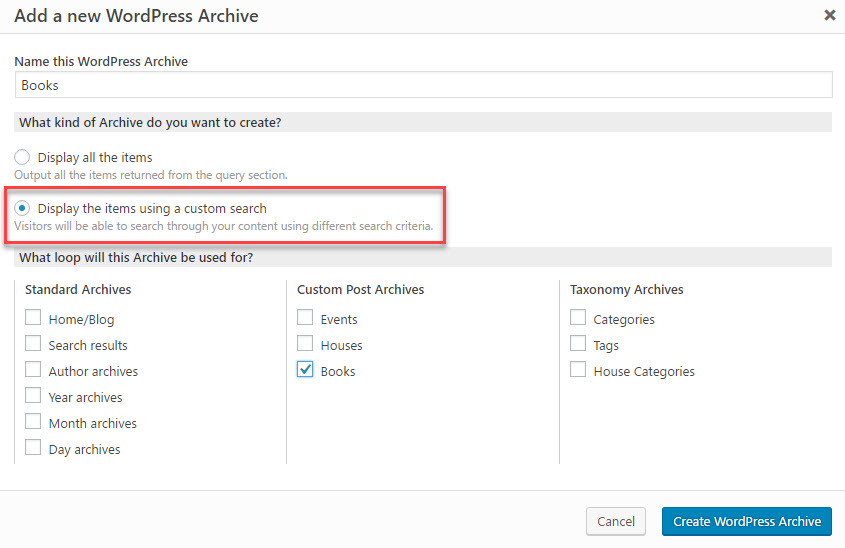
2. You can select Custom Search Settings and Filter Editor in the screen options of an existing WordPress Archive
2. Setting up the custom search form
Now that you have a View or a WordPress Archive for a custom search, we can set it up as a custom search form.
| Step | Where (View Editor Section) | What you need to do | Screenshot |
|---|---|---|---|
| A. Choose what to search in | Content Selection | You can set-up a custom search for any ‘post’ type including “posts”, “pages” and all custom post types (see how to create a search for users). | 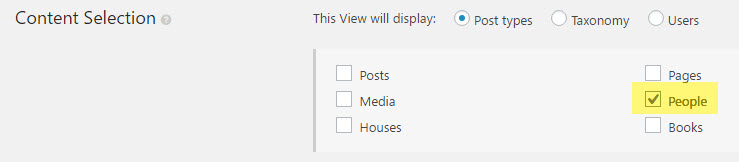 |
| B. Choose how the search behaves | CustomSearch Settings | Choose if the results update on every input change or when submitting the search form. You can also access advanced controls by choosing ‘Let me choose individual settings manually’. | 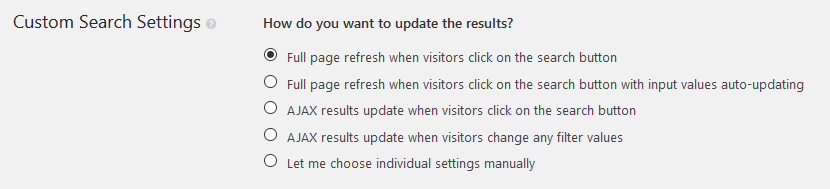 |
| C. Add search inputs and design the search form | Filter Editor | Add filters to the search form. They will look good out-of-the-box but you can further style them using HTML and CSS, if needed. | 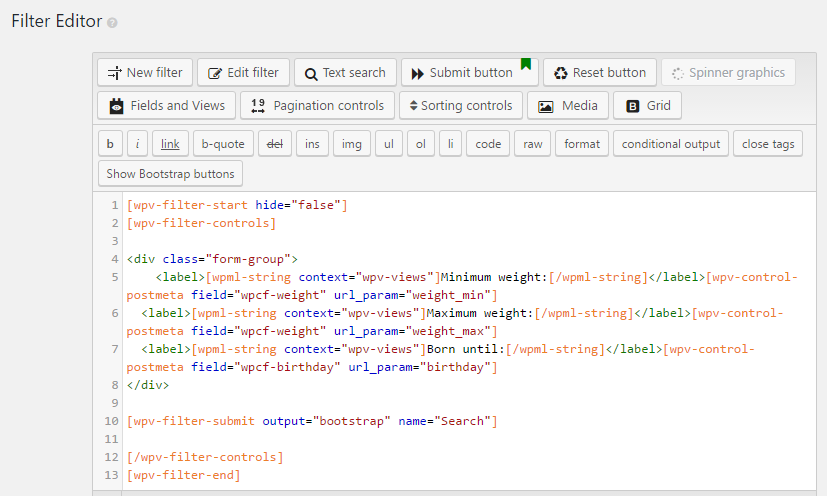 |
| D. Design how the search results look | Loop Output Editor | Design the search results, like you design any other View. Start with the ‘Loop Wizard’ and customize further by editing the Loop’s HTML. |  |
If you are new to Views, you can read more about steps (A) and (D) in the Create and display custom lists of content section of our Getting Started guide. In the rest of this document, we focus on the steps unique to custom search setup.
2.1. Custom search settings
The View can update the search results in different ways:
- Full page refresh when visitors click on the search button – when visitors click on the submit button of the search form (typically labeled ‘Search’), the entire page updates with the search results.
- AJAX results update when visitors click on the search button – when visitors click on the submit button of the search form, only the ‘search results’ part of the page update without a full page refresh.
- AJAX results update when visitors change any filter values – as soon as visitors change any of the filter inputs, the ‘search results’ part of the page update.
- Let me choose individual settings manually – this option allows you to access advanced settings for the custom search, where you can choose your own combination of options.
Toolset forms and shortcodes from 3rd party plugins (for example, Visual Composer) will not work properly when any type of AJAX call is used inside Content Templates, Views, and WordPress Archives. This includes AJAX pagination and custom search.
2.2. Adding inputs to the search form
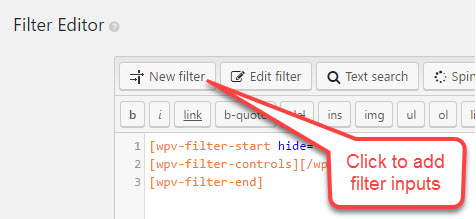
A “filter” is an input in the search form. To add filters to the search form, scroll to the Filter Editor section. Before you add any filter inputs, it will mostly be empty (except for a few placeholder shortcodes).
All filters need to appear between the {{wpv-filter-controls}} and {{/wpv-filter-controls}} shortcodes, which appear in the Filter section. Place the cursor after the {{wpv-filter-controls}} shortcode and click on the New Filter button to add the first filter input. Select what to filter by and the input element to use.


You can add search fields (filters) by custom fields, taxonomies and post relationships. If you haven’t yet added fields, taxonomy or post relationship to the content, use Types plugin to do this. Checkbox fields must be configured with “When unchecked, don’t save anything to the database” to be used as custom search filters. Read more in this erratum post.
Every time you add a filter field, you will see a new {{wpv-control}} shortcode in the Filter Editor section. For example, after we have added a filter for our ‘weight’ field, the Filter Editor looks like this:

The filter shortcodes are wrapped in the Bootstrap-compatible markup. This makes them look great on the front-end without any additional styling. This is true even if your theme does not use Bootstrap.
If you need, you can still add your own HTML and CSS around the filter shortcodes to style the form.
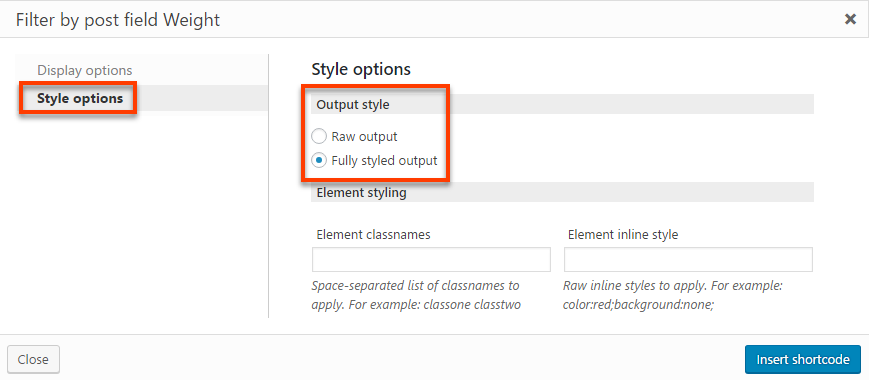
If you do not want to use Bootstrap output for custom search filters, you can select the Raw output option when inserting your filters, as displayed in the following image.
2.3. Adding front-end sorting controls
You can also allow users to sort the front-end results by any fields you specify. Click the Sorting controls button in the Filter Editor and choose the options for the sorting controls. You can read more about this on the page about allowing visitors to sort the front-end results.
2.4. Editing filter inputs
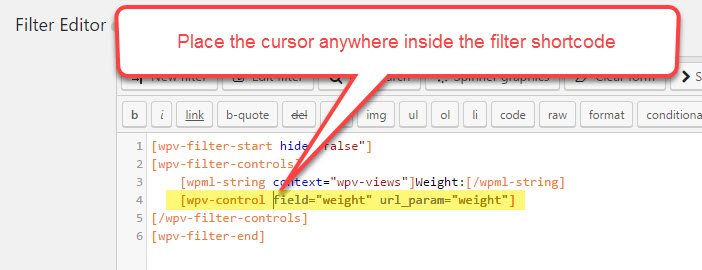
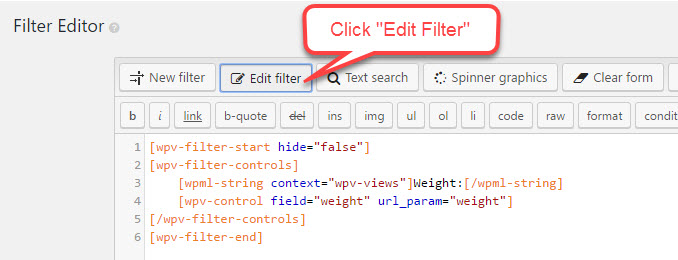
To modify the behavior of any of the controls you have added to the filter, place the cursor inside the {{wpv-control}} or {{wpv-control-set}} shortcode that generates the input, and click on the Edit Filter button.
2.5. Adding text-search for custom fields
The Text search button will add a free text input to your custom search. Normally, this text search will using the native WordPress search. It will look for matching texts in the post title and body. You can expand the text search to find matches in custom fields using the text search Relevanssi integration. This will give you far better results, more relevant matches and faster performance using a text indexing system.
2.6. Filtering posts by their ancestors
Two posts can be directly related to each other or they can be related through other posts. For example, you can have a “House” located in a “Neighborhood” of a “City” that is located in a certain “Country”. When you filter your View using Filter by post relationship / repeatable field groups owner you can add ancestors that connect your posts. This allows you to filter out the results based on a relationship between your posts. In our example, we can display only houses that are located in certain city regardless to which neighborhood they belong to.
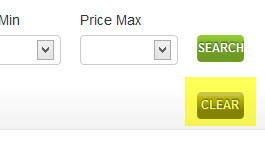
2.7. Adding submit, clear and a spinner to the custom search form
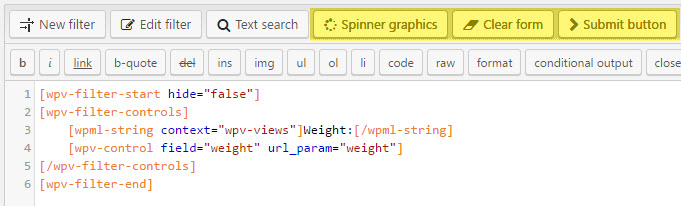
A complete search form may need the Submit and Clear buttons, and a spinner, to display when AJAX operations are in progress. You can add all these to the Filter section.
If your form uses AJAX updates, you can display a spinner while these operations are in progress. A spinner will provide feedback to visitors, letting them know that something is happening.

When you insert a spinner, you can choose these options:
- What kind of container will hold the spinner? It can be a div, a span or a p HTML tag.
- Where will be located this spinner related to that container? Before? After? In no place (it will not be displayed)?
- Do you need that container to hold any additional class name? if so, add it there
- Do you want the container to display any additional text? Just add if there
With a little CSS, this spinner container could become a fantastic overlay displayed when the form is updating its inputs to adjust dependent values, or when the View results are being updated on-the-fly. It is up to you.
2.8. Styling the custom search form
Whether you select the Bootstrap-compatible or “raw” type of output for your filters, you can add your own HTML and CSS around search inputs and the form, to apply custom styling.

You can also easily arrange your search form controls into columns, by using the Grid button in the filter editor.
3. Designing the custom search results
The Loop Output is where you design how the results of the custom search appear. The custom search section only determines what results will be displayed, but it doesn’t style the output.
If you are new to Views, read more about designing the output in How to Setup a View.
4. Displaying the custom search
By default, the search form will display just before the View results. You can change this in the Filter and Loop Output Integration Editor section.
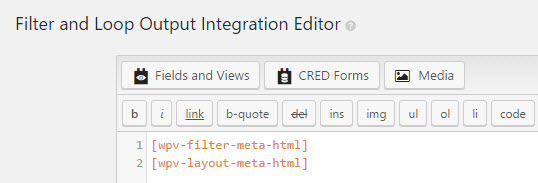
As you can imagine, the {{wpv-filter-meta-html}} shortcode will output the filter section, while the {{wpv-layout-meta-html}} shortcode will produce the output section. You can swap them or add any HTML around these shortcodes, to control the way the filter and the View output display. You can even remove the filter section altogether and display the search form in a separate location from the results page.
4.1. Adding the custom search form to a page or widget
If you are creating a Custom Search WordPress Archive, then you are all done. The WordPress Archive always displays in its place and now it also has search functionality.
However, if you created a Custom Search View, you also need to add it to the site. This section explains how to add the search form and the search results to pages.
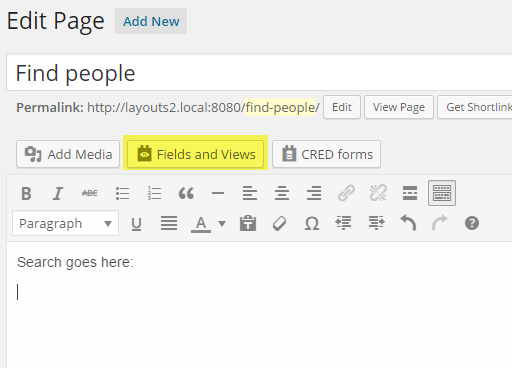
Edit the content, where you want the search form to appear and click on the Fields and Views button.
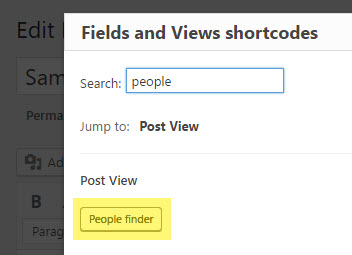
Select the View that you’ve just created.
Since this View is a custom search, it includes both a ‘search form’ and a ‘results’ sections. Select if you want to display both of them in the same page or on different pages.
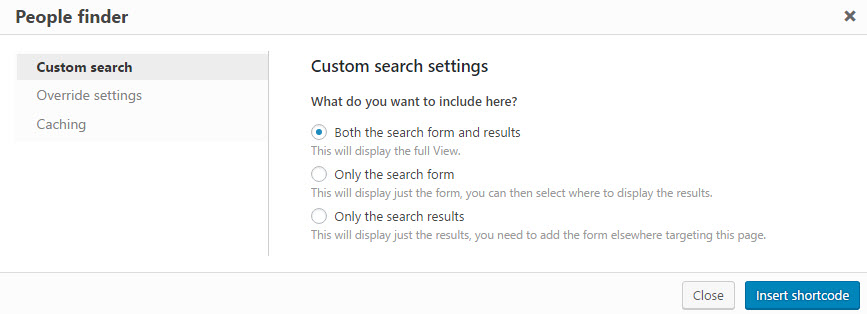
If you choose to display only the search form (the Filter section), you will be asked to choose where to display the results.
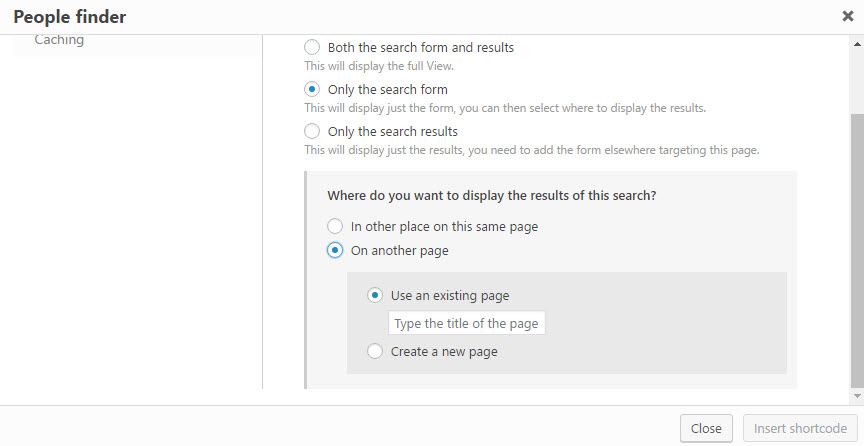
Displaying the results on a different page is convenient when you want to add a compact search form to one page (like the homepage), while the search results display on a different page.
4.2. Displaying the search form as a widget
From the WordPress Widgets page, select the WP Views Filter widget and drag it to the Sidebar where you want it to display.
In the widget settings, select the name of the View that contains your search form and the Target page where your View results will be displayed.

If the search form already displays in a widget, you probably want to prevent it from displaying in the View, so that you don’t display the exact same form twice. To hide your filter on the results page, add the hide=”true” to the {{wpv-filter-controls}} shortcode in the Filter section.
[wpv-filter-controls hide="true"] [/wpv-filter-controls]