Themes you build with Toolset provide your clients great customization possibilities from the WordPress administration area. This page outlines the steps necessary to create, publish, and distribute your own Toolset-based themes.
1. Set up the custom post types, fields, and taxonomy
One of the major advantages, of building Toolset-based themes, is great ease in displaying customized contents in unique ways. Before displaying custom content types, you need to set them up.
In the WordPress administration area, go to the Toolset -> Dashboard page and create your custom post types. Then, from the same dashboard, add custom fields and taxonomy.
Make sure that you enter the “description” of everything you create. We can later use this description to generate documentation for users. Good descriptions will allow your clients to understand the purpose of your theme’s elements and will save you a lot of time spent in providing online support.
2. Create the Views for custom content lists and searches
You can create different Views and WordPress Archives for displaying custom lists of contents and custom searches. Using Views, you can display the site’s customized post types in unique ways. Best of all, all this customized designing is easy for your end users to edit, without them having to learn any programming languages such as PHP or JavaScript.
Again, do not forget to enter the descriptions for the Views that you create.
3. Create Toolset forms for front-end content submission and user registration
With the help of Forms forms, you can create websites that facilitate front-end content submission and front-end user registration. Forms lets you build online directories and membership websites, with fully custom design, that your end users can easily modify without learning programming.
As pointed out before, do not forget to write clear descriptions of your Toolset forms.
4. Create the “demo content” that your clients will receive
To show off your theme, together with the Toolset-elements that you’ve built, you should create sample content, which includes the site’s homepage, and other main pages that depict different features of the theme.
Demo content can include:
- Standard Posts
- Standard Pages
- Posts belonging to your custom post types
- Media files attached to posts and pages
- Custom widgets
- Custom menus
- Settings for theme Customizer
- WordPress Reading Settings
As long as you are designing a theme with these elements, everything that you build locally will appear in your clients’ sites when they install the theme. If you use other elements (such as your own PHP functions), their settings will not appear in client sites.
5. Prepare the theme for distribution
Once you have finished designing the theme with the help of Toolset plugins, it’s time to merge everything into a single theme, which you can distribute (and sell).
5.1. Make sure that the theme’s style.css file contains the theme’s information
Make sure your theme’s style.css file contains the following fields:
/*
Theme Name: Test Theme
Description: Provides Toolset Plugins
Version: 1.0
Author: John Doe
Author URI: http://johndoe.com
*/
These fields are important because they provide some basic information to users about your theme. The “theme version” field enables users to easily update to the latest version of your theme.
5.2. Create a ZIP file containing your theme
Add your theme’s folder to a ZIP archive in the development website where you created your theme. You should upload this file during the first step of your theme registration (as explained later).
5.3. Export the settings of all Toolset plugins you used and the sample content that you created
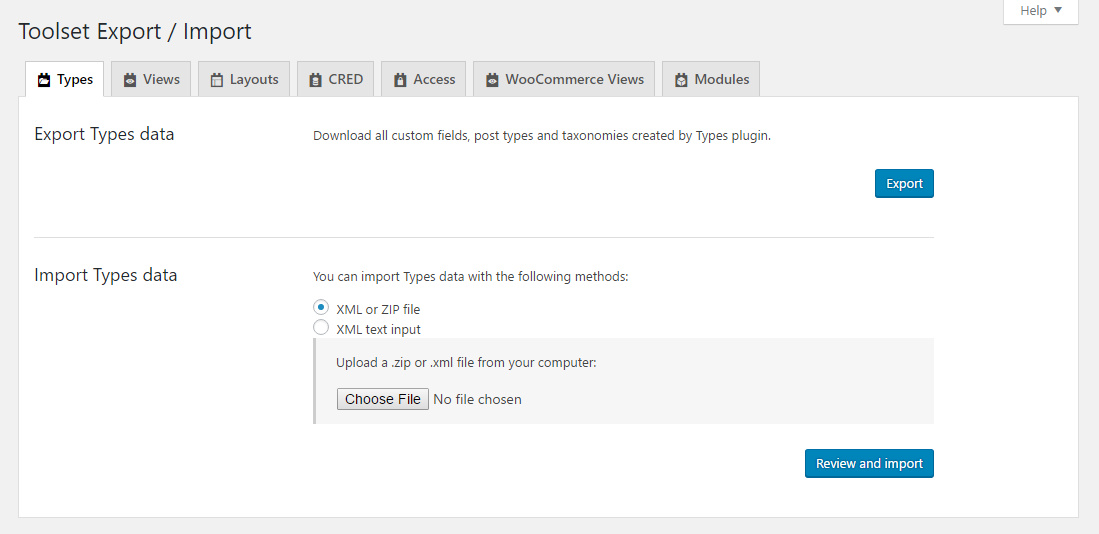
To export settings of all Toolset plugins, go to the Toolset -> Export/Import page. Use the provided tabs to access export options of all Toolset plugins. You will get a ZIP file for each plugin.
5.4 Export your theme’s sample content
You should export the site’s demo content using the following two tools:
| Export tool | What’s covered | How to reach it |
| The standard WordPress content exporter | Pages, posts, comments, custom posts, custom fields, terms, navigation menus. custom posts | On the Tools -> Export page |
| The WordPress Settings Exporter for Toolset plugin | Menus, widgets, customizer settings, and WordPress Reading Settings | Download the plugin from your Toolset account, install it and then go to Toolset -> Export. |
To export the sample content you prepared, go to the Tools -> Export page. There, select the All content option and click the Download Export File button.

Install the Toolset Extra Export plugin to export additional sample content including menus, widgets, WordPress customizer, and WordPress Reading Settings data. After activation, go to the Toolset -> Export/Import page, select the elements you want to export, and click the Export button.

6. Register your theme for distribution
Now that you have all the necessary theme files, it’s time to register your theme. This is done on your account page in toolset.com. There, click on Toolset-based themes and then on the Register your first theme button.
You will then be directed to a page that will guide you through the steps for setting-up your theme.
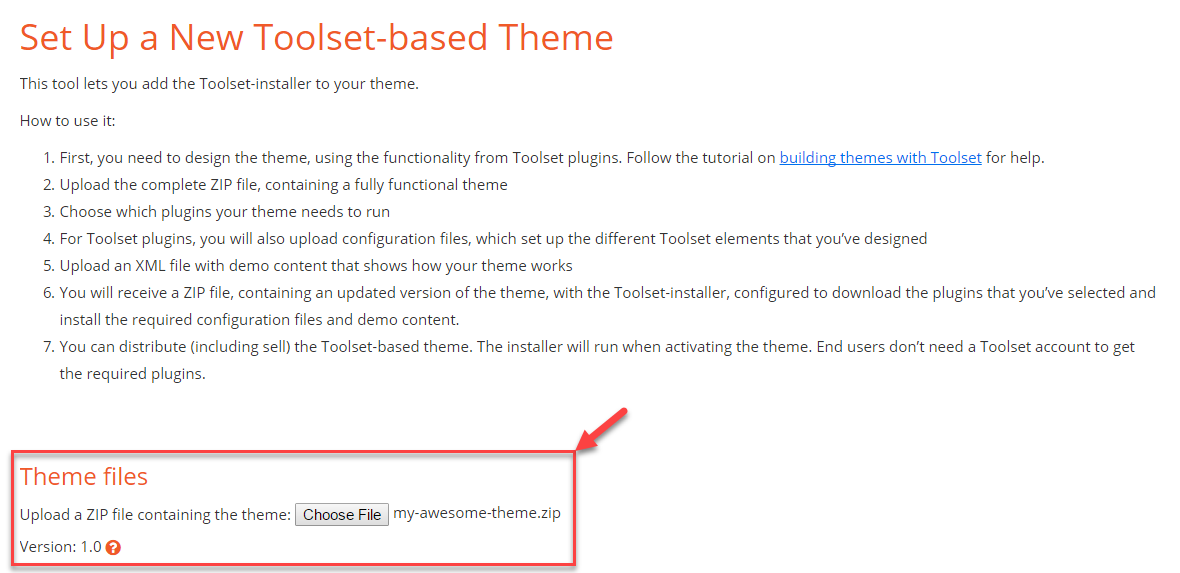
6.1. Upload the ZIP file with your theme
Click to select a ZIP file containing your theme, which you created earlier and wait for the file to be uploaded.
6.2. Select plugins needed for your theme
When your theme’s ZIP file finishes uploading, a new section will appear below. This section will comprise of a table, provided for selecting the plugins and their specific settings needed for all your theme’s features.
First, select which plugins are needed, optional, or not needed by the theme. Then select the ZIP files with the export settings for each plugin, which you created previously.
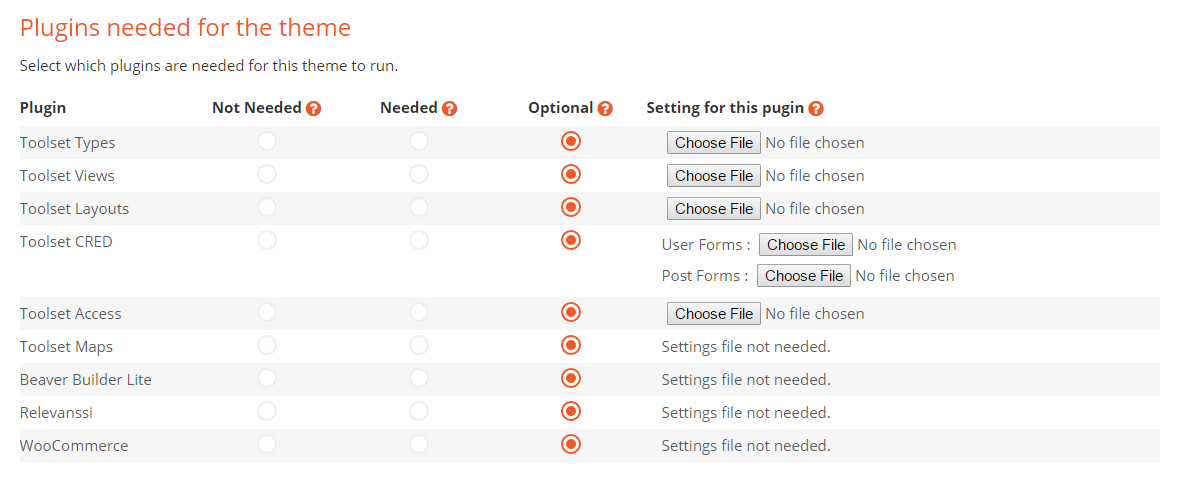
The theme registration tool automatically checks all the settings’ files you upload for the Toolset plugins and warns you if any important file is missing.
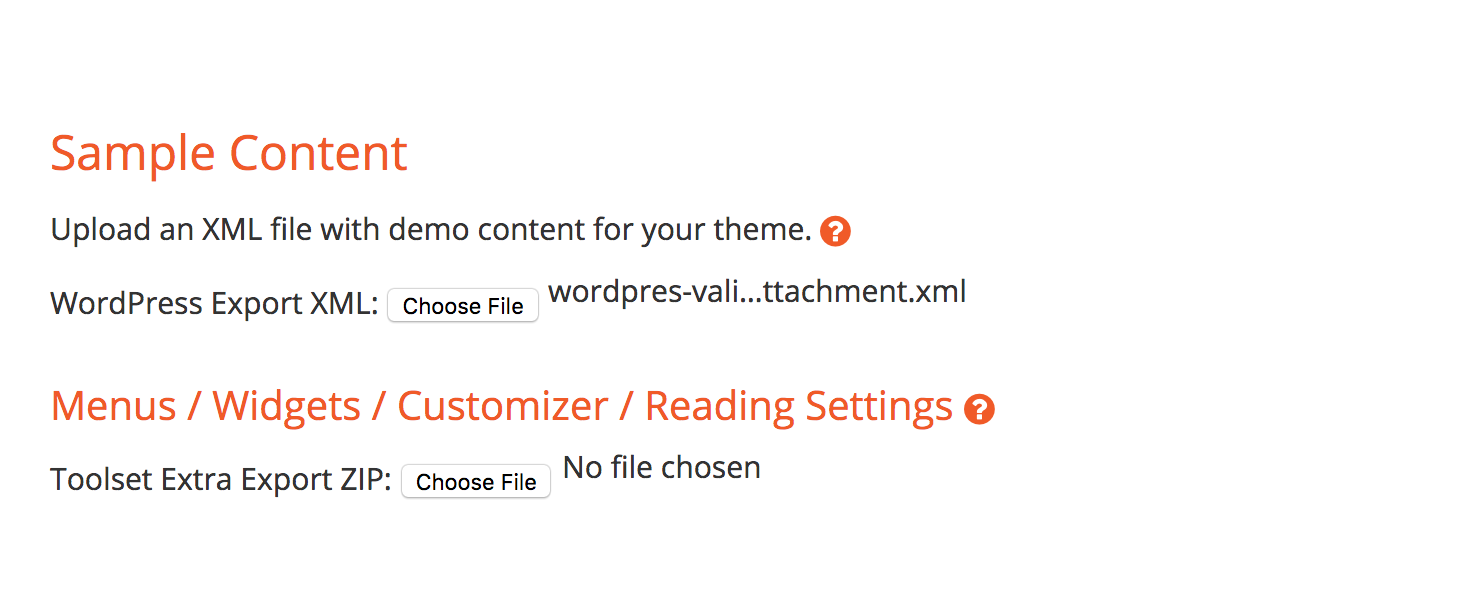
6.3. Select the sample content of your theme
Now, it’s time to select a file with the sample content of your theme, which you created previously. One is from the native WordPress exporter, and the other from our WordPress Settings Exporter for Toolset plugin.
The setup screen will ask you to provide the export files coming from these two tools.
The theme registration tool automatically checks if it cannot find any of the media files associated with your sample content. While you have the option to ZIP-archive the uploads folder containing these files, the recommended option is to upload the associated attachments to a server and change the URLs in your export files.
7. Distribute
There are two ways in which you can distribute Toolset-based themes:
- One-site installation – a convenient way to deploy sites powered by Toolset, for your clients and projects. Each theme/site can be deployed to only one client. This distribution model is available for all types of Toolset accounts.
- Distribution to unlimited sites – this model is meant for those theme developers who use Toolset to create and distribute their themes to an unlimited number of users. This feature is available only for Author accounts.
All you need to provide (to your clients) is the theme’s ZIP file. The ZIP file does not include Toolset plugins, but only includes a small installer which will automatically download the required Toolset plugins and configure them. This way, your clients will always receive the most recent, stable, and secure version of Toolset plugins. When updates are available, your clients will receive them automatically, using the standard plugins-update process of WordPress.
8. Prepare and release updates
When you have updates available for your theme, go to the theme registration page again and select the suitable option for adding a new version.
Please note that while it is possible to delete a theme version and create a new one with the same release number, clients that already updated to that version will not receive the changes you make the second time. This is why it is strongly recommended to simply create a new version of a theme whenever you have any updates for it.
8.1. Prepare the updated theme files
First, make sure that you update the “Version” field at the top of your theme’s style.css file. Then, archive your theme into a ZIP file.
Finally, export the settings for Toolset plugins and the sample content.
8.2. Upload the new theme version
When all the files are ready, you can start the process of uploading the new version of your theme. These steps are exactly the same as uploading a theme for the first time.
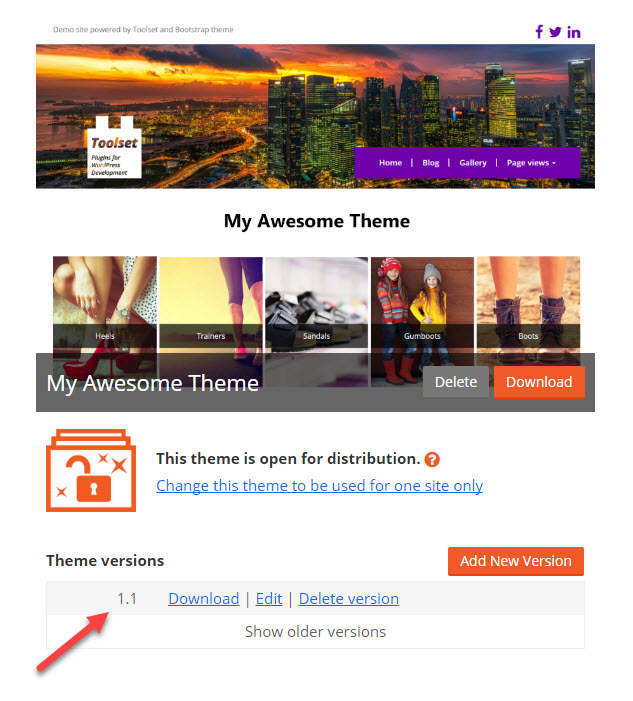
When finished, you will see a new version number available on your theme-overview page, as displayed in the following image.
8.3. Distribute the updated version
As in the case of any other theme, users who already have your theme installed will get a notice about the new version in their website’s WordPress administration area. If you are distributing your theme on your own, or via a third-party website, make sure that you upload the ZIP file containing the new version of your theme there.