Usually, a post relationship involves one post type acting as a parent which has many child posts. For example, real estate property can have multiple rooms. When displaying one of these child posts, you also often need to display other, related child posts.
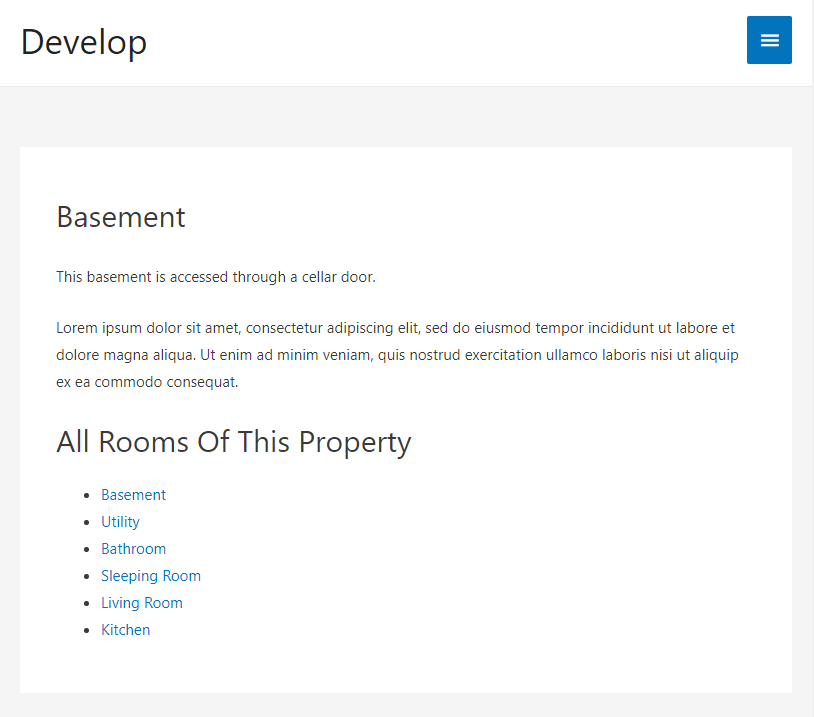
The following image shows an example of what we want to achieve. When viewing a post, in this case a room of a property, display a list of all rooms belonging to this property.
When we display a child post, we cannot directly display information from other posts related to it. We need to have the parent post list its children and then display them as part of the child post.
Here is what we’re going to do:
- Create a View and query the child post Type
- Create a Content Template and insert the View to it
- Create a Layout and insert the created Content Template into it
- Assign a Layout to the Child Posts Type and view single Child Posts
1. Creating a View that lists the children of the parent post
First, we need to create a View that lists the children of the parent post.
Go to the Toolset -> Views page and click to create a new View. We will call it “Listing Child Posts“.
Select your child Custom Post Type (i.e. rooms) in the Content Selection section. In our case, we select the “Rooms” post type.
Also, make sure that the Don’t include current page in query result option is not selected.
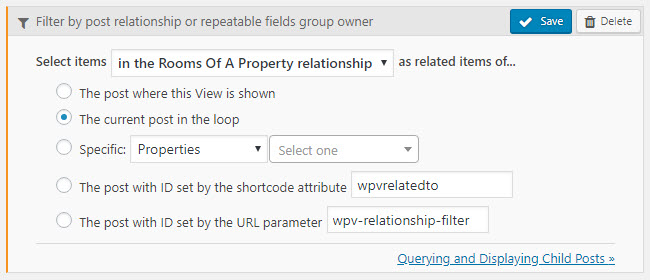
Then, add a new Query Filter and select the Post relationship or repeatable field groups owner option. In the dialog that appears we need to select the relationship in question (“Rooms Of A Property”) and The current post in the loop option. Click Save when done.
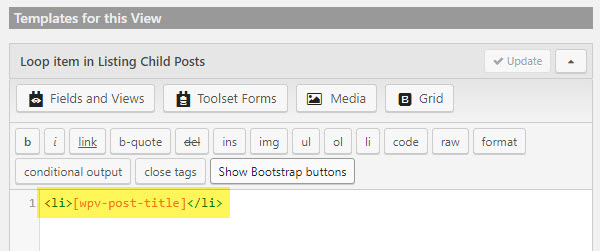
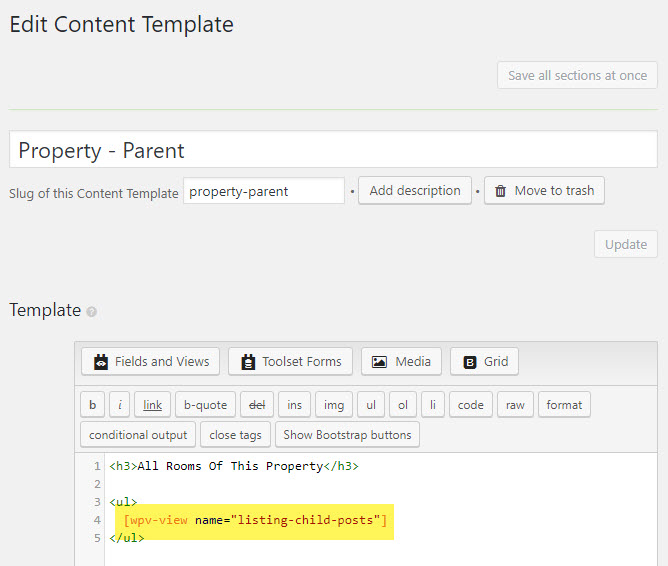
As the last part of the View creation, we need to add post fields to the Loop Output section. This is the information from the related child posts that we want to display. In our example, we used a simple post title with a link.
2. Creating a Content Template for the parent post
In our example, child posts will be rooms of a house. We will name the Content Template for the parent post “Property – Parent”. Don’t assign it to any post type. After you create it, leave it empty for now, we will come back to it shortly.
The purpose of creating a new Content Template is that we can display it inside another template and add the item=”@slug-of-the-relationship.parent” argument to its shortcode. This will make the Content Template display items for the parent post.
Later, when we show children in this Content Template, we will actually be displaying other posts, related to the one we are currently displaying.
3. Creating a template for the child posts and displaying the parent Content Template inside it
In this step, we need to create a template for displaying the single child posts. If you are using Layouts, create a template layout. If you are not using Layouts, create another Content Template.
We will name this template “Room – Single Child Post” and assign it to single pages of the “Rooms” post type.
This template will do two things:
- Display body of the current child post (room) being viewed.
- Display the “Property – Parent” Content Template we created in the previous section.
Using Layouts
First, insert a Post Content cell.
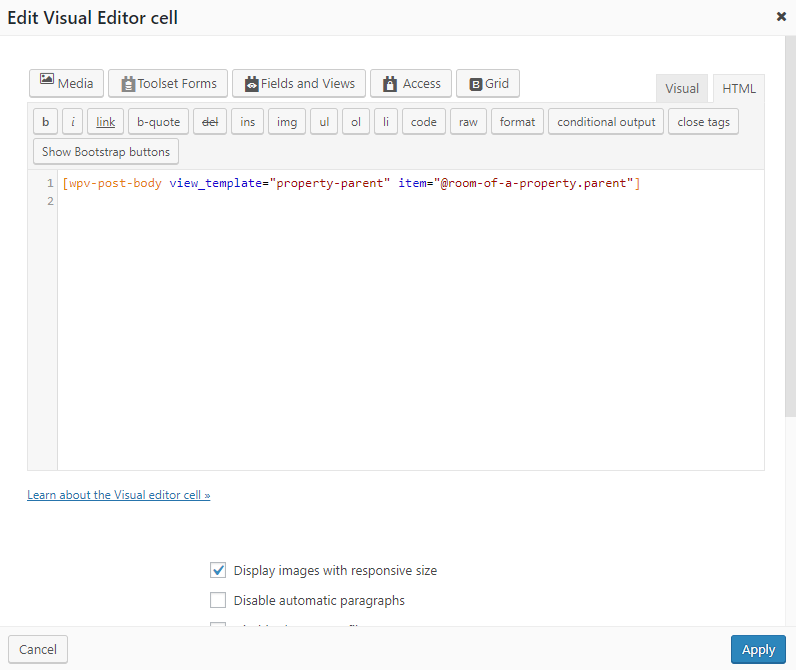
Then, create a Visual Editor cell and insert the “Property – Parent” Content Template into it. It is inserted as a wpv-post-body shortcode but will point to our “Property – Parent” Content Template. After inserting the shortcode, we append the item=”@slug-of-the-relationship.parent” to it. In our example, the relationship slug is “room-of-a-property”, so we use the item=”@room-of-a-property.parent”.
The ID selection is a critical step, as it tells Views to display the “Property – Parent” Content Template, not for the currently displayed post, but for its parent.
Your Visual Editor cell should now look similar to the one in the next image.
Using Views only
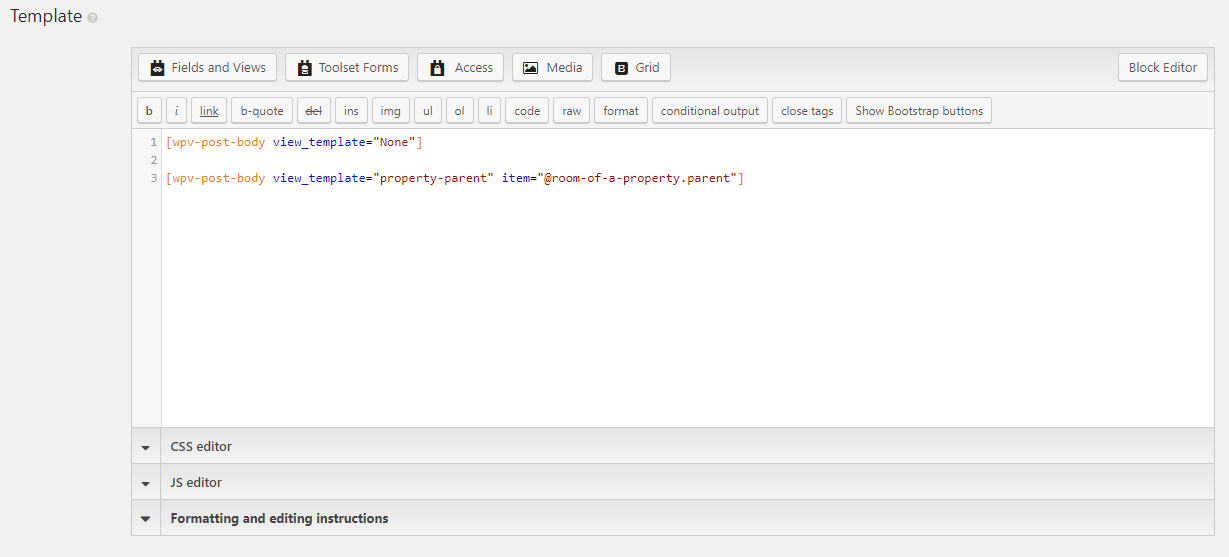
First, insert a Post body shortcode without any additional options and arguments.
Then, insert the “Property – Parent” Content Template. It is also inserted as a wpv-post-body shortcode but will point to our “Property – Parent” Content Template. After inserting the shortcode, we append item=”@slug-of-the-relationship.parent” to it. In our example, the relationship slug is “room-of-a-property”, so we use the item=”@room-of-a-property.parent”.
The ID selection is a critical step, as it tells Views to display the “Property – Parent” Content Template, not for the currently displayed post, but for its parent.
Your Content Template should now look similar to the one in the next image.
4. Inserting the View into the parent post Content Template
As the last step, you need to assign this Layout to the child posts type and view single Child Posts.
And that’s it! When we view any of the child posts, all the other related child posts are displayed. In our case, we ended up with a nice list of all rooms of the related property.