Toolset Maps plugin makes it easy to display any sort of information on Google and Azure Maps. You can use special custom fields for addresses, display the maps and add pointers to them.
First, install the Toolset Maps plugin, which is included in the full Toolset and Views packages.
Before you can start using the Google or Azure Maps API, you need to enter your API key.
After activating Toolset Maps, go to the Toolset -> Settings page and click the Maps tab. Enter the API key you got from the maps service of your choice.
Once everything is set up, you will have the following:
The following table summarizes typical uses for a map and how to implement:
What
How
Display a page with “our address”
1. Create a regular WordPress page. 2. Click on Fields and Views and insert the Map field from under the Toolset Maps section. 3. Add a Marker field, and in the Marker address comes from section, select An address option and enter the address.
Display a map with a marker for a single item
1. Add an Address field to the content type that needs to display an address on the map. 2. Create a Content Template for that content-type 3. When editing the Content Template, click on Fields and Views and insert the Map field from under the Toolset Maps section. 4. Add a Marker field and select the data source as the custom field that you’ve added in step (1).
Display a list of items on a map
1. Add an Address field to the content type that needs to display an address on the map. 2. Create a View that will display that content type. 3. When editing the Loop Output, position the cursor before the View Loop, click on Fields and Views and insert the Map field from under the Toolset Maps section. 4. Position the cursor inside the View Loop, add a Marker field and select the data source as the custom field that you’ve added in step (1).
Adding Map Addresses as Custom Fields for Posts, Terms and Users
Once the Toolset Maps plugin is active, you will see a new kind of field called Address. You can use it as a custom field for your custom post types and as a term or user field.
In the WordPress editor, the field will display like this:
You can enter the address by typing it, or by clicking on the map. The Address field is saved as an address string.
You can adjust the location of the address by dragging the marker on the map preview, or by setting latitude and longitude coordinates manually. In this case, the field value will be stored as a pair – {latitude,longitude}. After fine-tuning this location, you can also pick the nearest street address if you want.
The Address field will display very similarly in Toolset forms and in Field Tables.
Displaying a Map
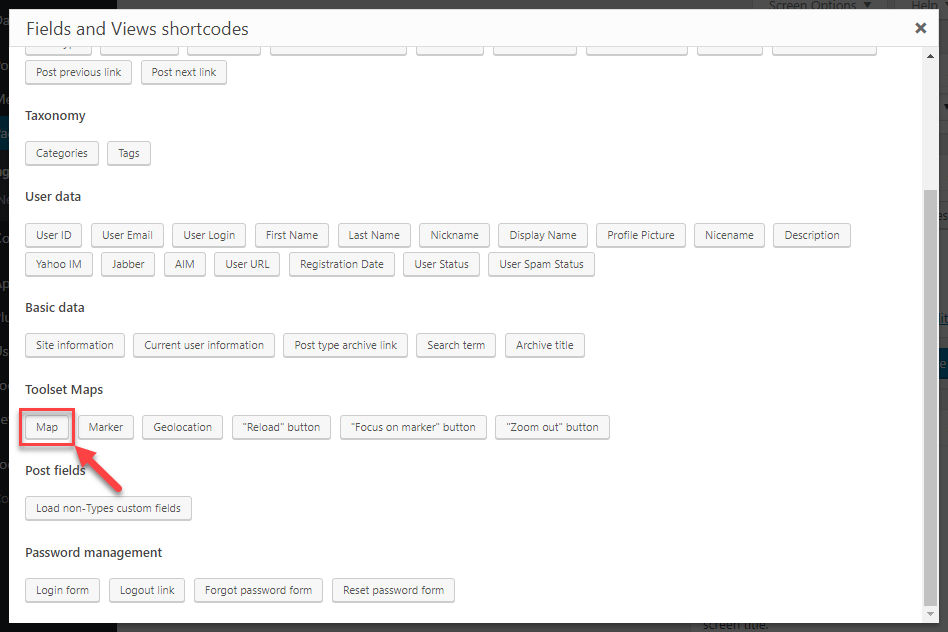
Under Fields and Views, you will find a new section for Toolset Maps. In it, there are different fields for map-related functionality.
You should always start by inserting the Map field.
The “map” field alone will display just the map, without any markers on it. Usually, you will include some markers on the map (see the next section). When you add markers to the map, the markers will center it.
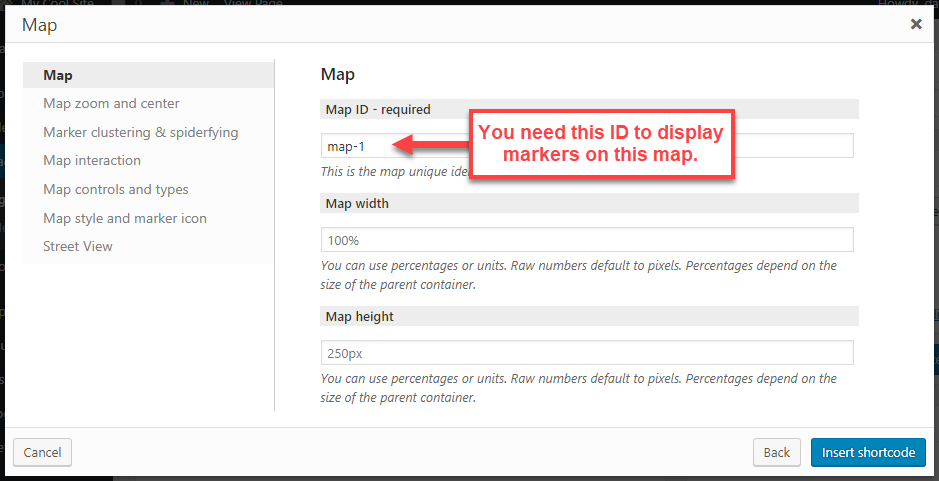
After you insert the map, you will get a wpv-map-render shortcode, like this one:
[wpv-map-render map_id="map-5"]
Every map that you insert gets a “map ID” and in the insertion dialog, Toolset Maps plugin will automatically suggest the best Map ID option. This ID will appear in the resulting shortcode (which will display the map on the front-end). You need these map IDs, in order to display markers on maps. The marker knows which map to display on, according to the map ID.
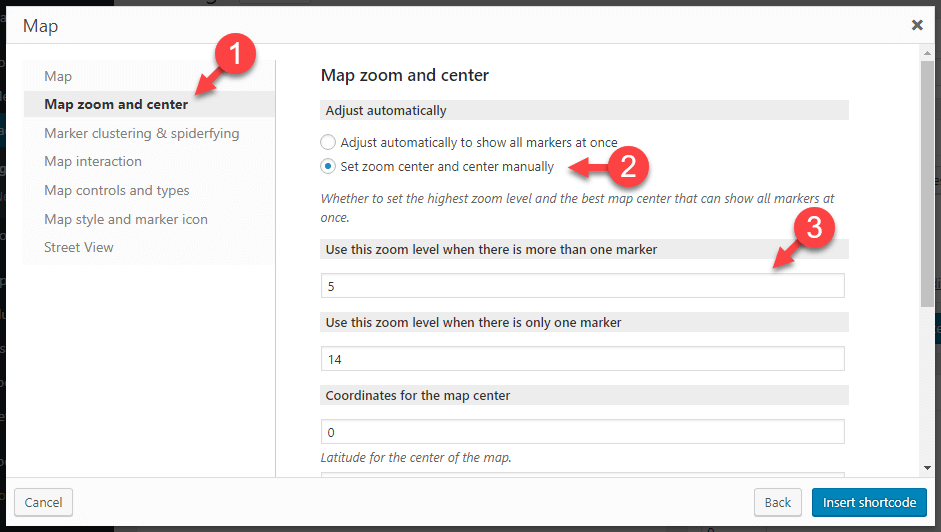
If you don’t need any markers on the map, you should center it manually. In that case, click on the Map zoom and center tab, disable the Adjust automatically to show all markers option and enter the map coordinates.
Displaying Custom Message While the Map is Loading
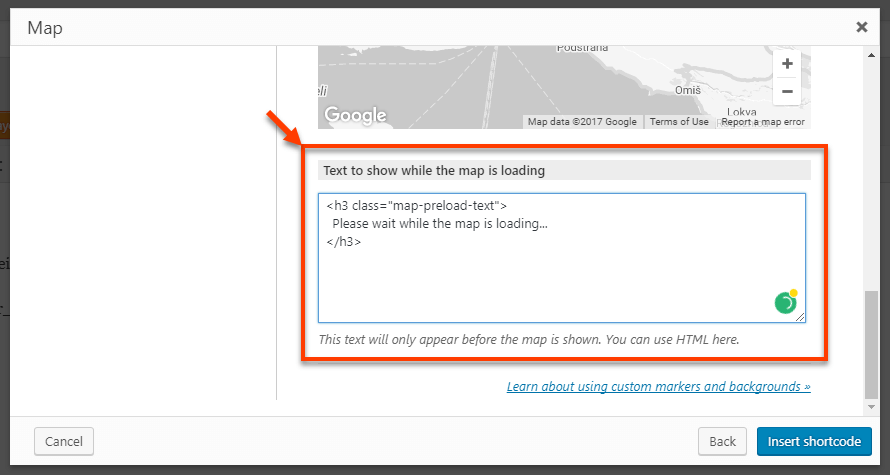
Sometimes, maps take time to load and display on the page and Toolset Maps allows you to display a custom message while the map is loading.
In the Map insertion dialog, click the Map style and marker options tab and scroll down to the Text to show while the map is loading section.
Enter your text here and feel free to use HTML, if needed.
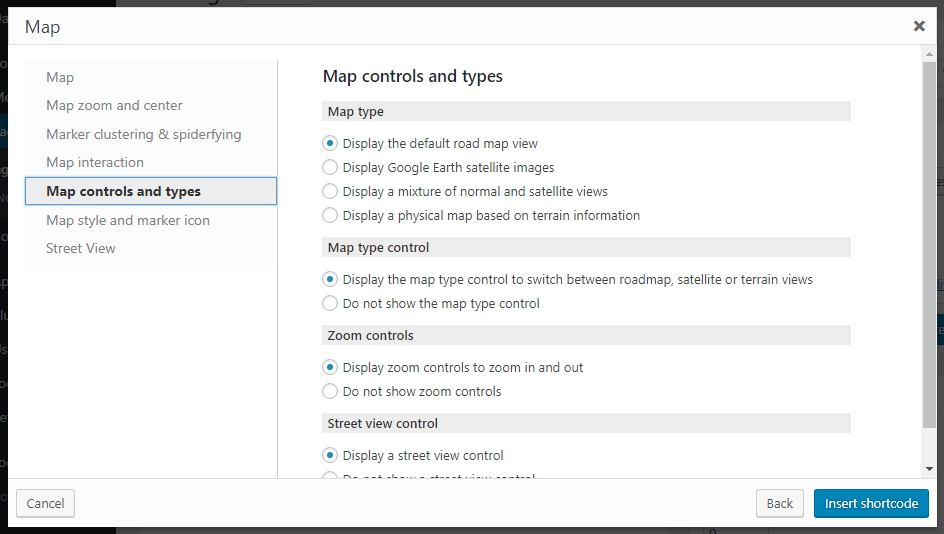
Selecting the map controls and type
Some of the features explained in this section are unavailable when using Azure Maps API.
When inserting the map, you can select its type, like the default road view and satellite view. Additionally, you can customize which map controls are displayed.
To customize these options, use the Map controls and types tab in the map insertion dialog.
Using Custom Styles for Maps
Please note that the features explained in this section are not yet supported by Azure Maps API.
You can easily upload and use custom styles for Google Maps on your site. The styles can be created or downloaded in JSON format from the Google Styling Wizard page or websites like Snazzy Maps, and then uploaded and selected from the Toolset Maps user interface.
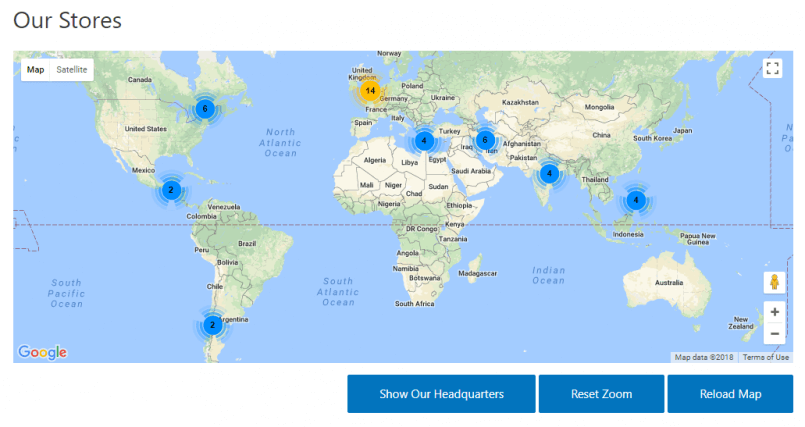
Displaying Additional Controls for Maps
Toolset allows you to display additional controls for the maps you create.
These controls provide the following functionality:
Focus the map on a specific marker – For example, you could make it focus on the marker with your business’ headquarters.
Reload a map – Map is reloaded to the original state of zoom, position, and other settings.
Zoom out – Map is zoomed out to the original state. Other settings, like a map type, are preserved.
You can insert these buttons using the Fields and Views button, under the Toolset Maps section. In the insertion dialog, you can select if you want them to be in a form of a button or a link. Naturally, you can also add custom styling to them.
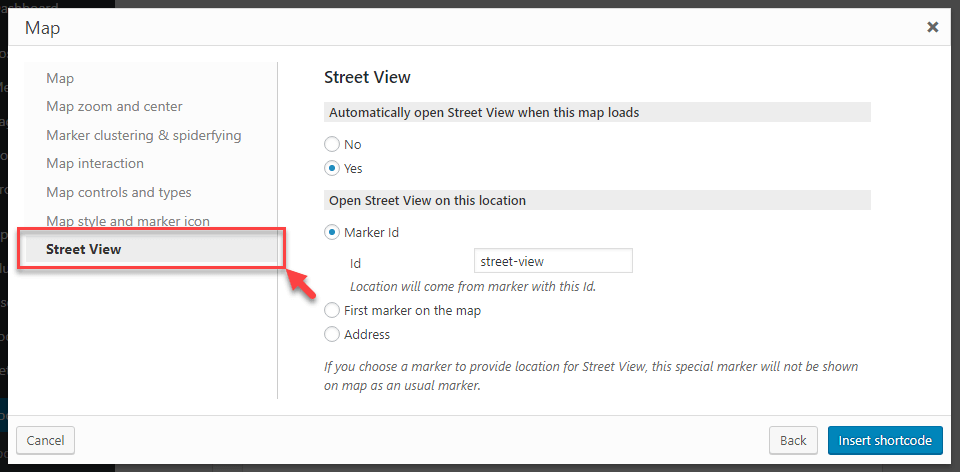
Displaying A Street View
Please note that Azure Maps do not provide a Street View or similar feature.
If you are using a Google Maps API, you can make the map display in a Street View mode.
Click the Street View tab when inserting a map and select the option to automatically open Street View. Adjust the options that appear to select which location Street View will display.
Once the shortcode is created you can edit it manually to include two additional parameters, heading, and pitch. They allow manual tuning of the street view.
The heading parameter can have a value in the range between 0 and 359. If the value is not set it is determined automatically.
The Pitch can have a value between -90 and 90. If the value is not set it is then set to 0.
Using these two parameters, your shortcode could look something like this:
When displaying multiple markers on a map, you can add front-end controls that allow visitors to filter the markers by distance. It is also possible to order posts listed by a View, by their distance from a fixed location or users geolocation. You can also calculate the distance between two given points.