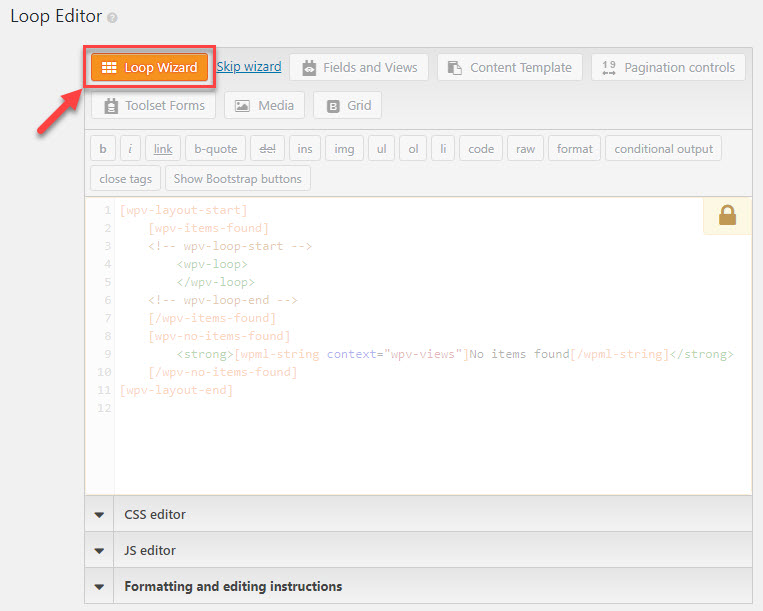
The Loop Wizard is a great tool to use to generate the markup for your View output. The wizard will let you choose the output format, set options, and add the fields and field options you want to include in your View output.
To launch the wizard, scroll to the Loop Editor, and click on the Loop Wizard button.
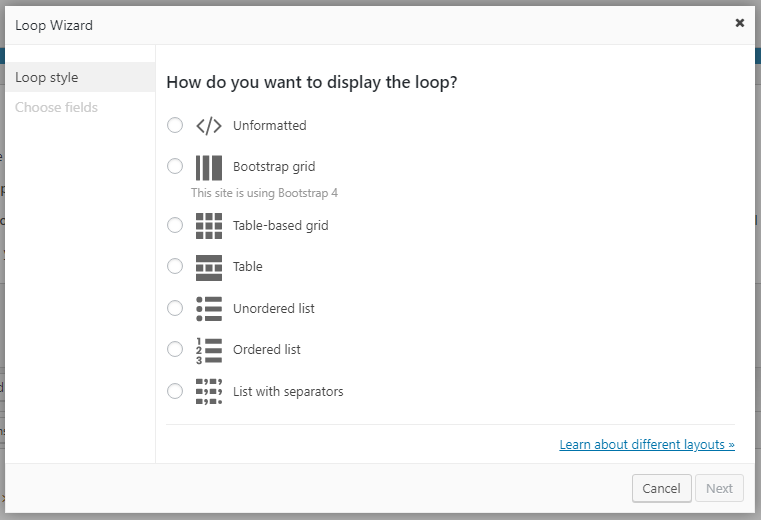
You can select from one of the six pre-defined output formats.
The View loop output
A View retrieves a list of content from the database and then iterates over the resulting list. For each list item, it outputs elements of content that you specify in the Loop Output section. The combination of Views shortcodes and HTML markup determines what is included where. The Loop Wizard allows you to easily output the content in lists, grids, even sortable tables.
For a more detailed look at the markup added in the Loop Output editor see the page Views layout Meta HTML.
The output formats
Let’s look at how each of the output formats works. We’ll add two fields to our loop output, the post title and featured image, to demonstrate the formats. We’ve added added a header tag, <h4></h4> just to make the output a little clearer.
Unformatted
The unformatted output adds no HTML to the Loop Output editor. The only thing that it includes is wpv-loop. This means you can insert any fields you want and use your own markup to format the output how you choose.
Meta HTML
The Meta HTML refers to the markup and shortcodes added to the Loop Output editor.
[wpv-layout-start]
	[wpv-items-found]
	<!-- wpv-loop-start -->
	   <wpv-loop>
		  <h4>[wpv-post-title]</h4>
		  [wpv-post-featured-image]
	   </wpv-loop>
	<!-- wpv-loop-end -->
	[/wpv-items-found]
[wpv-layout-end]
HTML on the page
This is the HTML that will be generated on your page.
<!-- wpv-loop-start -->
<h4>Our first red product</h4>
<img src="/tractor-150x150.png" alt="tractor">
<h4>A summer special</h4>
<img src="/van-150x150.png" alt="van">
<h4>Our most popular product</h4>
<img src="/truck-150x150.png" alt="truck">
<h4>Annual results published</h4>
<img src="/dosh-150x150.png" alt="dosh">
<!-- wpv-loop-end -->
Bootstrap grid
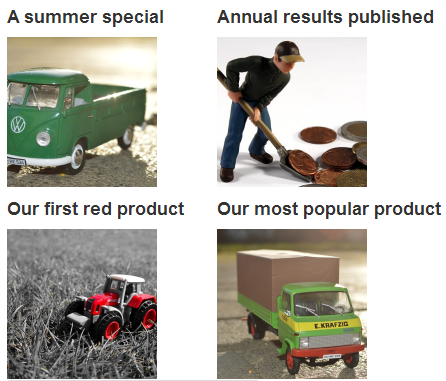
The Bootstrap grid will generate a template containing the Bootstrap containers and class names, so you can use it with any theme that provides the Bootstrap framework, or when Toolset loads Bootstrap.
Before you can use this output format, you need to set the Bootstrap version used in your theme. Go to the Toolset -> Settings page and select the option that is best suited for your site, in the Bootstrap Layouts section, under the General tab.
You can use one of the two available Bootstrap versions, 4.0 or 3.0, according to the one loaded by your theme, or let Toolset load Bootstrap. Note that each version produces different markup and uses specific class names, so please double-check and make sure to select the version bundled with your theme.
Once this output format is available, you will be able to set additional options:
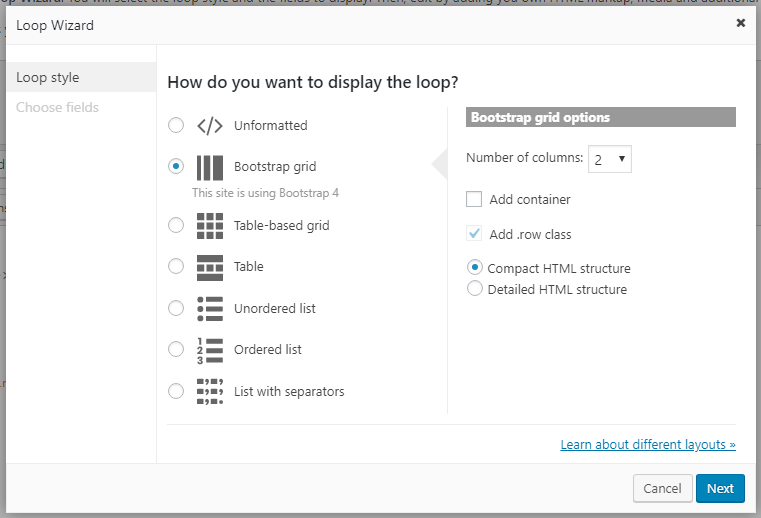
- Number of columns: depending on the Bootstrap version used, you can select the number of columns per row in your layout.
- Wrapper: whether the layout should be wrapped in a div with class name container.
- Normal or extended output: whether Views will generate the minimum markup or a detailed structure for each column.
Meta HTML
[wpv-layout-start]
	[wpv-items-found]
	<!-- wpv-loop-start -->
   <wpv-loop wrap="4" pad="true">
         [wpv-item index=1]
            <div class="row"><div class="col-md-3"><h4>[wpv-post-link]</h4>[wpv-post-featured-image]</div>
         [wpv-item index=other]
            <div class="col-md-3"><h4>[wpv-post-link]</h4>[wpv-post-featured-image]</div>
         [wpv-item index=4]
            <div class="col-md-3"><h4>[wpv-post-link]</h4>[wpv-post-featured-image]</div></div>
         [wpv-item index=pad]
            <div class="col-md-3"></div>
         [wpv-item index=pad-last]
            </div>
    </wpv-loop>
	<!-- wpv-loop-end -->
	[/wpv-items-found]
	[wpv-no-items-found]
		[wpml-string context="wpv-views"]<strong>No items found</strong>[/wpml-string]
	[/wpv-no-items-found]
[wpv-layout-end]
HTML on the page
<!-- wpv-loop-start -->
  <div class="row">
    <div class="col-md-3">
      <h4>A summer special</h4>
      <img src="/van-150x150.png" alt="van">
    </div>
    <div class="col-md-3">
      <h4>Annual results published</h4>
      <img src="/dosh-150x150.png" alt="dosh">
    </div>
    <div class="col-md-3">
      <h4>Our first red product</h4>
      <img src="/tractor-150x150.png" alt="tractor">
    </div>
    <div class="col-md-3">
      <h4>Our most popular product</h4>
      <img src="/truck-150x150.png" alt="truck">
    </div>
  </div>
<!-- wpv-loop-end -->
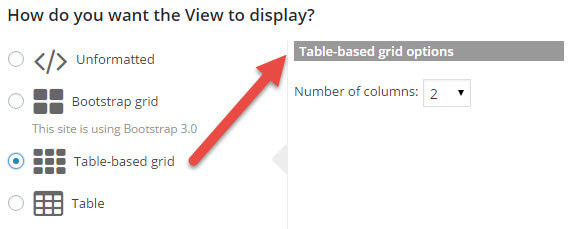
Table-based grid
The table-based grid is the most complex of the predefined formats. All the content of each element in your loop will be displayed within a single table cell – <td></td>.
You can specify the number of columns in your grid, and Views will automatically generate the markup to create your table, building the rows for you and even filling any empty cells in your last row.
You can read more about the shortcodes used on the table-based grid format in detail, or follow the steps to build one yourself.
Meta HTML
[wpv-layout-start]
	[wpv-items-found]
	<!-- wpv-loop-start -->
   <table width="100%">
      <wpv-loop wrap="2" pad="true">
         [wpv-item index=1]
        <tr>
			<td>
				<h4>[wpv-post-title]</h4>
				[wpv-post-featured-image]
			</td>
         [wpv-item index=other]
            <td>
				<h4>[wpv-post-title]</h4>
				[wpv-post-featured-image]
			</td>
         [wpv-item index=2]
            <td>
				<h4>[wpv-post-title]</h4>
				[wpv-post-featured-image]
			</td>
		</tr>
         [wpv-item index=pad]
            <td></td>
         [wpv-item index=pad-last]
            <td></td>
		</tr>
      </wpv-loop>
   </table>
	<!-- wpv-loop-end -->
	[/wpv-items-found]
[wpv-layout-end]
HTML on the page
<table width="100%">
	<tbody>
		<tr>
			<td>
				<h4>Our first red product</h4>
				<img src="/tractor-150x150.png" alt="tractor">
			</td>
			<td>
				<h4>A summer special</h4>
				<img src="/van-150x150.png" alt="van">
			</td>
		</tr>
		<tr>
			<td>
				<h4>Our most popular product</h4>
				<img src="/truck-150x150.png" alt="truck">
			</td>
            <td>
				<h4>Annual results published</h4>
				<img src="/dosh-150x150.png" alt="dosh">
			</td>
		</tr>
   </tbody>
</table>
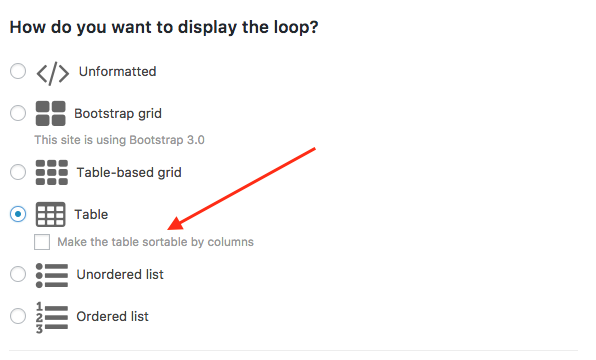
Table
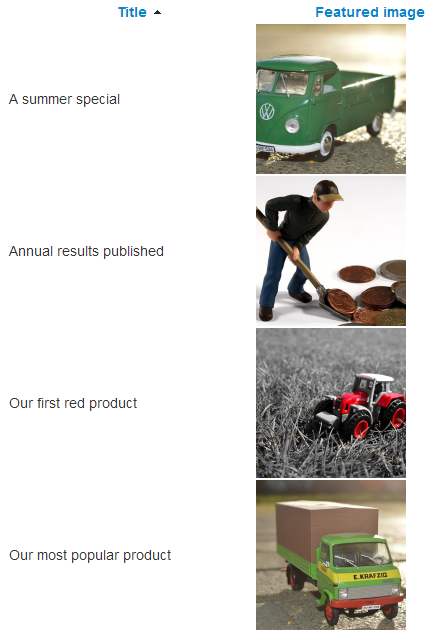
The table format produces a very different result from the table-based grid. Each of the results in your loop will be wrapped in a table row – <tr></tr> – and its fields will be a single table cell – <td></td> – displayed in columns of your table. You can select the Make the table sortable by columns option, which adds a header to your table and, for specific fields, allows site visitors to click and sort the table by a specific column.
Meta HTML
[wpv-layout-start]
	[wpv-items-found]
	<!-- wpv-loop-start -->
   <table width="100%">
            <thead><tr>
               <th>[wpv-heading name="post-title"]Title[/wpv-heading]</th>
               <th>[wpv-heading name="post-featured-image"]Featured image[/wpv-heading]</th>
            </tr></thead>
      <tbody>
      <wpv-loop>
            <tr>
               <td>[wpv-post-title]</td>
               <td>[wpv-post-featured-image]</td>
            </tr>
      </wpv-loop>
      </tbody>
   </table>
	<!-- wpv-loop-end -->
	[/wpv-items-found]
[wpv-layout-end]
HTML on the page
<!-- wpv-loop-start -->
<table width="100%">
	<thead>
		<tr>
			<th>
				<a href="#" class="wpv-header-asc" onclick=" return wpv_column_head_click_1('post-title', 'desc')">Title<span class="wpv-sorting-indicator"></span></a>
			</th>
			<th>
				<a href="#" class="wpv-header-no-sort" onclick=" return wpv_column_head_click_1('post-featured-image', 'asc')">Featured image<span class="wpv-sorting-indicator"></span></a>
			</th>
		</tr>
	</thead>
	<tbody>
		<tr>
			<td>A summer special</td>
			<td><img src="/van-150x150.png" alt="van"></td>
		</tr>
		<tr>
			<td>Annual results published</td>
			<td><img src="/dosh-150x150.png" alt="dosh"></td>
		</tr>
		<tr>
			<td>Our first red product</td>
			<td><img src="/tractor-150x150.png" alt="tractor"></td>
		</tr>
		<tr>
			<td>Our most popular product</td>
			<td><img src="/truck-150x150.png" alt="truck"></td>
		</tr>
	</tbody>
</table>
<!-- wpv-loop-end -->
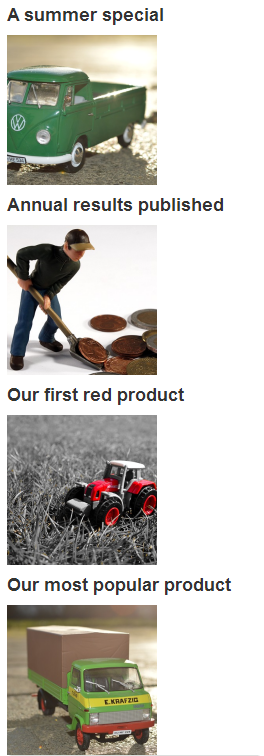
Unordered list
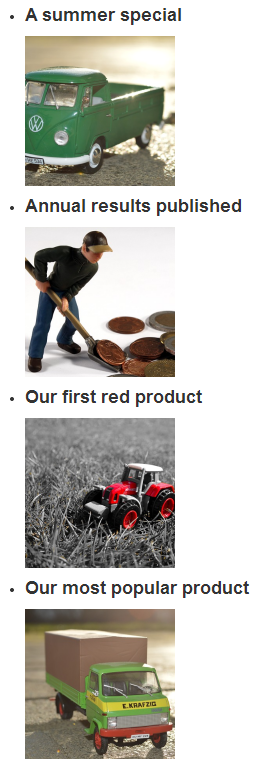
The Unordered list is probably the most flexible of the formats and the one you’ll find yourself using most. By default, this will display a bullet point list, with one list item for each of the posts returned in your loop.
If you are using a Bootstrap-based theme, you can add the built-in ‘.unstyled’ class to your list (edit the HTML after inserting the markup) to remove any styling (padding, margins and bullet point).
<!-- wpv-loop-start -->
<ul class="unstyled">
This format will wrap your loop in a <ul></ul> and all the items within your loop in an <li></li> for each record returned.
Meta HTML
[wpv-layout-start]
	[wpv-items-found]
	<!-- wpv-loop-start -->
   <ul>
      <wpv-loop>
        <li>
			<h4>[wpv-post-title]</h4>
			[wpv-post-featured-image]
		</li>
      </wpv-loop>
   </ul>
	<!-- wpv-loop-end -->
	[/wpv-items-found]
[wpv-layout-end]
HTML on the page
<!-- wpv-loop-start -->
<ul>
	<li>
		<h4>A summer special</h4>
		<img src="/van-150x150.png" alt="van">
	</li>
	<li>
		<h4>Annual results published</h4>
		<img src="/dosh-150x150.png" alt="dosh">
	</li>
	<li>
		<h4>Our first red product</h4>
		<img src="/tractor-150x150.png" alt="tractor">
	</li>
	<li>
		<h4>Our most popular product</h4>
		<img src="/truck-150x150.png" alt="truck">
	</li>
</ul>
<!-- wpv-loop-end -->
Ordered list

The Ordered list format will produce a numbered list, with one item for each of your posts returned in the loop. This format will wrap your loop in a <ol></ol> and all the items within your loop in an <li></li> for each record returned.
Meta HTML
[wpv-layout-start]
	[wpv-items-found]
	<!-- wpv-loop-start -->
   <ol>
      <wpv-loop>
         <li><h4>[wpv-post-title]</h4>[wpv-post-featured-image]</li>
      </wpv-loop>
   </ol>
	<!-- wpv-loop-end -->
	[/wpv-items-found]
[wpv-layout-end]
HTML on the page
<!-- wpv-loop-start -->
<ol>
	<li>
		<h4>A summer special</h4>
		<img src="/van-150x150.png" alt="van">
	</li>
	<li>
		<h4>Annual results published</h4>
		<img src="/dosh-150x150.png" alt="dosh">
	</li>
	<li>
		<h4>Our first red product</h4>
		<img src="/tractor-150x150.png" alt="tractor">
	</li>
	<li>
		<h4>Our most popular product</h4>
		<img src="/truck-150x150.png" alt="truck">
	</li>
</ol>
<!-- wpv-loop-end -->
List with separators
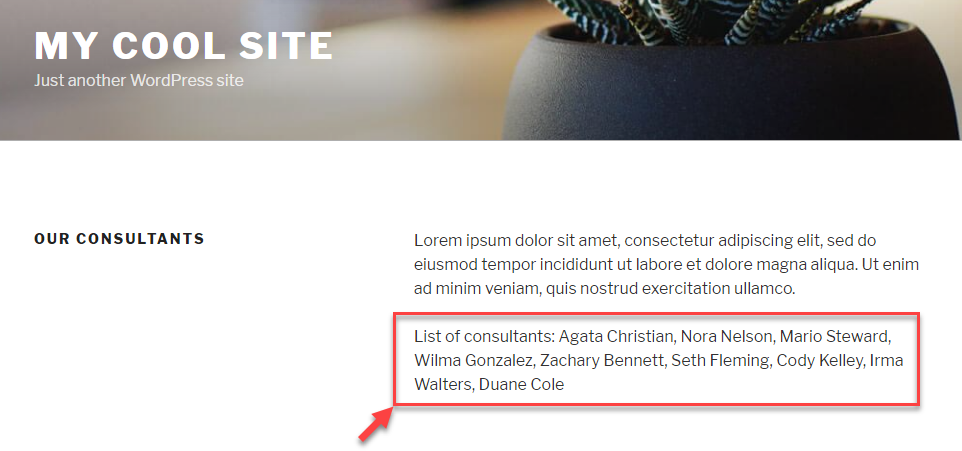
Use the List with separators format when you want to display post information inline, as a list of items with separators.
To be able to display this list inline, the Disable the wrapping DIV around the View option is automatically selected after completing the Loop Wizard.
Meta HTML
[wpv-layout-start]
	[wpv-items-found]
	<!-- wpv-loop-start -->
		<wpv-loop>
			[wpv-item index=other]
				[wpv-post-title],
			[wpv-item index=last]
				[wpv-post-title]
		</wpv-loop>
	<!-- wpv-loop-end -->
	[/wpv-items-found]
	[wpv-no-items-found]
		<strong>[wpml-string context="wpv-views"]No items found[/wpml-string]</strong>
	[/wpv-no-items-found]
[wpv-layout-end]
HTML on the page
<p>List of consultants: Agata Christian, Nora Nelson, Mario Steward, Wilma Gonzalez, Zachary Bennett, Seth Fleming, Cody Kelley, Irma Walters, Duane Cole</p>