Layouts can be used to design templates for post types and archives, or contents of single pages. Layouts for templates are like ordinary templates. On the other hand, layouts for single pages are part of the pages and are translated together with the page.
| How they work | How to build for multilingual sites | How to translate from WPML -> Dashboard | |
|---|---|---|---|
| Layouts for templates | Create one template layout for each post type. No need to create per language. | Wrap texts that require translation with the shortcode. | Find the template layout and send to translation. |
| Layouts for archives | Create one layout for each archive. No need to create per language. | Wrap texts that require translation with the shortcode. | Find the template layout and send to translation. |
| Content layouts (layouts for individual pages) | When you design pages with layouts, the layout is part of the page. Translated pages will have their own translated layouts. | The shortcodes are optional. You can use them to reuse the same cells for all languages, or skip the shortcodes and translate the entire cell content. | Find the pages and send to translation. |
Translating layouts for templates and archives
Layouts for templates and layouts for archives typically include some “static” texts like page section headings and some “dynamic” content, like the contents of the posts and pages. For layouts, you need to translate only the static texts, and WPML will automatically load all the dynamic content in the correct language.
Let’s take a look at an example similar to the one discussed on the page about translating Content Templates, WordPress Archives, and Views.
We have a “House” custom post, available in English and Spanish. We created a simple layout for the “Houses” post type, as displayed in the following image.
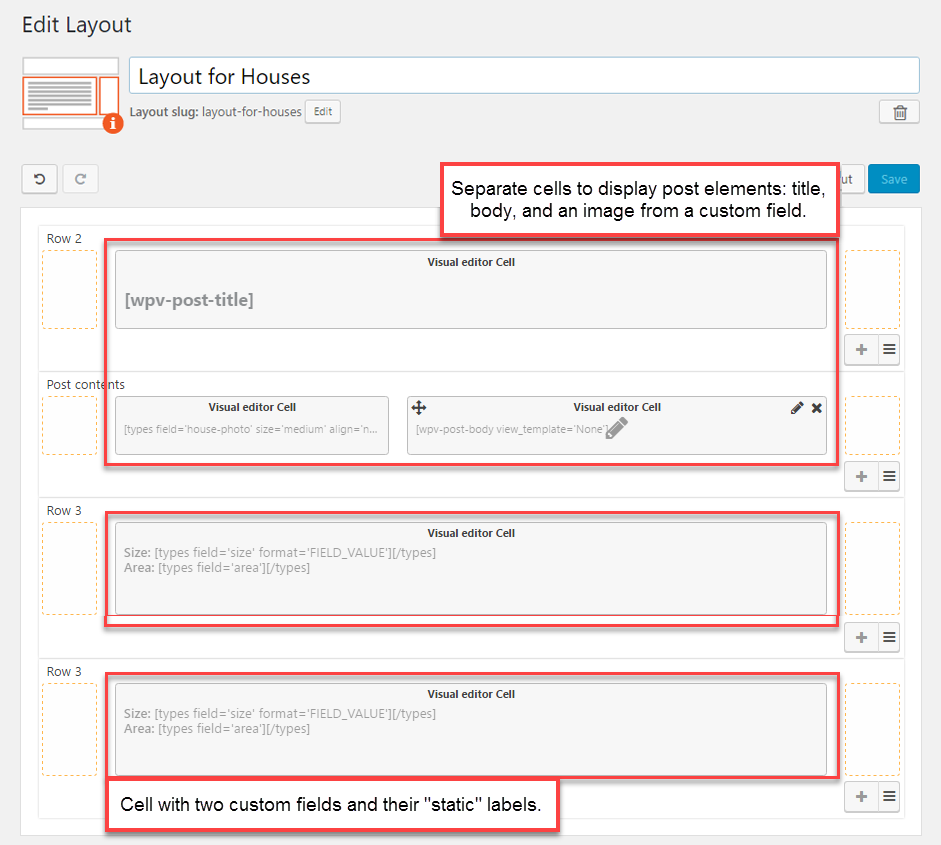
We used Visual Editor cells to display the house title, custom image field, the body, and two additional custom fields at the bottom, “area” and “size”.
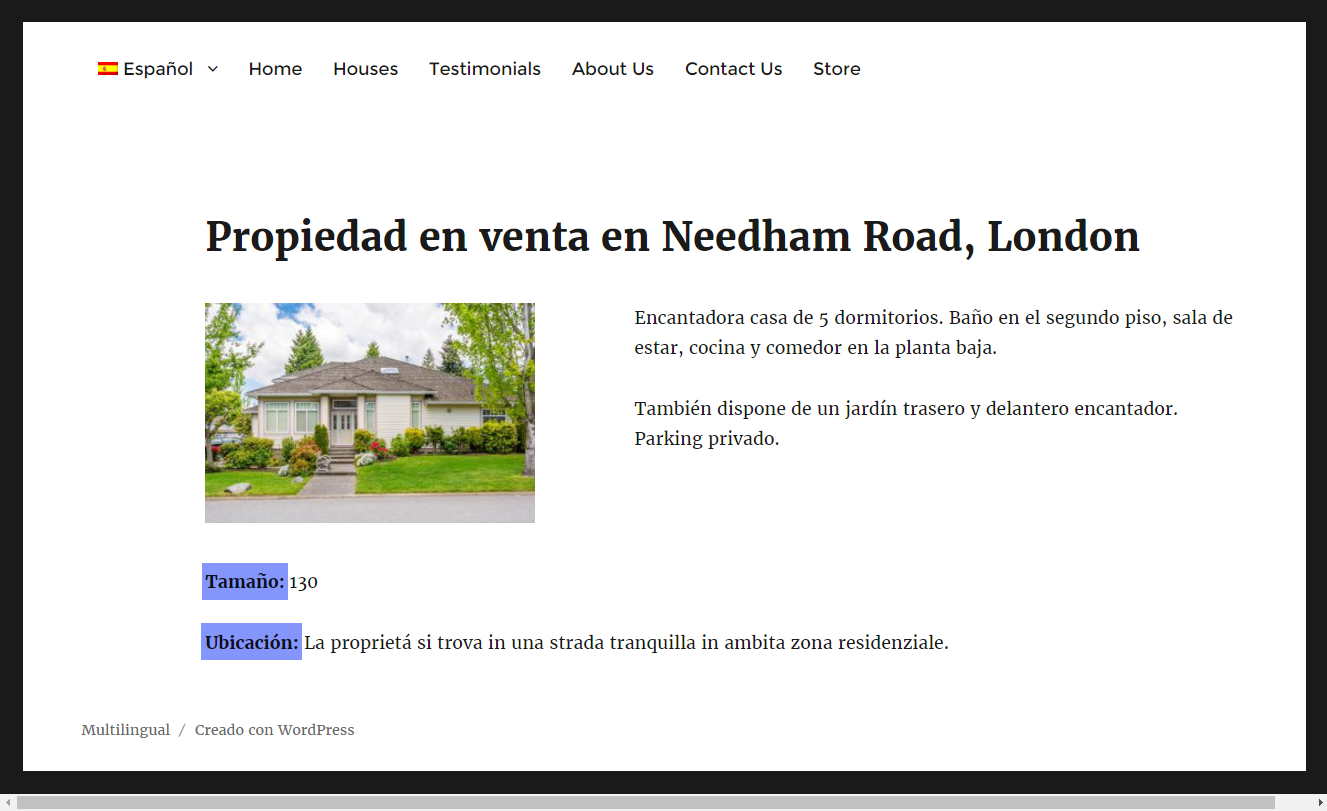
The following two images show how our layout displays the house post on the front-end.
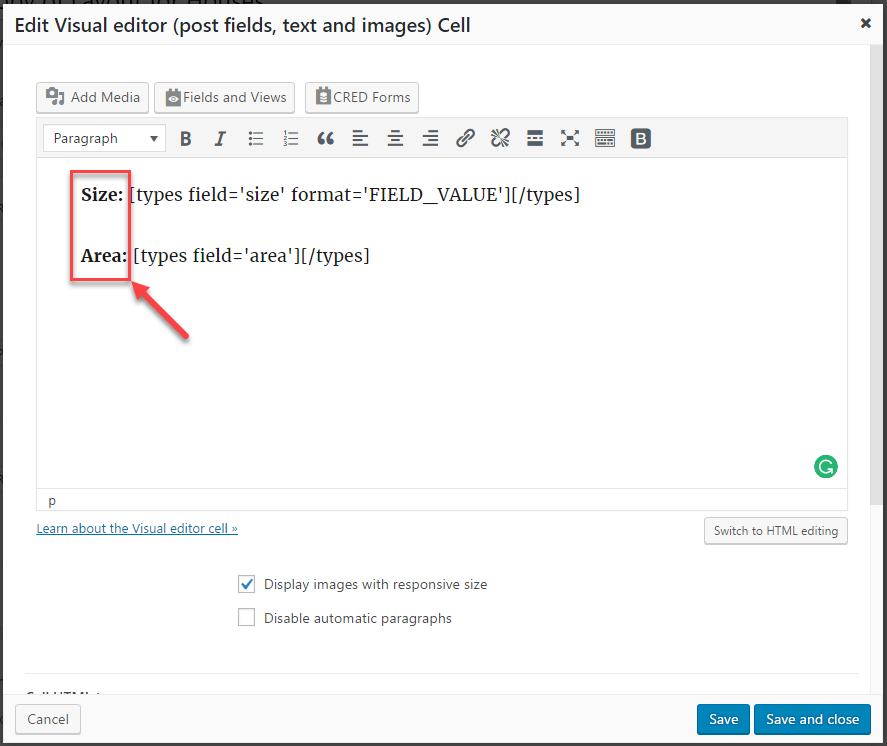
Again, in the Spanish version, everything looks right, except for the custom field labels size and area. This is because we “hard-coded” these two labels inside our Visual Editor cell, as displayed in the following image.
To translate your layouts you need to use WPML’s Translation Management feature. It allows you to specify exactly what content is to be translated by which translators. Translators can be any users in your site or professional translating services integrated with WPML.
To translate your layouts by yourself, you need to make your own user a translator. This is done on the WPML -> Translation Management page, under the Translators tab.
Let’s now go over the five steps for translating your layout.
| Step | Screenshot |
|---|---|
| 1. Go to the WPML -> Translation Management page. In the Translation Dashboard tab, under the Filters section select Layout from the Type drop-down menu. | |
| 2. Select your layout and send it to the Translation Basket for the preferred language(s). | |
| 3. Go to the Translation Basket tab, select the translator for your layout in specific language, and click the Send all items for translation button | |
| 4. Go to the WPML -> Translations page, locate the job for your layout and click the Translate button in its row. | |
| 5. Use the editor to translate your layout’s texts.
Remember to click Translation finished next to each field and the Translation complete checkbox at the very bottom of the page. |
Now, we can visit our “Houses” on the front-end, in the language we translated our layout into, and see the results. Everything, including labels for “area” and “size” is translated.
Please note that you can edit or add texts to the layout after translating it, but you will need to update the translation, starting with the Translation Dashboard again.
Translating pages built with Layouts
You can use Layouts to design the contents of individual pages, using Layouts as a page builder.
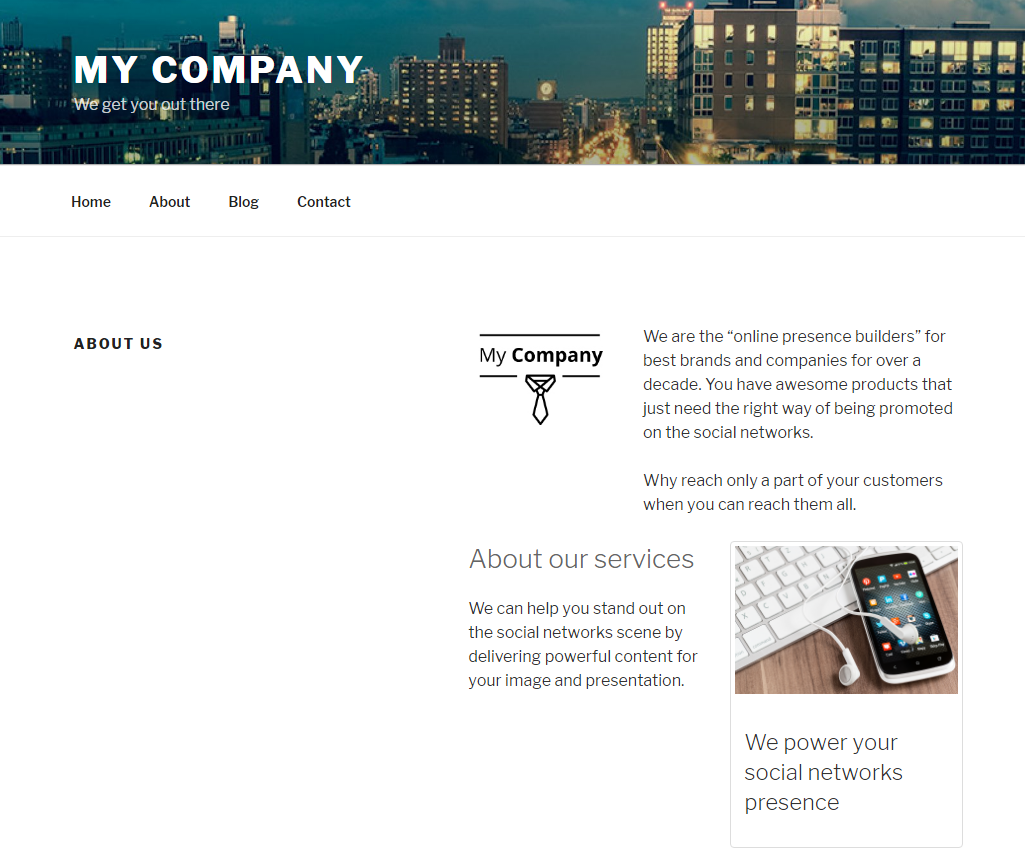
Let’s take a look at an example of a simple content layout we created for an “About Us” page.
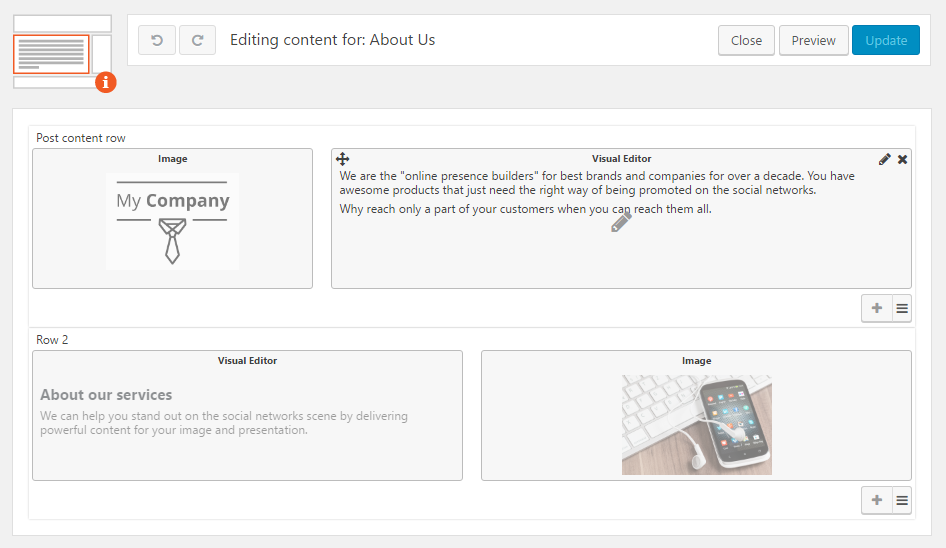
We used two Visual Editor cells to describe our company and two images to represent it. The following image displays how this page looks like on the front-end.
There are two ways to translate content layouts for single pages:
- Using WPML’s Translation Management – the process is the same as the one described above for template layouts.
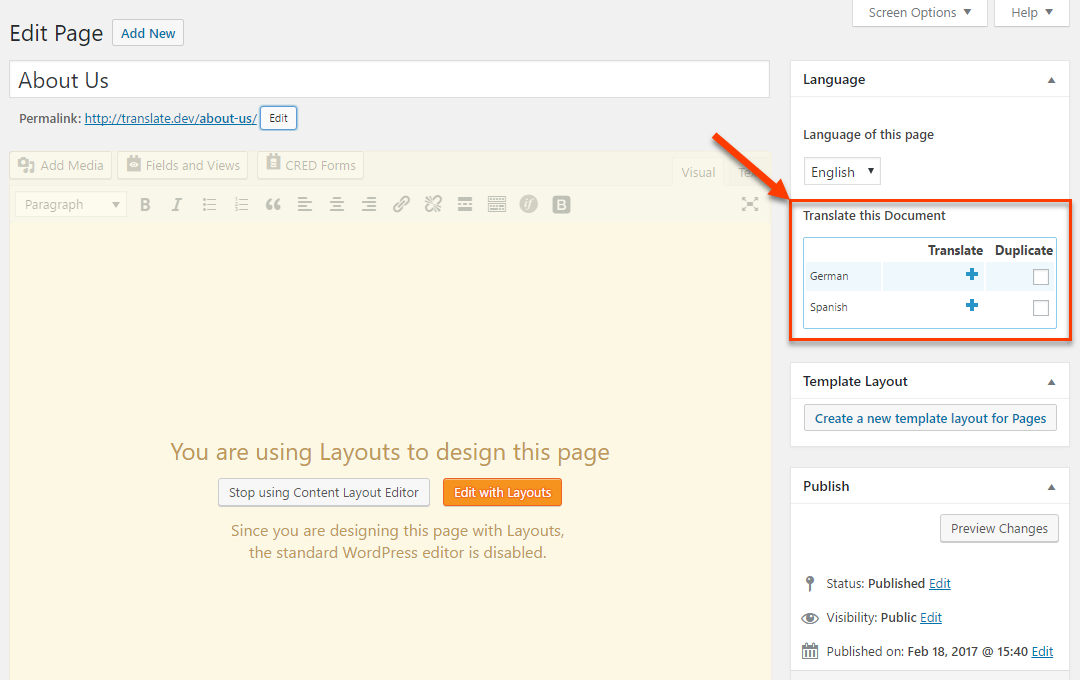
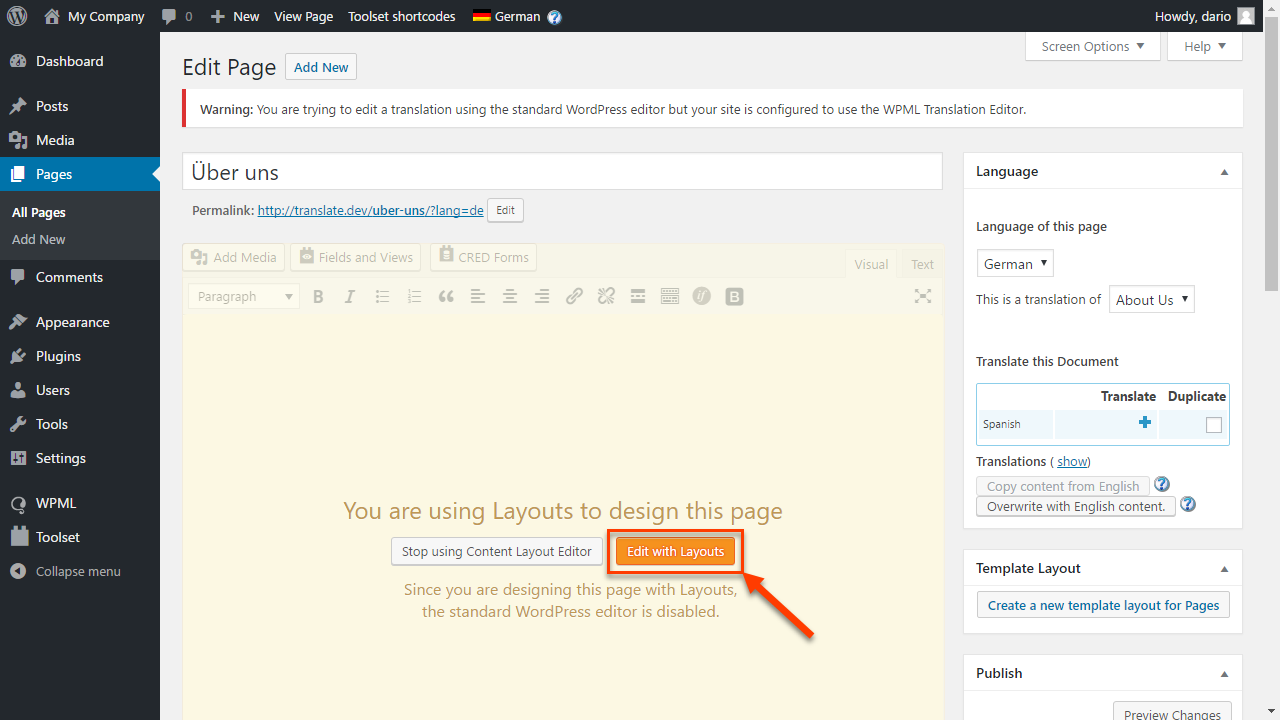
- Using the Language box in the page editor, just like when translating posts and pages, as shown in the following image.
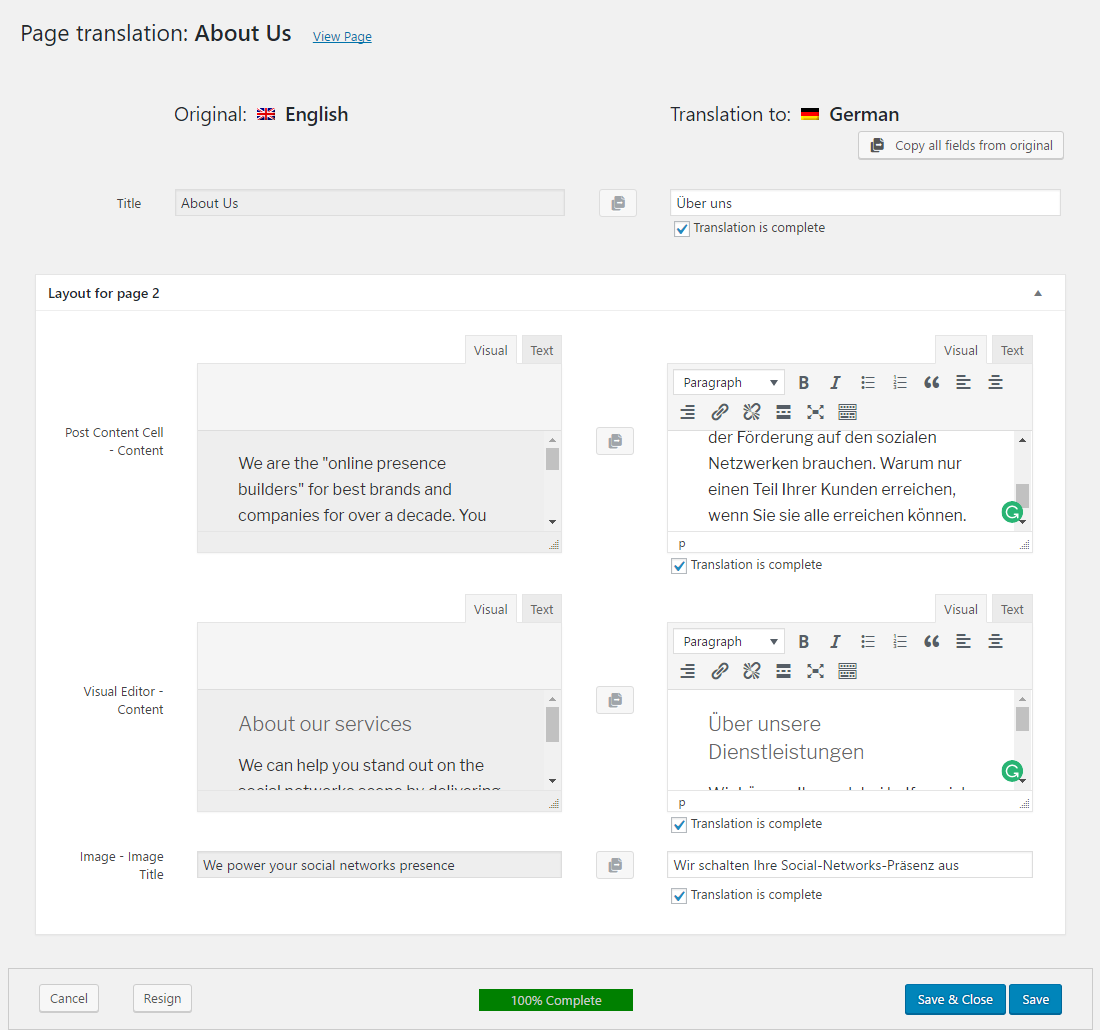
In both cases, you will reach the WPML Translation Editor. There, you can translate all the texts present in the layout.
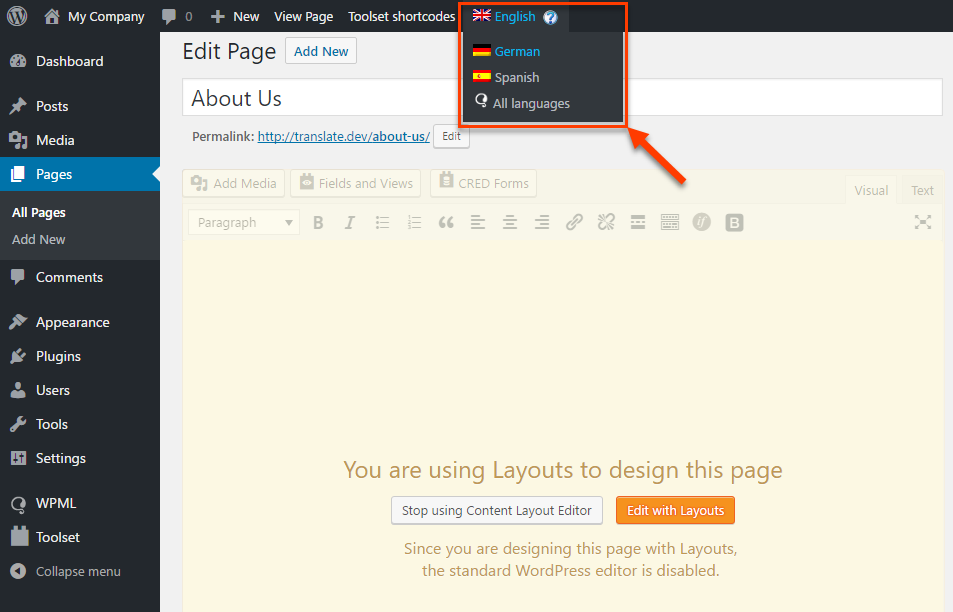
Editing the page layout for other languages
Layouts allows you to edit the layout of the page in other languages. This way, the page’s design can be different across different languages. However, this is not recommended since your edits will be lost when the translation is updated.
The following table presents two steps to edit a content layout in another language.
| 1. To edit a page’s layout in other languages, edit that page and use the language switcher at the top, to switch to the language of your choice. | 2. Click the Edit with Layouts button. |
 |
 |
Translation options for the Visual Editor cell
Visual Editor cell is an important and powerful part of building your layouts. You can use it to insert text, media, post fields, and even Views or Toolset forms. Additionally, you can add any HTML markup and CSS classes for complete customization.
Since different instances of the Visual Editor cell can range from very simple texts to very complex markup, it provides you with three translation options.
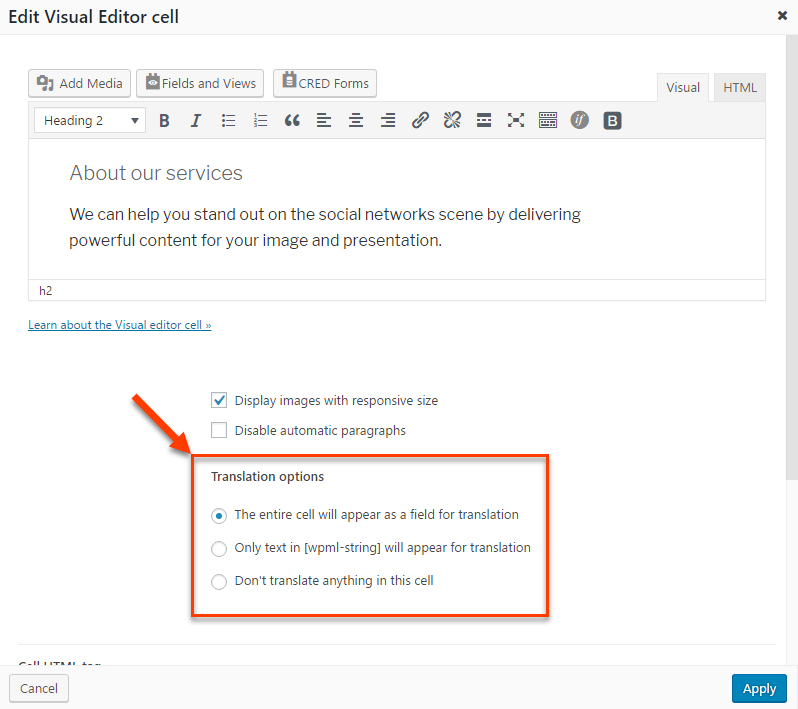
The following table presents these translation options and explains best practices for each.
| Option | Recommended usage |
|---|---|
| The entire cell will appear as a field for translation | Good for simple text cells that do not include HTML. To style the cell’s output, it is best to add the CSS IDs and classes to the cell’s settings and not include HTML in the cell’s content. |
| Only text in will appear for translation | Good for complex text cells, which contain both HTML markup and text.
In this case, you should only wrap the texts with the shortcode. This way, the translators do not see the HTML markup in the Translation Editor and can focus entirely on text. |
| Don’t translate anything in this cell | Use when the text does not include texts but only HTML markup and media. In this case, there is simply nothing to translate and you do not want to ask translators to translate HTML. |
Need help?
Ask us about translating layouts and we’ll do our best to help.
For more elaborate questions, please use our Toolset Professional Support forum.