A WordPress thumbnail slider is a great way to display your content in a dynamic, animated way to attract users to your website.

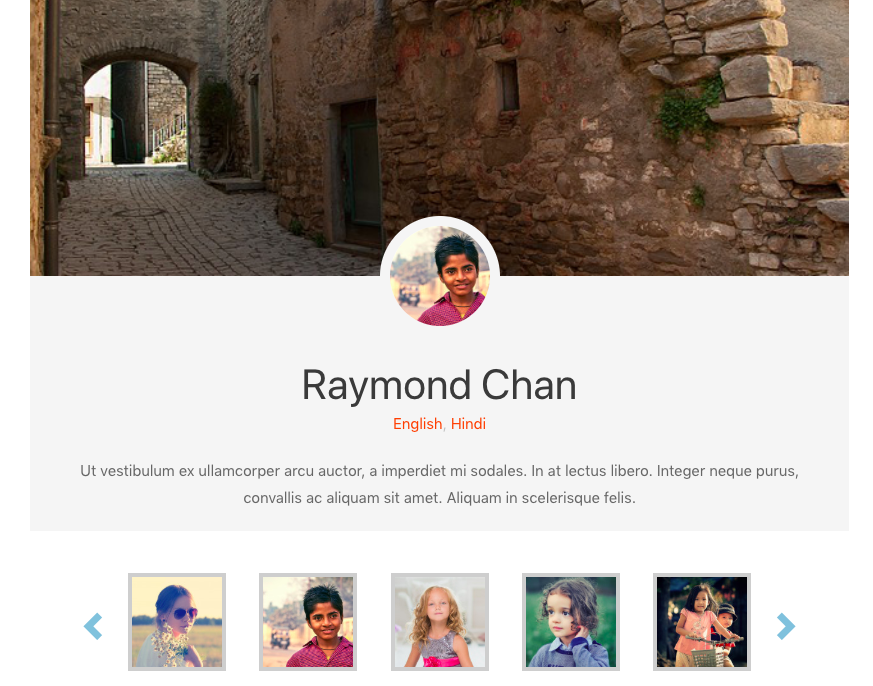
A thumbnail slider contains a series of images on a slider which you can click through to view. Below is a set of thumbnails of all of the available images. If you click on one, it navigates you to that image’s main slide. It works just like the standard dots on normal sliders except you can see a preview with the thumbnails.
Why use Toolset to create your WordPress thumbnail slider
The problem is most WordPress thumbnail slider solutions require you to create each slide manually. Imagine if you wanted to add seven slides; you would have to create the same slides seven times. For busy developers and users, that is a waste of valuable time.
One template, easy management
With Toolset, you create your thumbnail slider template once and only once. Your site’s users/editors will edit the posts and their changes to the content will be automatically reflected in the slider.
Complete control over your output
With Toolset, you have complete control over your output. Toolset allows you to select any custom post type for your thumbnail slider and add whatever content you want easily and quickly.
Using custom fields and taxonomies
You can also add any custom field or taxonomy to your thumbnail sliders. Instead of a basic slider, you can offer your users something complex that will stand out.
No PHP coding
That’s not all! To create your thumbnail slider with Toolset you don’t need any PHP coding. All you need is a couple of lines of basic HTML. You can have your thumbnail slider up and running in minutes.
You can check out a live demo (coming soon) of one of our thumbnail sliders to see how it works on a website.
How to create a WordPress thumbnail slider using Toolset
The fastest way to create a thumbnail slider is to import and customize one of the sliders from the Toolset Module Library.
There are two sliders with thumbnail navigation in the Modules Library:
You can use any of the templates for your custom slider.
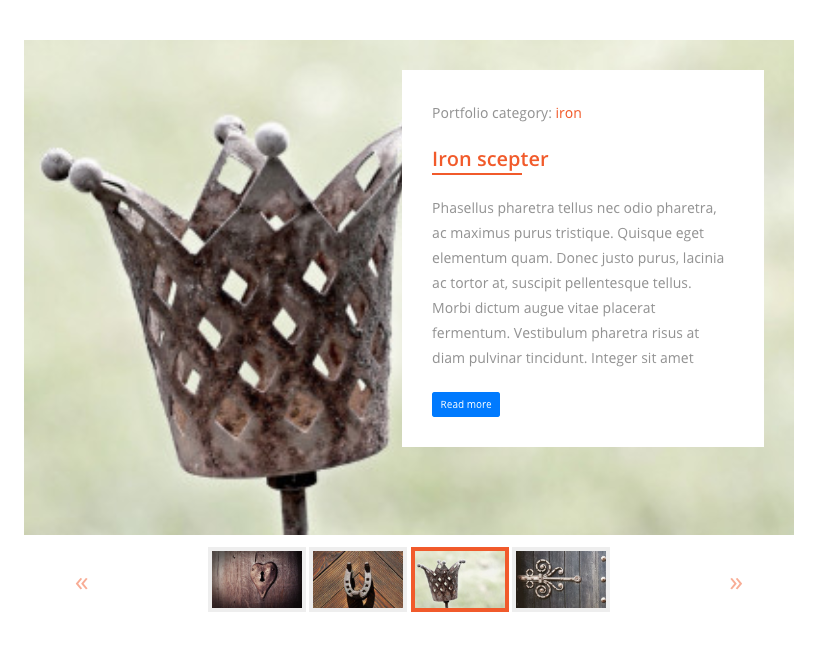
Below we describe how you can add the Portfolio slider with thumbnails, but both sliders work similarly.
Requirements:
- Toolset Types
- Toolset Views (2.7.3+)
- Toolset Module Manager (only to import the module)
- Make sure your theme has Bootstrap 4 enabled (go to Toolset -> Settings -> Bootstrap loading -> Toolset should load Bootstrap 4)
To install the slider:
- Go to Toolset -> Modules.
- Switch to the Modules Library tab.
- Locate the Portfolio slider with thumbnails module.
- Click Install.
- Go to the page where you want your slider to appear and insert the Portfolio slider with thumbnails View.
- Replace the slider with your custom post type and fields.
To replace the custom post type:
- Go to Views.
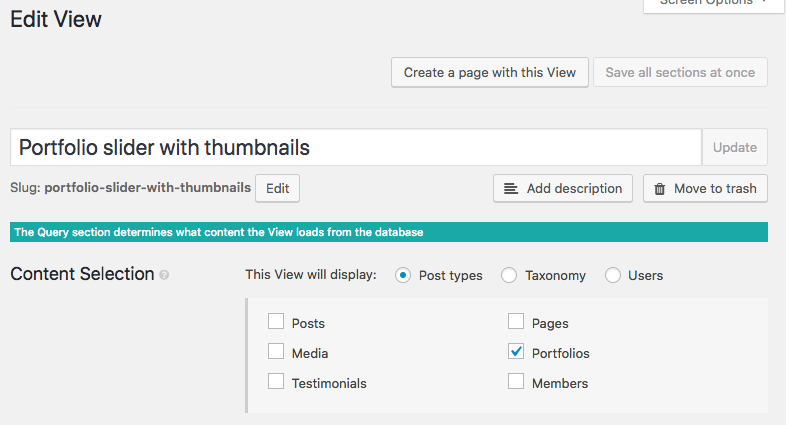
- Open the Portfolio slider with thumbnails View for editing.
- In the Content Selection section, uncheck Portfolio, check your post type, and save the changes.
- Go to Views.
- Open the Portfolio slider with thumbnails – carousel View for editing.
- In the Content Selection section, uncheck Portfolio, check your post type, and save the changes.

To replace custom fields:
- Go to Views.
- Open the Portfolio slider with thumbnails View for editing.
- Scroll down to the Templates for this View section.
- Replace the fields with your custom fields.

- Go to Views.
- Open the Portfolio slider with thumbnails – carousel View for editing.
- Scroll down to the Templates for this View section.
- Replace the shortcode generating the image with your custom field.

The slider should work with your content now.
If you are interested in understanding how the thumbnail slider works in detail, continue reading.
Anatomy of the thumbnail slider
If you are tech-savvy and would like to fully understand how the slider is built and what each of its elements does, this section is for you.
To implement a WordPress slider with thumbnail navigation we’ve used the Bootstrap Carousel component and replaced the navigation controls with thumbnail images.
As soon as your site is set to load Bootstrap you don’t need to include any additional JS libraries. Visit the Toolset Settings page to check if Bootstrap is included in your site (Toolset -> Settings -> General -> Bootstrap loading)

The Portfolio slider with thumbnails slider consists of two Views:
- View #1: Portfolio slider with thumbnails – the main slider
- View #2: Portfolio slider with thumbnails – carousel – the slider that displays thumbnails
Items from both sliders are connected through special classes and attributes coming from the Bootstrap Carousel component.
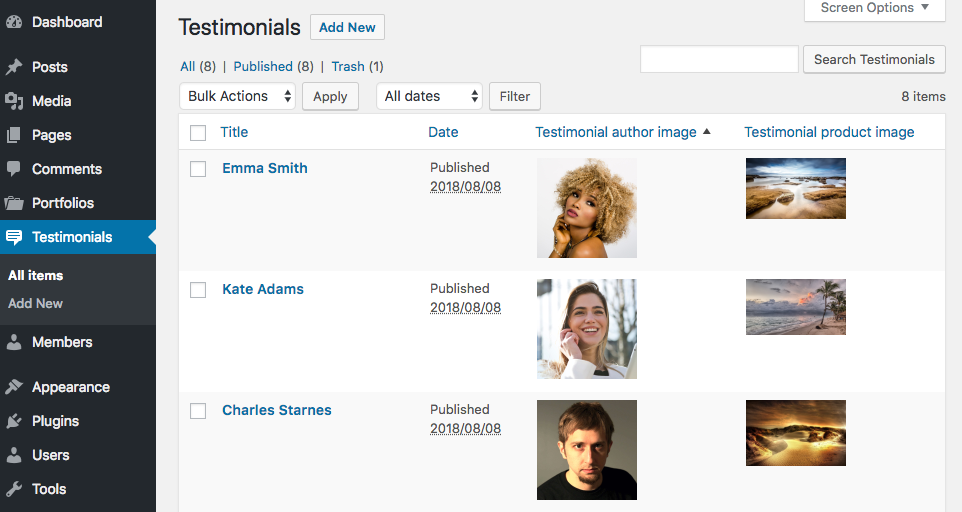
Both Views display the same set of posts from the Portfolio custom post type in our example.
Below we explain the most significant parts of both Views. It will help you better understand how the thumbnail slider works.
View #1: Portfolio slider with thumbnails – the main slider
The first View displays the main images.
In the Content Selection section, the Portfolio post type has been selected.
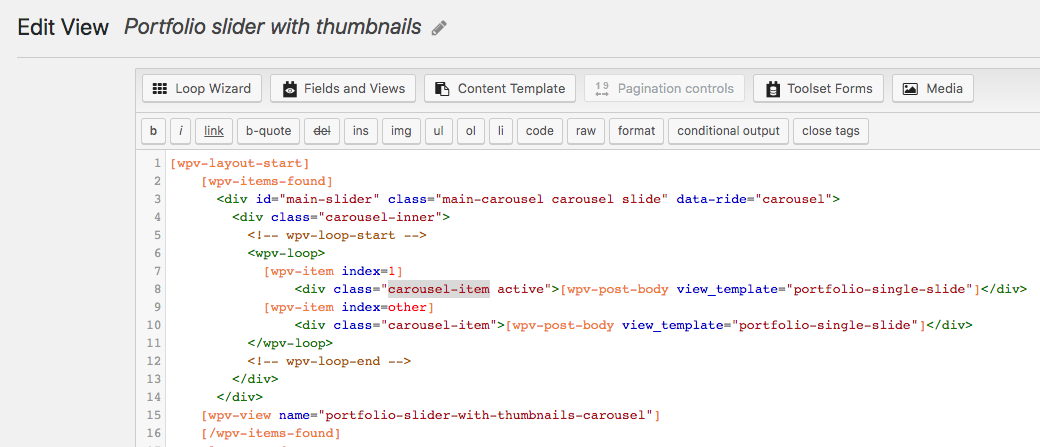
- Line 3 – the id will be used in the second slider (Portfolio slider with thumbnails – carousel). Sliders with thumbnails require the use of an id (in this case id=”mainSlider”) for carousel controls to function properly.
- Lines 3-4 – Bootstrap classes: carousel, slide, carousel-inner
- slide, carousel – Bootstrap classes to control transition and animation effect, which makes the items slide.
- data-ride=”carousel” – the attribute tells Bootstrap to begin animating the carousel immediately when the page loads.
- Lines: 7-8 – the output generated for the first slide (loop iteration), note the active class, the visible slide; carousel-item – Bootstrap’s 4 class to specify the content of a single slide.
- Lines 9-10 – the output generated for all other loop iterations, carousel-item – Bootstrap’s 4 class.
- Line 15 (outside the loop) – View that displays the second View: Portfolio slider with thumbnails – carousel.
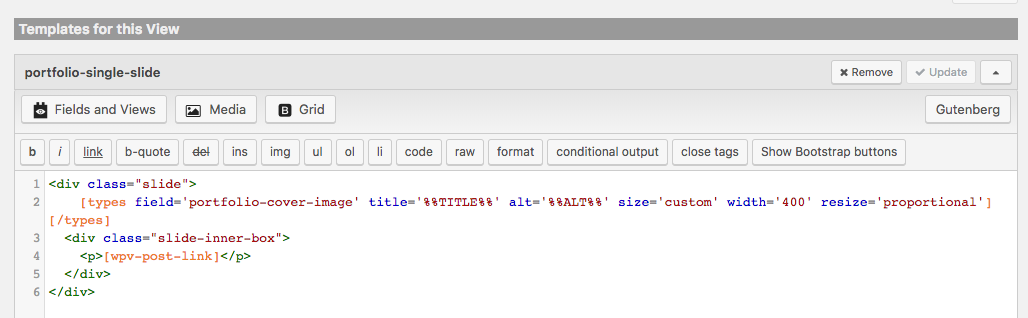
[wpv-post-body view_template=”portfolio-single-slide”] – Content Template used by the View, outputs the content of a single slide:
View #2: Portfolio slider with thumbnails – carousel
The second View displays the thumbnail images.

Again, in the Content Selection section, the Portfolio post type has been selected.
The loop reflects the markup of the indicators of the Bootstrap Carousel, but we use thumbnail images as indicators. In addition, the images have been split into groups, five images in each.
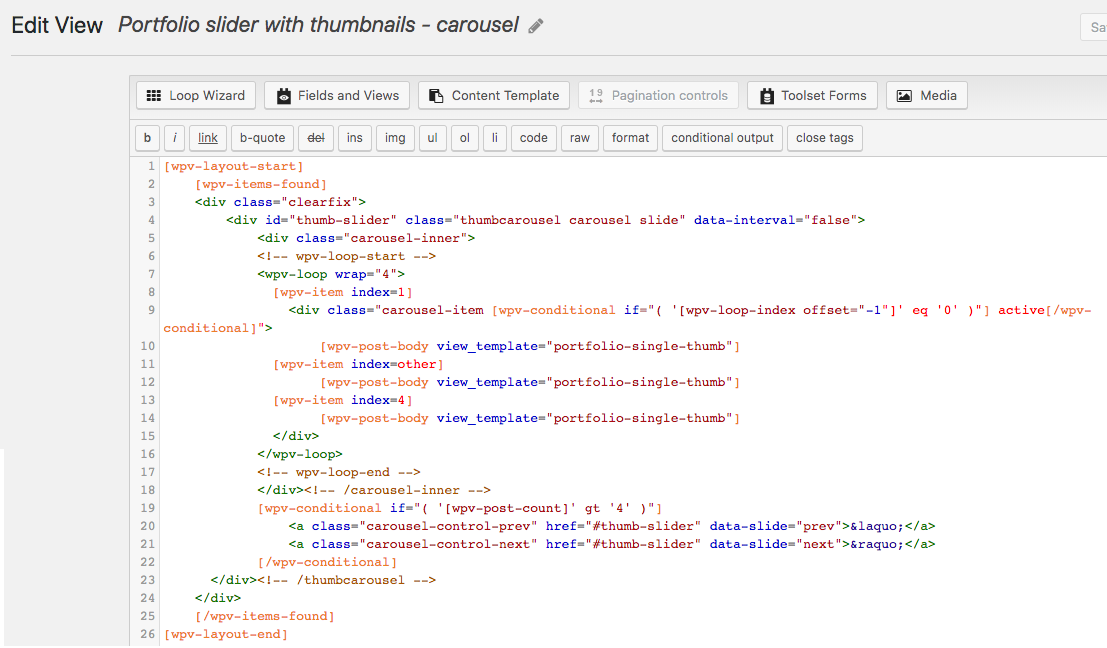
- Lines 4-5 – thumb-slider – the slider’s unique id, the navigation controls (see lines 20-21) will refer to:
- thumbcarousel – for styling purposes
- carousel, slide – Bootstrap classes to control transitions and the animation effect, which makes the items slide
- data-interval=”false” – carousel will not automatically cycle
- Line 7 – wrap parameter, used to process posts in groups; five items will be displayed in one group (the visible part of the slider), check details in Toolset documentation.
- Line 8-9 – controls the output generated for the first iteration, note the active class
[wpv-loop-index offset=”-1″] – returns current index of the loop, -1 has been used to start counting from 0 instead of 1 (default).
The conditional statement ‘[wpv-loop-index offset=”-1″]’ eq ‘0’ )” – adds the active only for the first loop iteration.
- Lines 11-14 – controls the output for other loop iterations.
- Lines 19-22 – navigation controls; the conditional statement reassures that the navigation controls will be displayed only if there are more slides than five.
[wpv-post-body view_template=”single-thumb”] – Content Template used by the View to group the content of a single slide (thumbnail image).
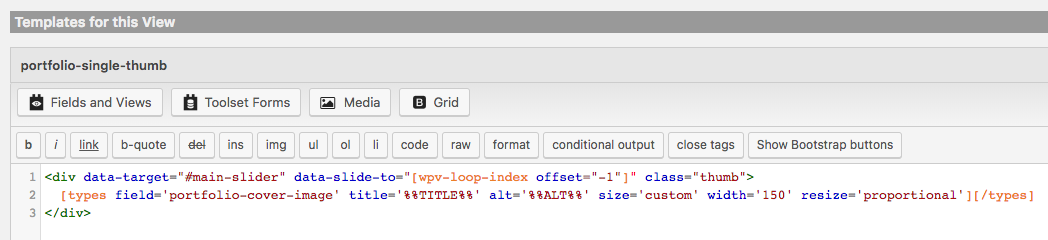
- data-target – the attribute points to the id of the slider.
- data-slide-to – the attribute specifies which slide to go to when clicking on the specific thumbnail image.