Conditional HTML output, in the Views plugin, lets you display sections according to logic conditions. This is similar to if/else statements in programming languages, just without having to write PHP.
Setting up conditional output using the user interface
Toolset Views provides a graphical user interface for setting up conditionals, making the process easier for you. You define your conditional output by filling out relevant input fields using a dialog.
If you setup your conditions using the user interface:
- You do not have to remember the exact names of your custom fields used in your site. The interface will provide you with a complete list,
- You will see a complete list of Views shortcodes that can be used in your conditions.
- You can register your custom shortcodes and functions via the interface.
- And more.
Once your condition is defined using the user interface, you can manually update it, if needed. More about setting up conditions manually.
Where the user interface is available
The user interface dialog for defining conditional output is available in all your WordPress editors.
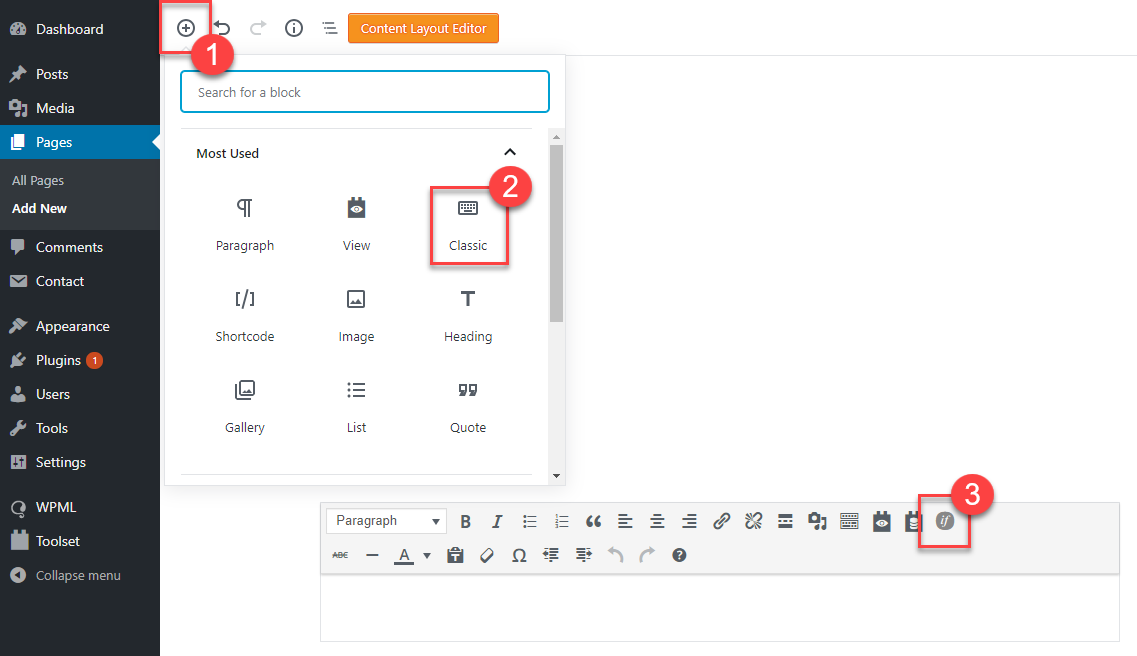
In the Block editor for posts and pages:
- add Classic editor block, locate the “if” icon (as displayed in the picture)

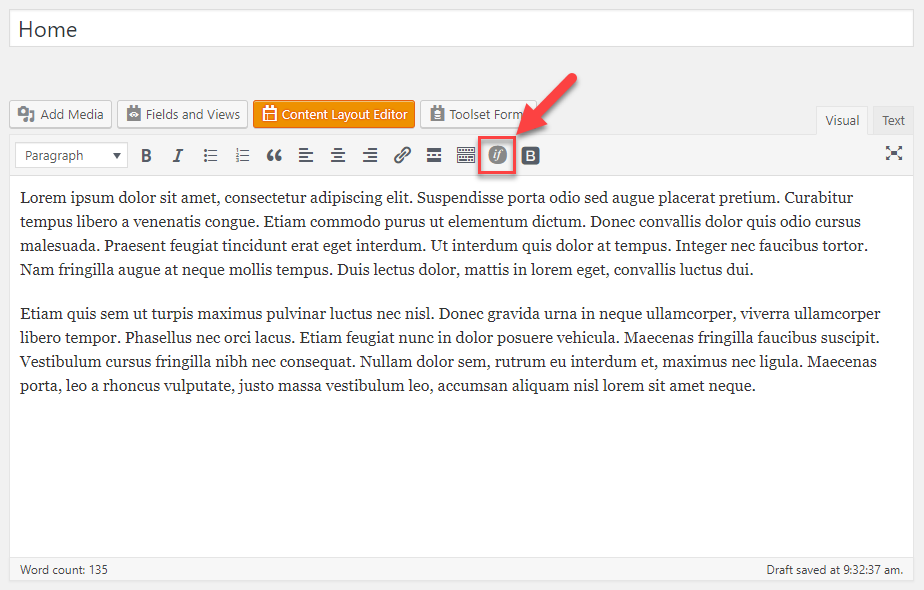
In the WordPress classic editor for posts and pages:
- if you work in the Visual mode, locate the “if” icon (see the picture)
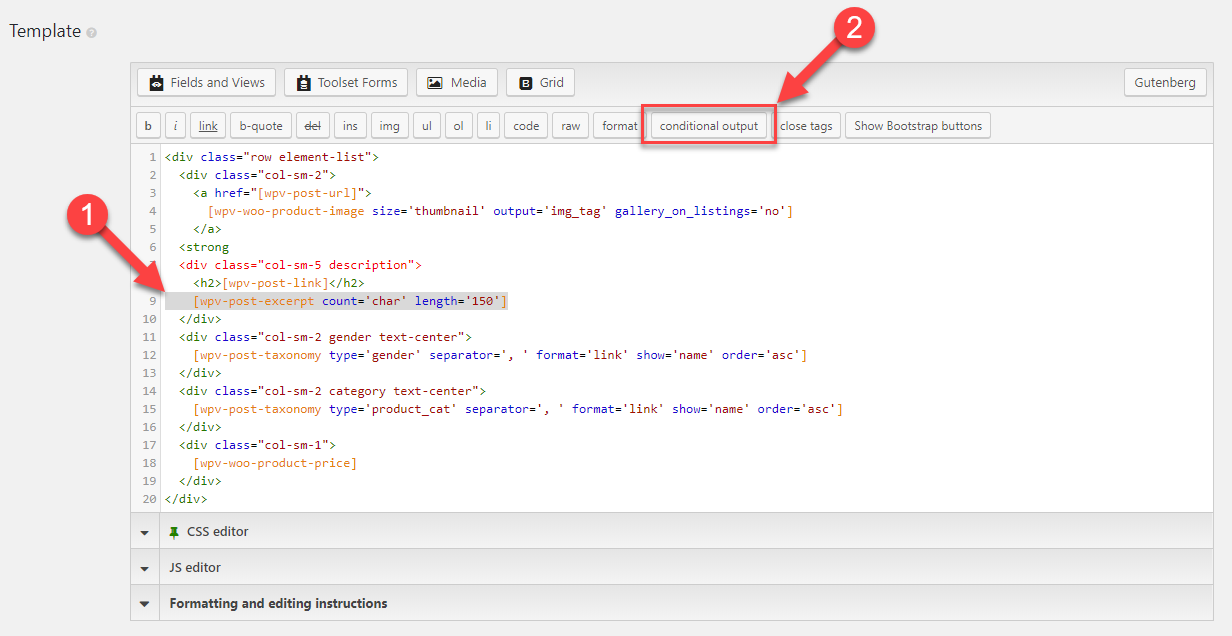
- if you work in the Text mode locate the conditional output button

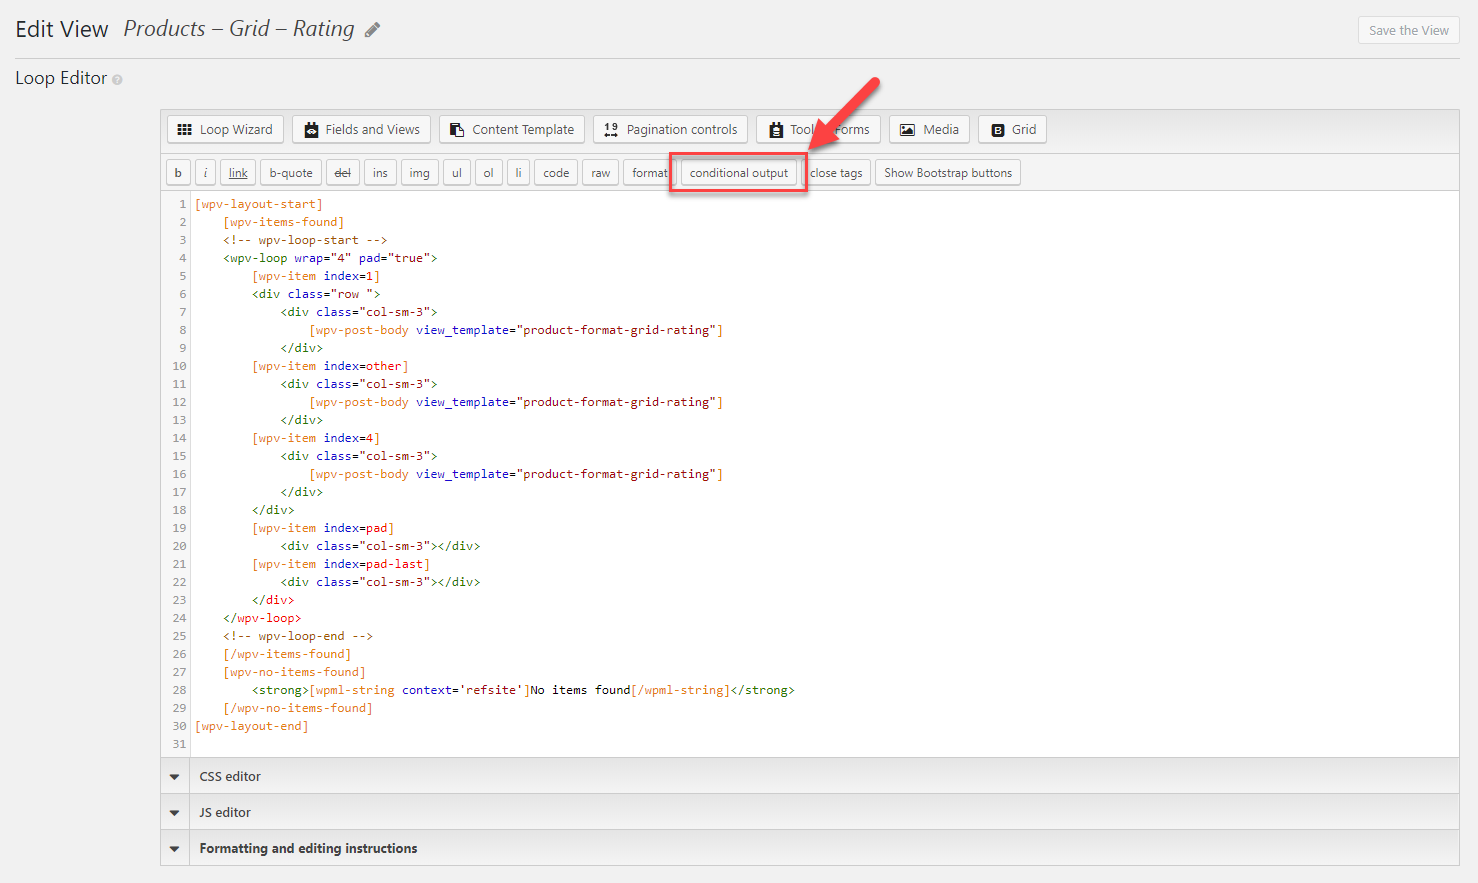
In all Toolset editors (Views Loop Output and Templates for This View sections, Content Templates, WordPress Archive, etc.). Locate the conditional output button.
Entering the condition to display
You can start defining conditions using the user interface in two ways:
- By selecting the conditional output first:
- In your editor,use your mouse to select the area you want to display conditionally. It can be any piece of content, a shortcode or a group of shortcodes.
- Click the “conditional output button”.
- Set your condition by filling out the input fields provided by the user interface.
Your output will be wrapped automatically in the conditional shortcodes.
- By defining the condition first
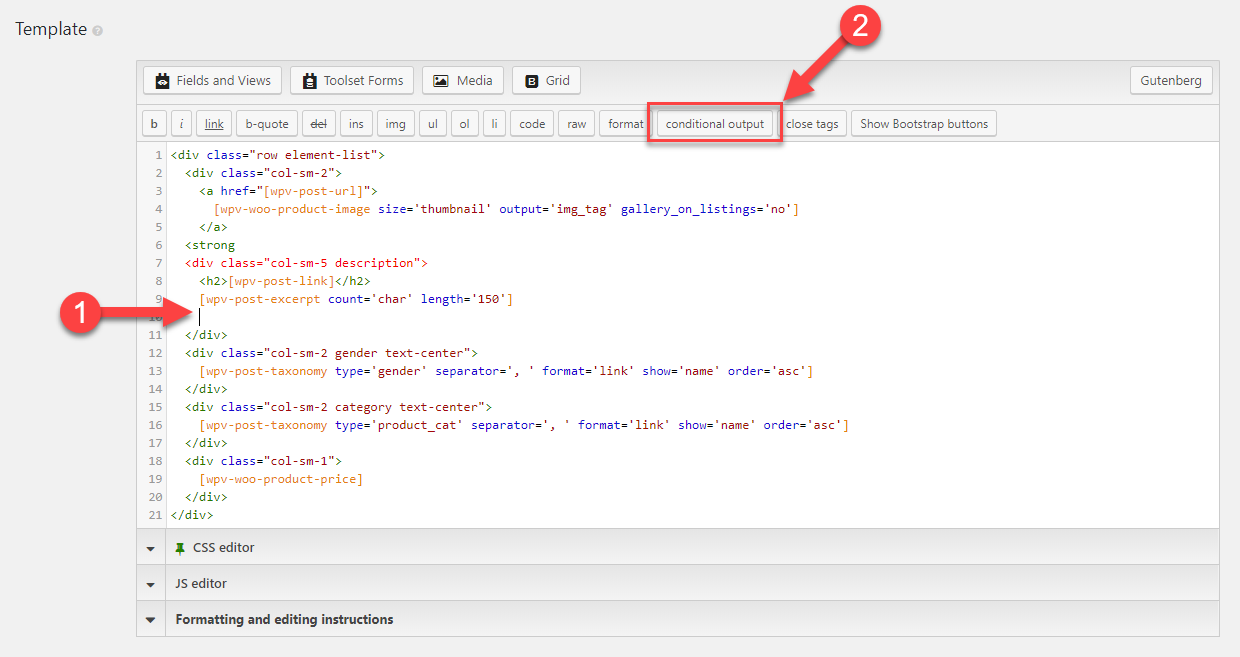
- In your editor, position your cursor where you want your condition output to be displayed.
- Press “conditional output”
- Set your condition by filling out the input fields provided by the dialog
- Add the output you want displayed conditionally.
- Close the condition by pressing the “/conditional output” button.
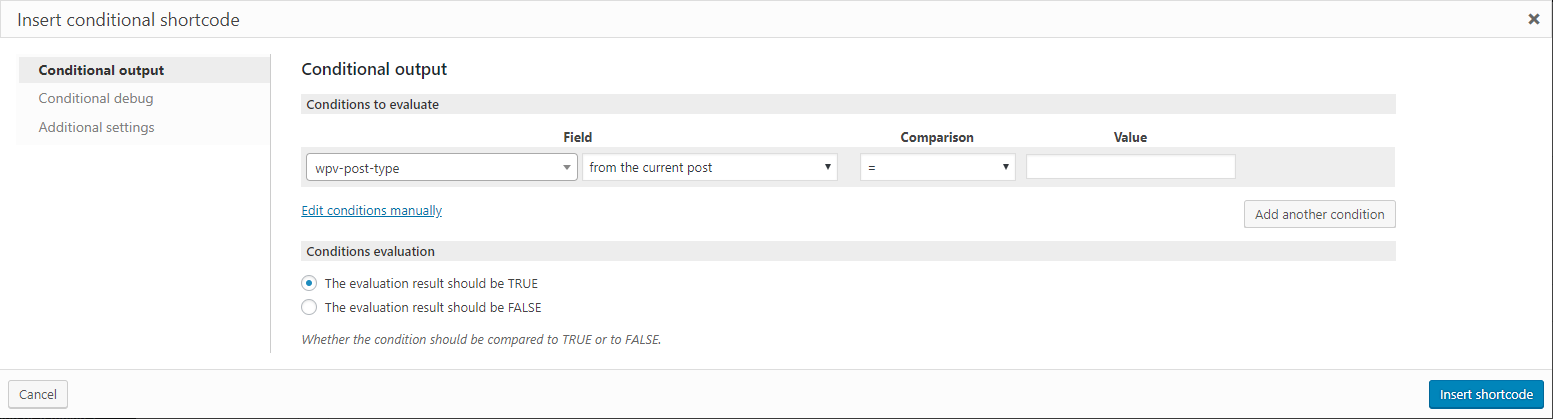
Once the insertion dialog opens, specify your condition in the Conditions tab by filling out the provided inputs.

A basic condition is defined by setting up the following sections:
- Field
- Comparison
- Value
- Relationship
Field
' and " in Values you compare with HTML conditionals. You could always use ʼn, or ʼ, or ˮ. However, if you must use ' and ", you can only conditionally evaluate such content by adding it to Types Fields and later omitting the ' or " in your HTML conditional. This is because Types removes the apostrophe from the field value while evaluating the condition. It doesn’t affect the display of that field, only the evaluated Conditional values.Start defining your condition from setting up the Field. Data origin consists of one or more Field dropdowns.
- In the first one you choose custom fields, shortcodes, taxonomies or functions. Custom Shortcodes and Custom Functions will appear only if you have any custom shortcode/function registered in the Front-end Content tab of the Toolset Settings page.
- The value that appears in the second dropdown will depend on what you have selected in the first dropdown and possible relationships
All options are summarized in the list below.
Table 1: Possbile sources for Filed dropdown
| Field | Explanation |
|---|---|
| Types fields | A list of all custom fields created in your site with the Types plugin. |
| Custom fields | A list of native custom fields created outside the Types plugin:
|
| Taxonomy | A list of all taxonomies in your site. |
| Views shortcodes | A list of selected Views shortcodes that produce output that can be further checked for including specific content or a value. Visit the Using shortcodes in conditions page – Views shortcodes to see examples. |
| Custom shortcodes | A list of
registered in Toolset -> Settings -> Front-end Content tab -> Third-party shortcode arguments section. |
| Custom functions | A list of
Note: The Custom functions field appears in the Data origin list only if you have at least one shortcode defined in Toolset -> Settings -> Front-end Content tab -> Functions inside conditional evaluations section. |
Comparison operator
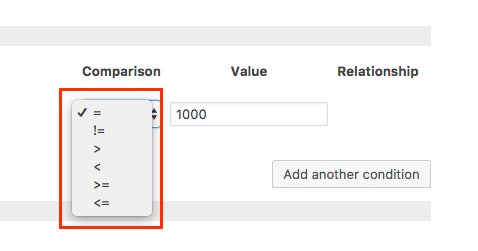
The interface provides you with six comparison operators: =, !=, >, <, >=, <=.
Table 2: Operators that can be used in the Comparison section
| Operator | Description | Example
A = 100, B = 200 |
|---|---|---|
| == | Checks if the values of two operands are equal or not. If the values are equal, then the condition becomes true. | (A == B) is not true. |
| != | Checks if the values of two operands are equal or not. If the values are not equal, then the condition becomes true. | (A != B) is true. |
| > | Checks if the value of left operand is greater than the value of right operand. If yes, then the condition becomes true. | (A > B) is not true. |
| < | Checks if the value of left operand is less than the value of right operand. If yes, then the condition becomes true. | (A < B) is true |
| >= | Checks if the value of left operand is greater than or equal to the value of right operand. If yes, then the condition becomes true. | (A >= B) is not true. |
| <= | Checks if the value of left operand is less than or equal to the value of right operand. If yes, then the condition becomes true. | (A <= B) is true. |
Note that you can use the comparison operators with different types. You can compare:
- strings
- numeric values
- boolean (true/false) values
- date fields
If you are using taxonomy as a field you can use include the term and don’t include the term operators.

Table 3: Operators that can be used for taxonomy terms in the Comparison section.
| Operator | Description |
|---|---|
| include the term | Checks if the value of the field includes the term name, ID or slug. If it is included it then the condition becomes true. |
| don’t include the term | Checks if the value of the field does not include the term name, ID or slug. If it is not included then the condition becomes true. |
Value field
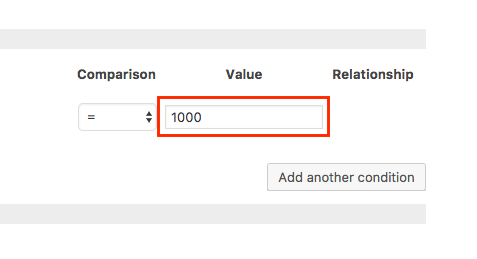
Usually in the Value field you will use text or numeric constants (‘red’, 500) but you can also use custom fields and more complex expressions together with mathematical operators. This table summarizes what can be used in the Value field:
Table 4: Value section of the Condition Output dialog
| Value | Description | Example |
|---|---|---|
| Empty value | Leave this field empty if you want to test your field for an empty value | ‘ ‘ |
| Text String | Any constant text string | woman, ‘black and white’ |
| Other field | Fields defined with the Types plugin | $(wpcf-employee-age) |
| Numeric constant | Any numeric constants, including Integer and floating-point numbers | 100, 3.14 |
| Expressions | You can use fields, constants and math operators to define complex expressions | $(wpcf-employee-age) – ($(wpcf-work-experience)) |
| Views functions | Date filters | TODAY(), MONTHS_FROM_NOW(3) |
Connecting conditions
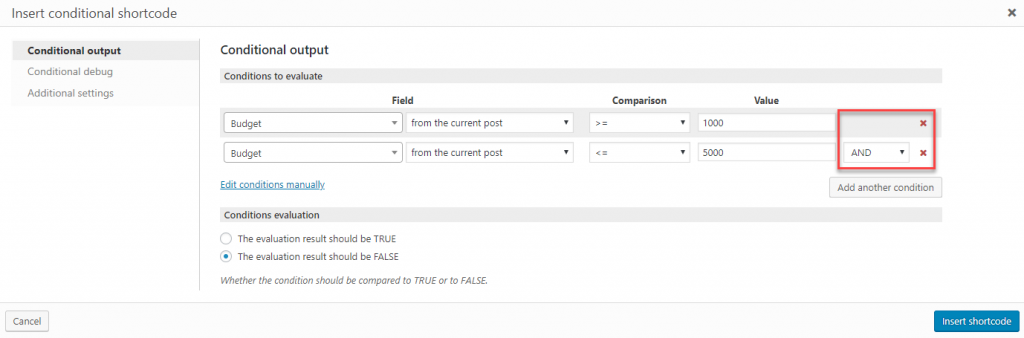
The Connecting conditions section of the dialog allows you to evaluate more than one condition in one if-statement. With the relationship operator (AND, OR) you can combine two or more conditions:
- the budget is greater than 1000 and the budget is less than 5000
- the work-experience is greater than 20 or the age is greater than 40
To use more than one condition in your if-statement use the “Add another condition” button. By default the conditions are AND statements.
You can use different options in the left side dropdown of the data origin for each condition, for example Types field together with Views shortcodes:
- the post excerpt (Views shortcode) is not empty and the gender (Types field) equals female
Setting up conditions manually
You can also set up or update your conditions manually using the wpv-conditional shortcode.
Typical cases when you will manually update your condition:
- to add some attributes to shortcodes or custom functions used in your condition
- to quickly add the debug attribute (to enable the debugging mode for your condition)
- to test some special cases that are not supported by the user interface, such as checking for a featured image or to test if a post has a parent
- to evaluate more complex expressions.
Syntax
The basic syntax for wpv-conditional shortcode is the following:
[wpv-conditional if="(expression)"]
	What will be done if the expression is true
[/wpv-conditional]
If the expression is true, then the meta HTML between the [wpv-conditional][/wpv-conditional] shortcodes will be executed.
The shortcode takes the following attributes:
- if (required): it is the evaluation string and holds the actual condition to evaluate
Inside the evaluation expression, you can use any of the following:
- Types fields
- Custom fields
- Views shortcodes
- Custom shortcodes that had been already registered in Toolset -> Settings -> Front-end Content
- Views Date filters
- Custom functions functions that had been already registered in Toolset -> Settings -> Front-end Content
- WordPress native functions that had been already registered in Toolset -> Settings -> Front-end Content
- Integer and floating-point numbers
- Strings wrapped inside single quotes
- Math operators: +, -, *, /
- Comparison operators: < or lt, > or gt, = or eq, <= or lte, >= or gte, != or ne
- Boolean operators: AND, OR, NOT
[wpv-conditional if="( $(wpcf-budget) lt '50' )" ] Your output [/wpv-conditional]
[wpv-conditional if="( '[wpv-post-excerpt]' ne '' ) AND ( $(wpcf-consultant-gender) eq 'female' )"]
Your output [/wpv-conditional]
More examples in the Example pages.
- debug (optional): it can be set to true or false and controls whether to display debug information for administrators. The default value is false
[wpv-conditional if="( $(wpcf-budget) eq '50' )" debug="true"] Your output [/wpv-conditional]
- evaluate (optional): it can be set to true or false and controls whether we want the condition to be met or not. The default value is true.
[wpv-conditional if="( $(wpcf-budget) eq '50' )" evaluate="false"] Your output [/wpv-conditional]
Debugging conditional output in Views
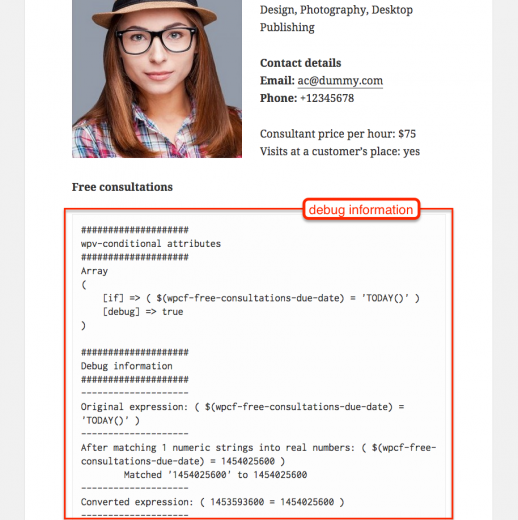
Debug output lets you quickly find why conditional logic isn’t doing what you expect it to do. When you enable debug output, site administrators (and only them) will see full details of the fields involved in the conditional logic and the way they are evaluated.
To enable debug mode, add the debug=”true” attribute to the wpv-conditional shortcode. For example:
[wpv-conditional if="( $(wpcf-budget) eq '500' )" debug="true"][/wpv-conditional]
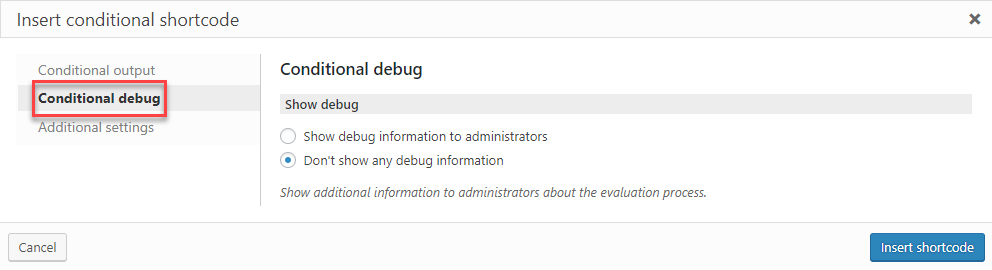
You can also enable debug mode when you create the conditional expression. To do this, click on the Conditional debug tab in the dialog for inserting conditional output:
Visit the “Using debug mode – example” subpage to see a detailed example.