In this lesson, you will learn how to design templates for custom post types and for the built-in types in WordPress. You'll see how to display fields in templates, how to create beautiful responsive designs and more.
What’s a Template?
A template is something that you design once and it controls the way a “group of posts” appear on the site’s front-end. Toolset’s templates work similarly to the WordPress PHP templates, but you design them visually through the editor without having to edit any files or write any code. The templates that you design with Toolset can include fields, taxonomy, related posts and anything else coming from the WordPress database.
How to Design Templates
To build a template, you insert fields, arrange them in any custom layout of your choice, and design how to display them on the front-end.
- Go to Toolset → Dashboard and click the Create Content Template button in the row of the post type you want to design a template for.
- Use the WordPress Block Editor to design your template.
- Choose blocks from the Toolset section for any part of the template that displays fields (not static elements). For example, use Toolset’s Heading block for any heading that will display a field.
- Enable Dynamic Sources for blocks that should display fields of the post that the template displays.
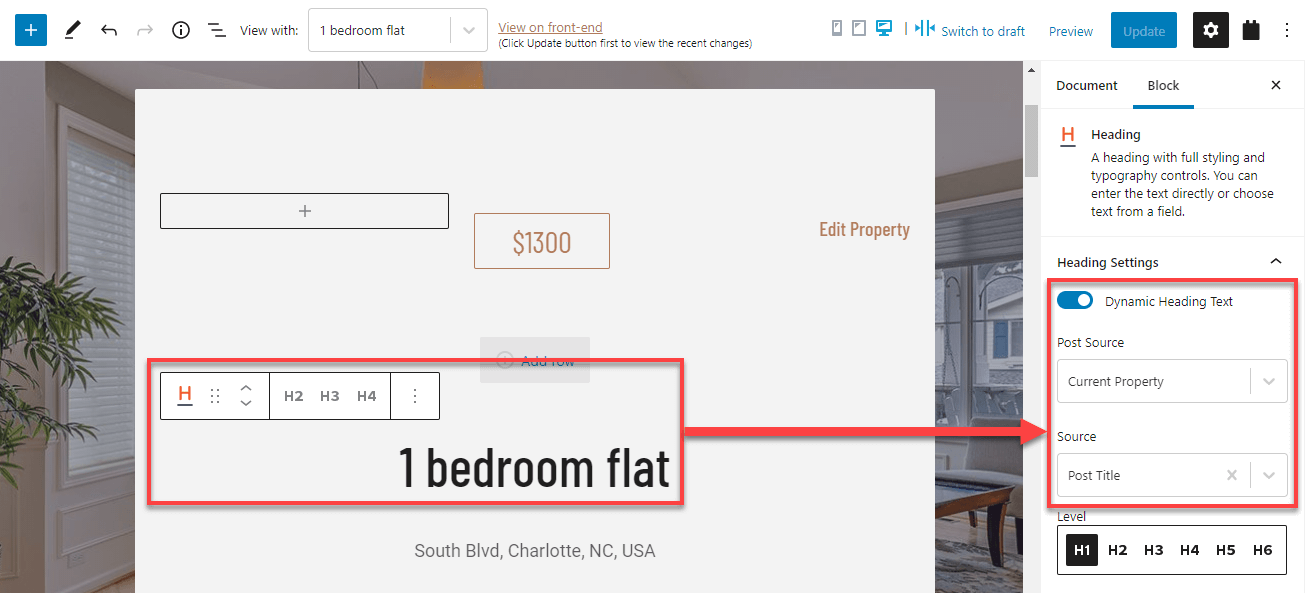
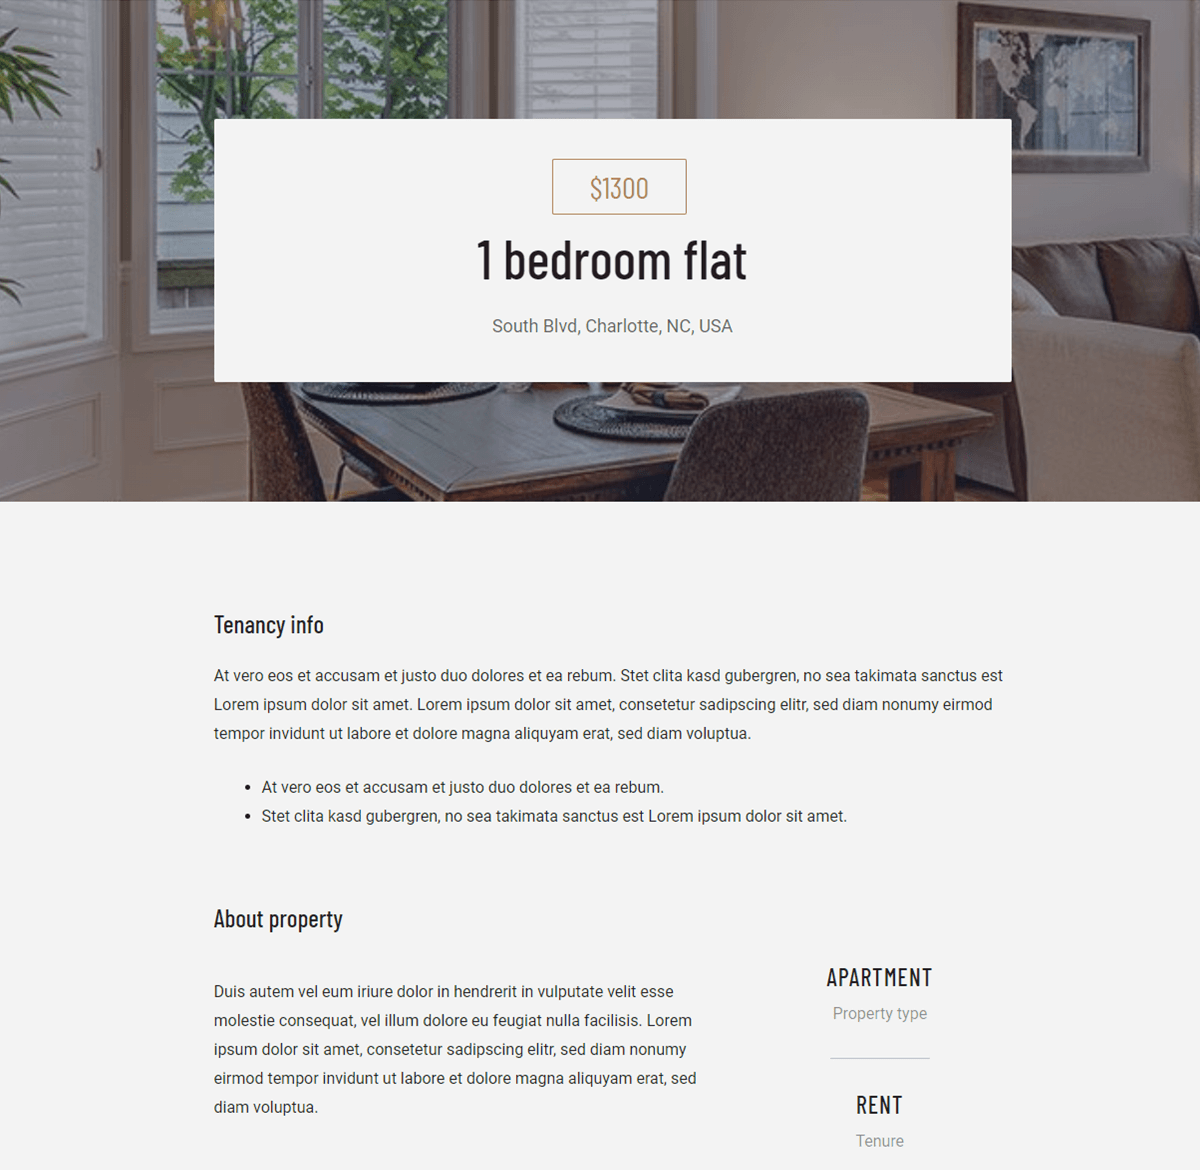
Here’s an example of displaying the post title in a template for single “property” posts on a Real Estate site.
That’s it, now you can further tweak your template. For example, you can arrange content in columns, use containers, display parts of the template conditionally, display a list of related posts, create responsive designs, and more.
Display dynamic sources using WordPress core and popular block plugins

Toolset comes with a big collection of blocks to display dynamic sources (custom fields, WordPress fields, and taxonomies). However, you can also display Dynamic Sources using WordPress core blocks and popular block plugins.
Use the following steps to display a Dynamic Source in any supported block:
- Insert or select a block.
- In the right sidebar, expand the Dynamic Sources section.
- Toggle on the option for any of the supported fields in that block.
- Use the dropdowns that appear to select the dynamic source you want this block to display for that field.
Display Dynamic Sources inside all text blocks

Toolset allows you to display Dynamic Sources, like custom fields, inside any text blocks like headings, buttons, and more. This includes WordPress core blocks, Toolset blocks, and popular block plugins.
To display any Dynamic Source inline, insert or select a block with a text input and look for the Inline Fields button. Dropdown menus will appear, allowing you to select a Dynamic Source.
For more information, check out the lesson about displaying Inline Fields.
Add columns to templates
You can easily arrange your template’s content into columns.
Insert the Toolset Grid block and select the column layout you want to use. Then, add blocks to the places inside your columns. If you need to resize the columns, hover your cursor between columns and adjust the width by drag-and-dropping.
Visit the dedicated lesson to learn all about creating responsive columns and grids
Style templates using containers
Putting multiple blocks inside container blocks allows you to add a background to a section, apply custom styling, spacing, and more.
Insert the Toolset Container block and then add any number of blocks inside it. With the Container block selected, use the options in the right sidebar to change the background, typography, content width, and more.

Learn more about this topic in the lesson about advanced styling with container blocks.
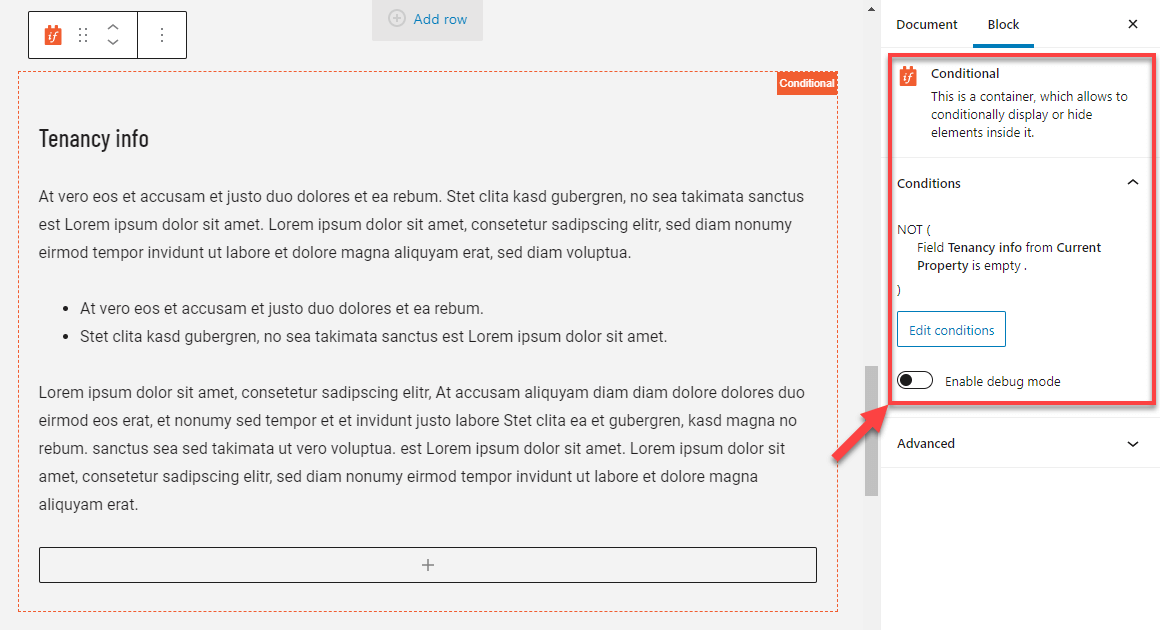
Conditional display for parts of the template
Sometimes, you want to display information only when certain condition is met. For this, you need to insert the Toolset Conditional block. It acts as a container block but the blocks that you put inside it will only display if the condition is met. You can create conditions based on post data like custom fields and taxonomies, current user role, and more.
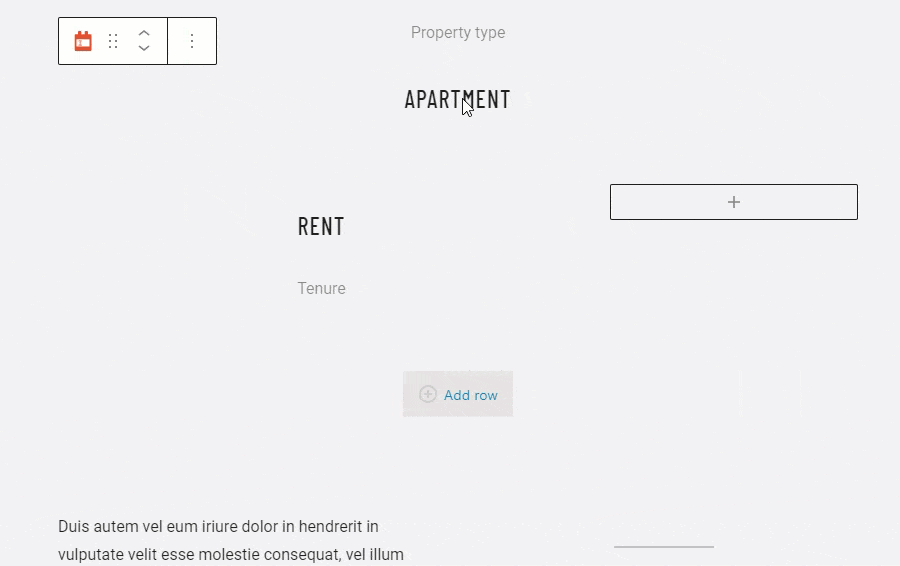
Let’s consider a real estate site that offers properties you can buy or rent. In it, we have a custom field call “Tenancy information” and naturally, it’s only meant for properties you can rent. This means that our template for displaying single properties should only display the “Tenancy info” heading and this custom field if that field has any value.
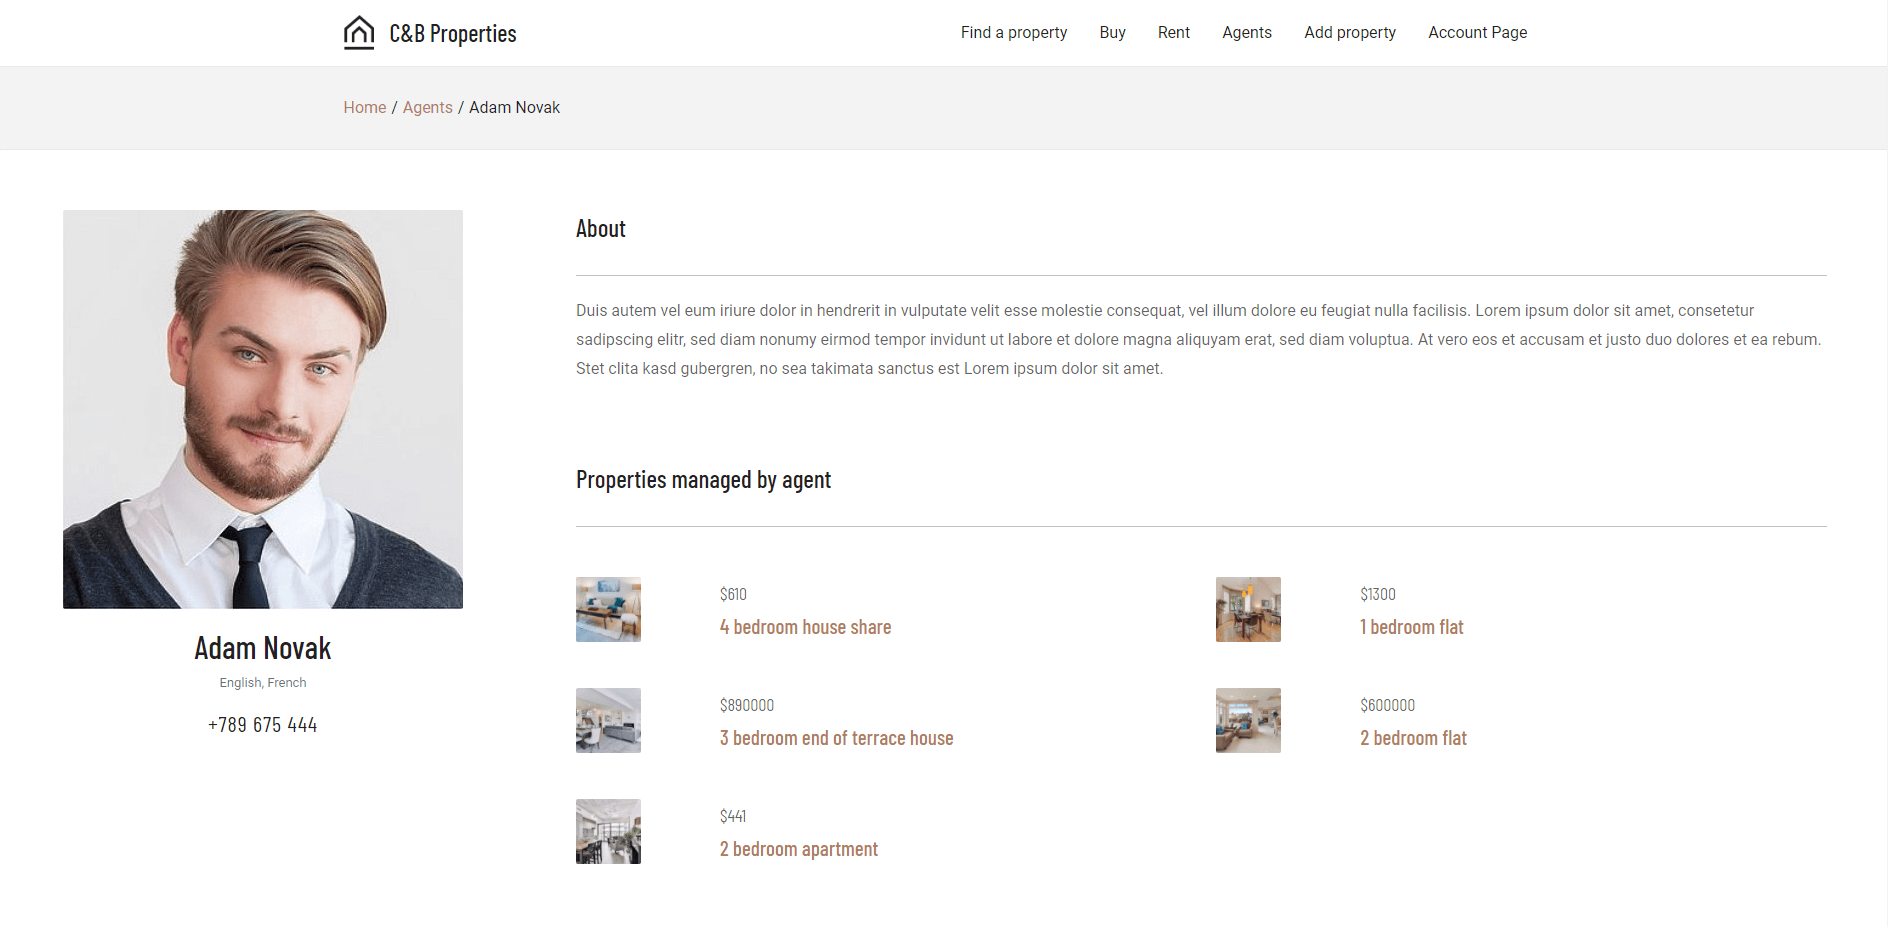
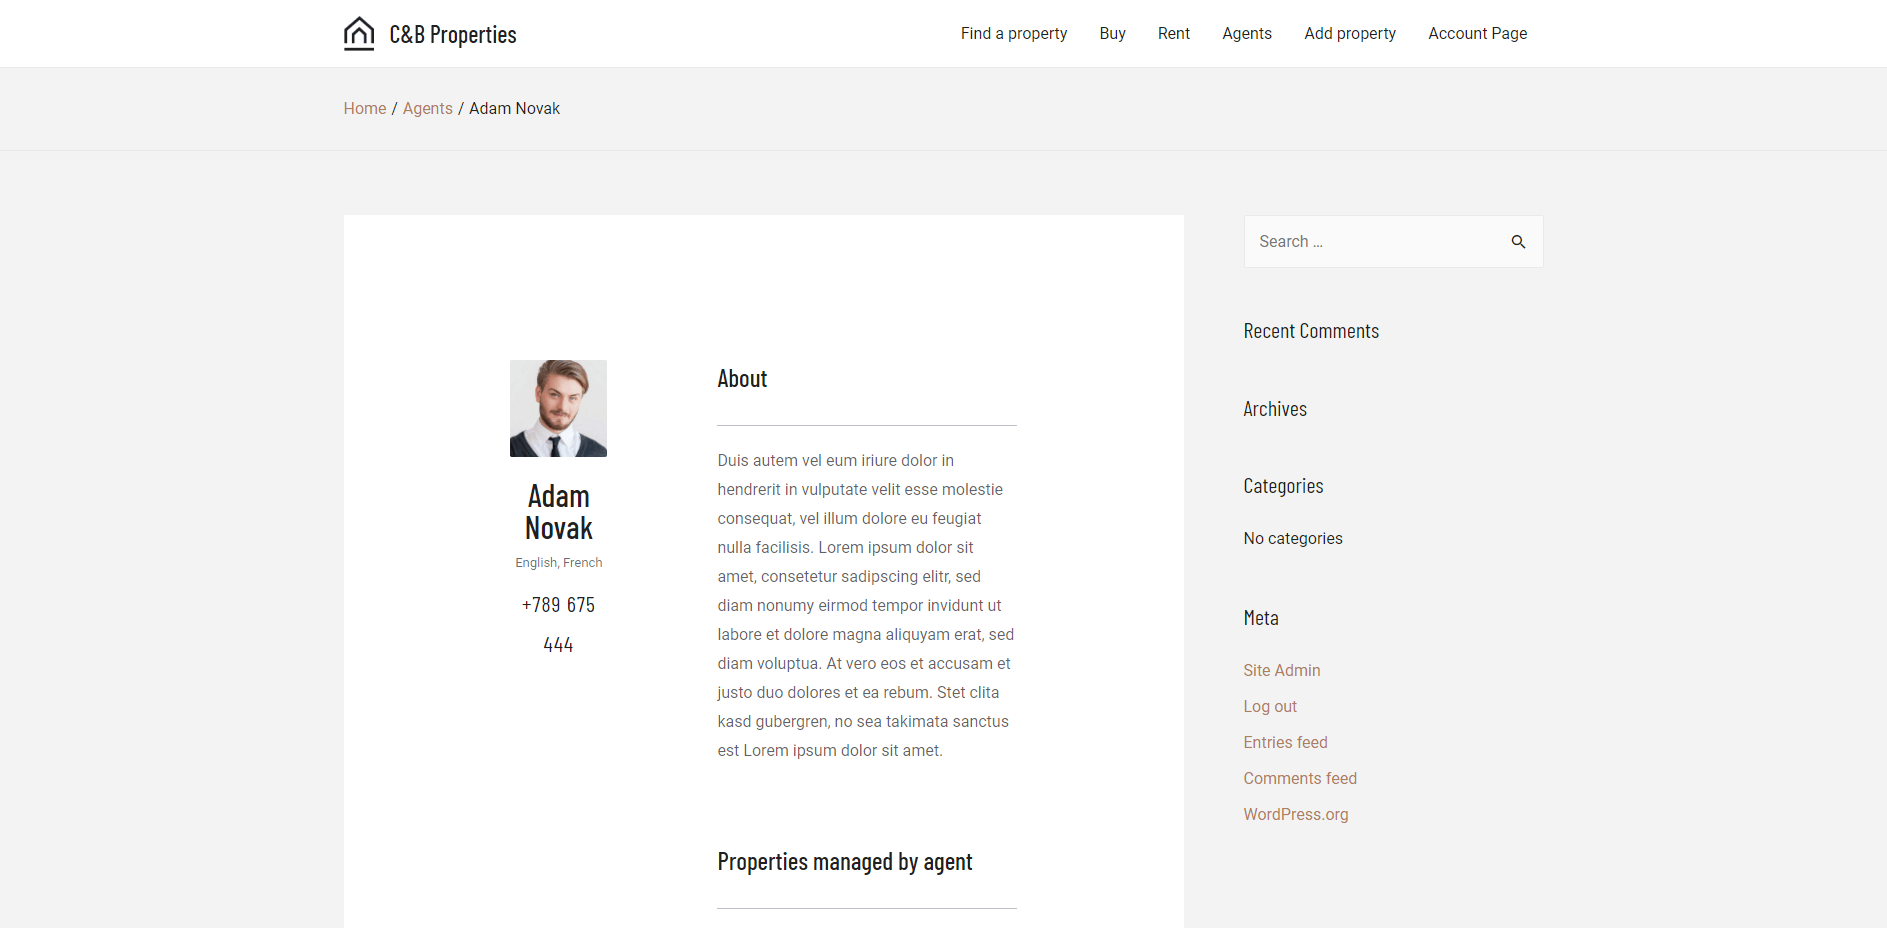
The following two images show two properties, one for sale (no tenancy info) and one for rent (with tenancy info).
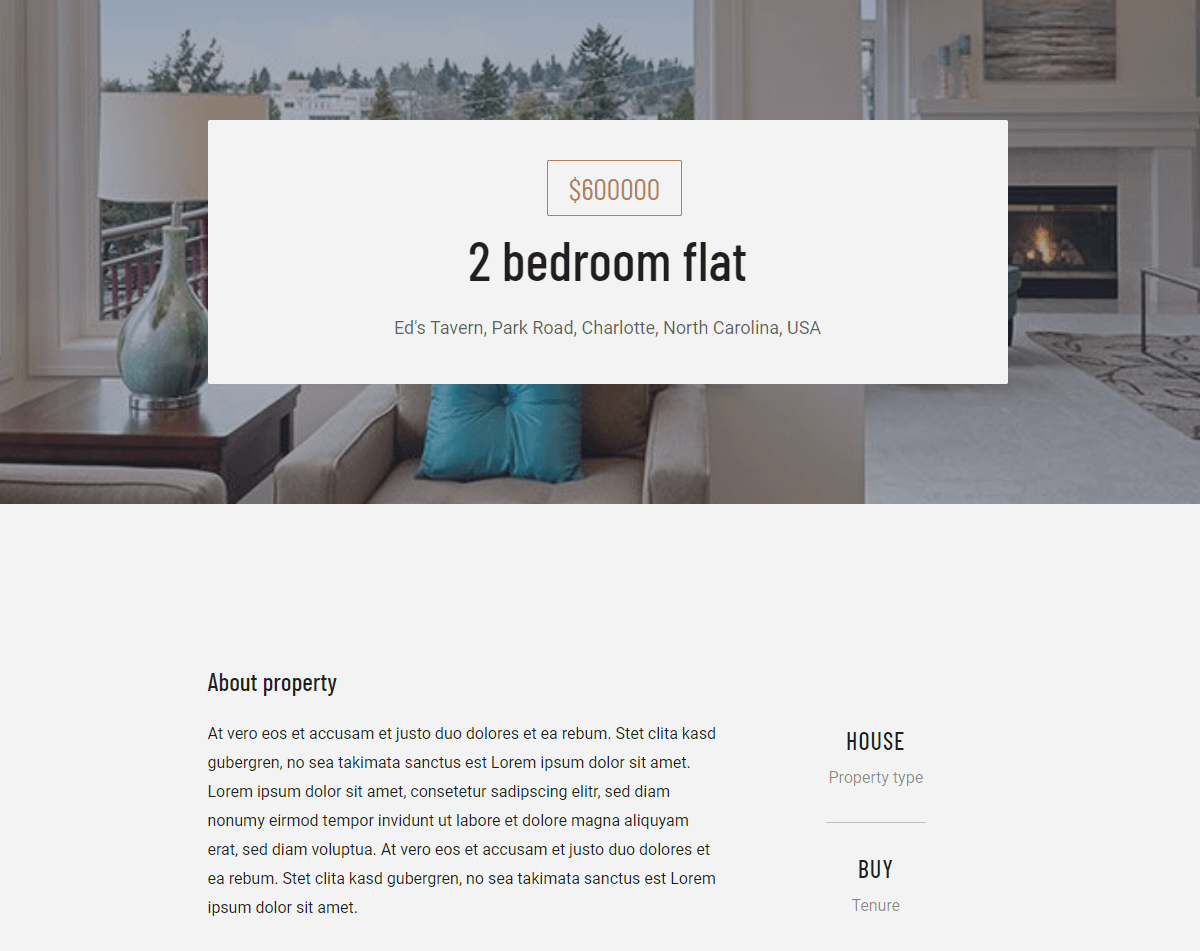
To achieve this, we use the Toolset Conditional block and set up the condition that checks if our custom field is empty or not.
Read more about this in the lesson about displaying content conditionally.
Change the layout of a template
Theme defines the basic layout of single-post pages on the site. This includes options like the width of the page, displaying of sidebar and the page title, and more.
Here’s an example of using two different layouts for the same page.
Using one of the themes integrated with Toolset allows you to control the layout of the single-post template. You can set different layout options for different templates.
If your theme is integrated with Toolset use the following steps to change the layout options:
- In the right sidebar, click the Document tab.
- Expand the Toolset settings for… section (the last part will be the name of your theme).
- Tweak theme options as needed.
Please note that different themes provide different options.
If your theme is not integrated with Toolset, you might try changing the layout options from the Appearance → Customize page, or from the theme’s own settings page.
Display repeatable field groups and related posts in the template
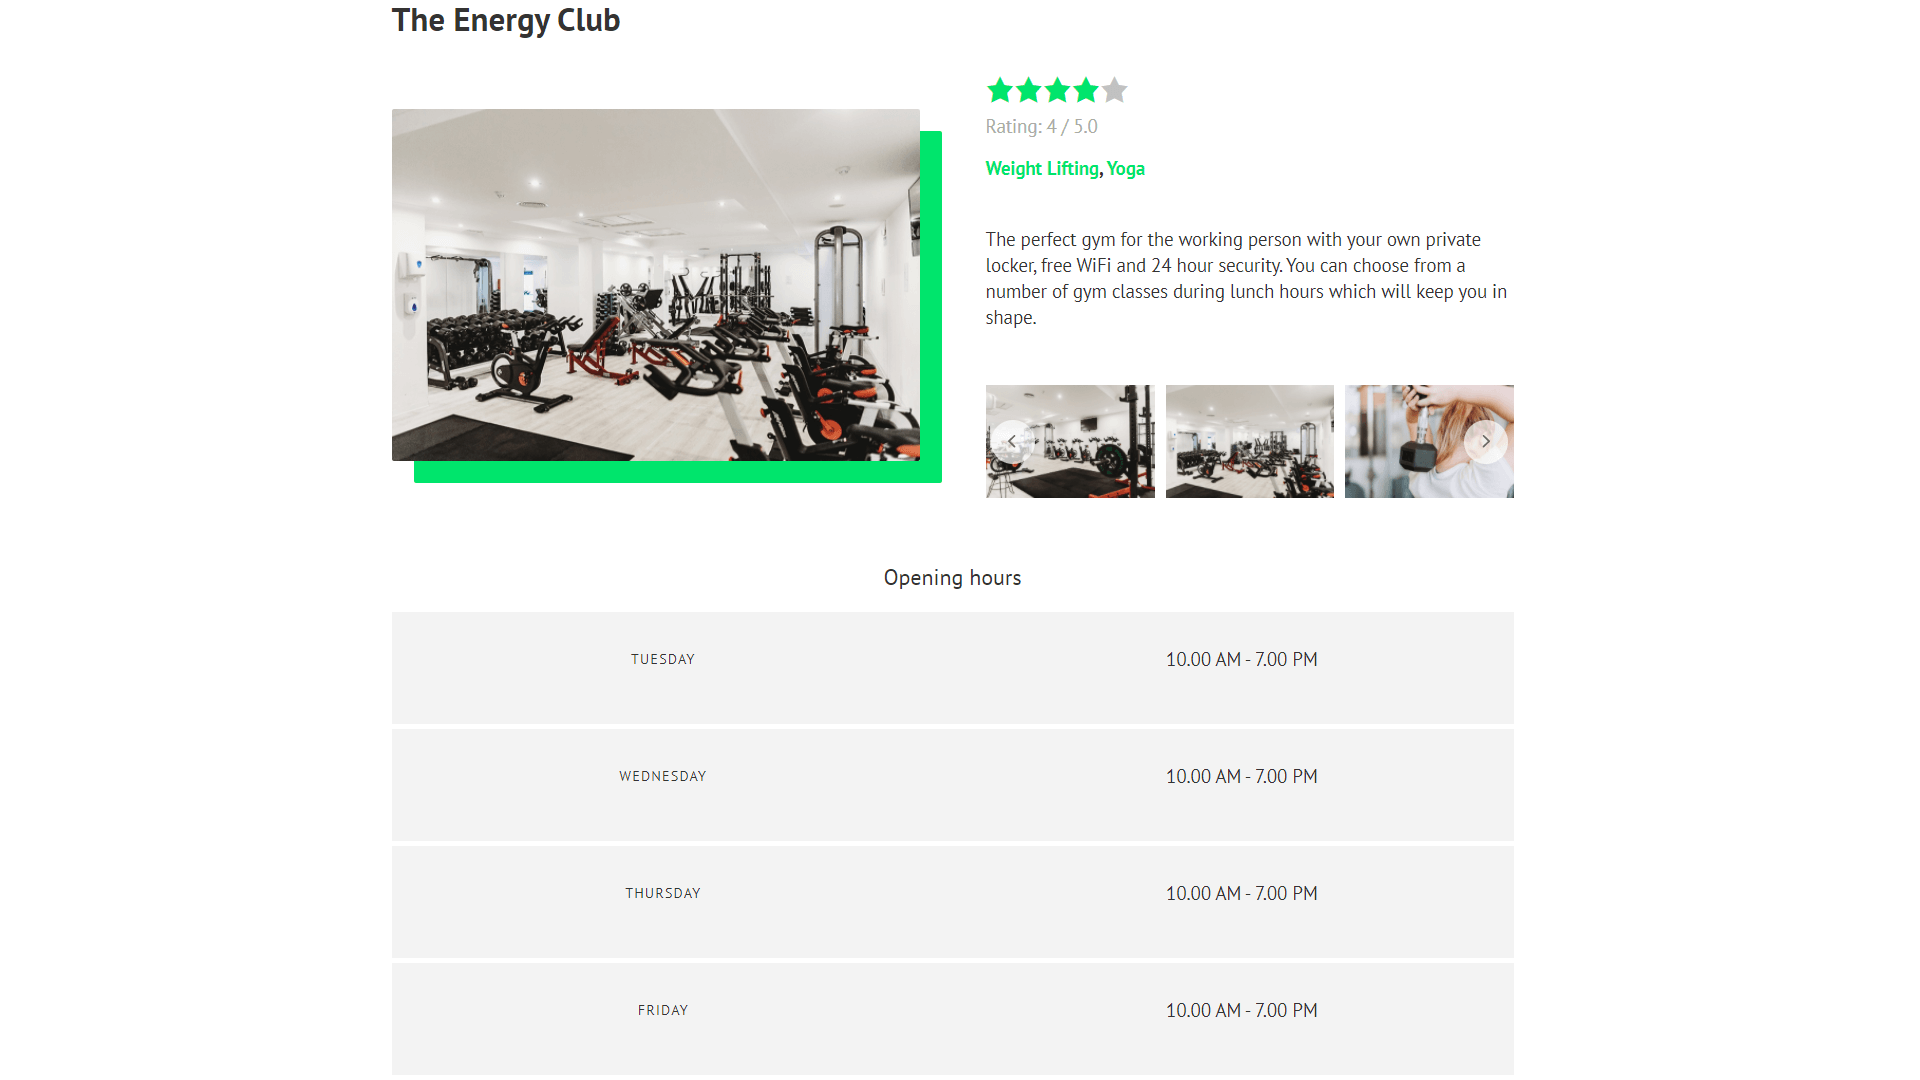
Your single-post pages might feature a repeatable group of custom fields. For example, shops, gyms, or offices might use it to display their working hours. In this case, you have two fields that repeat: day of the week and working hours for that day. When you edit a post, you can repeat these two fields any times you need, for each working day of the week.
Here’s how such repeatable field group might look on the front-end, showing a working hours for a gym.
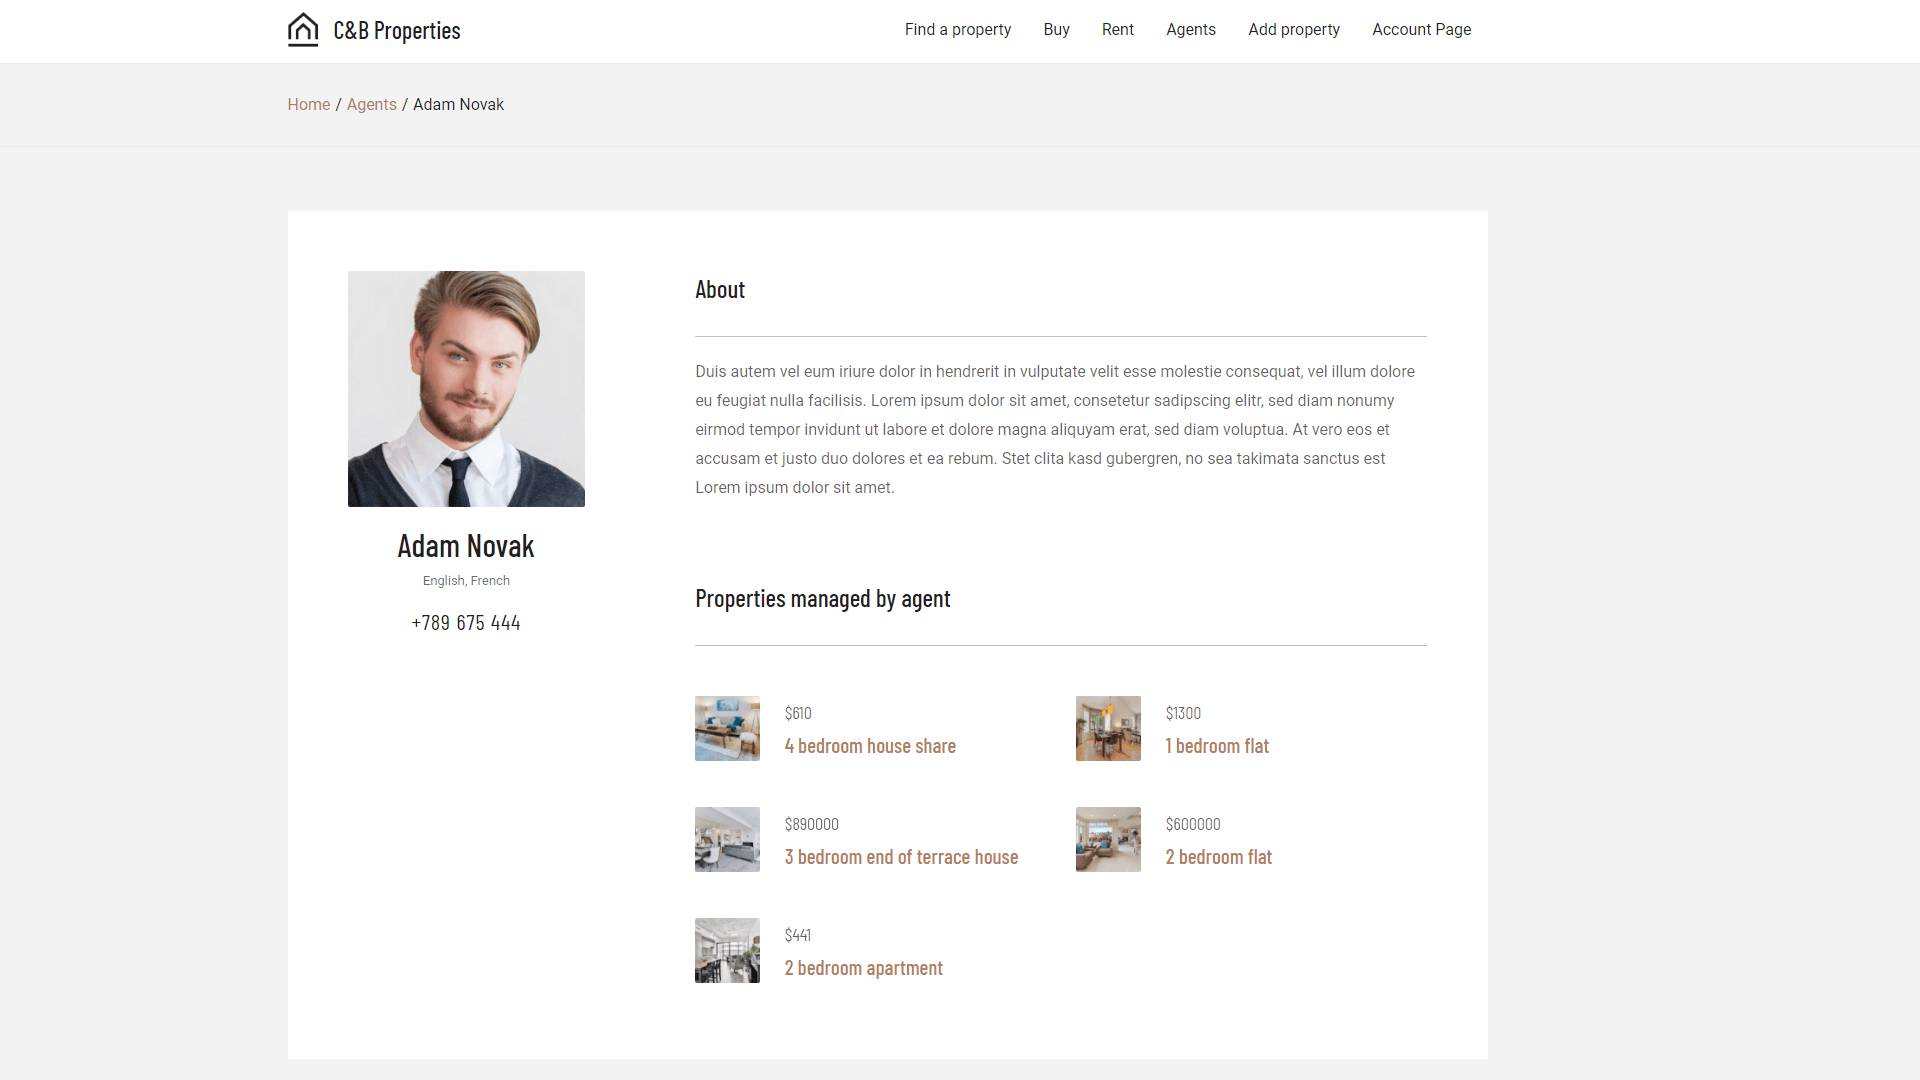
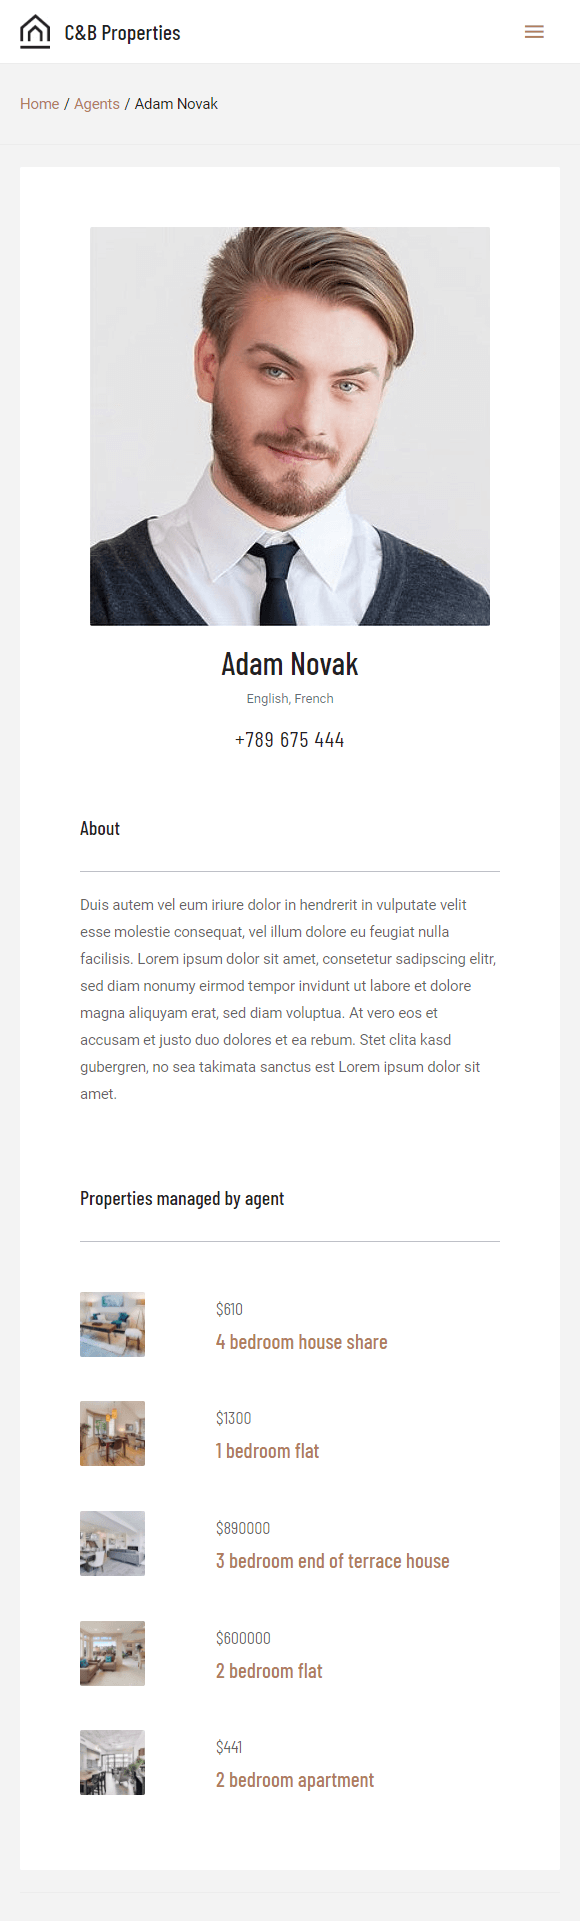
Similarly, your single-post pages might be connected to some other types of posts. For example, a real estate agent might be connected to a number of properties they are selling.
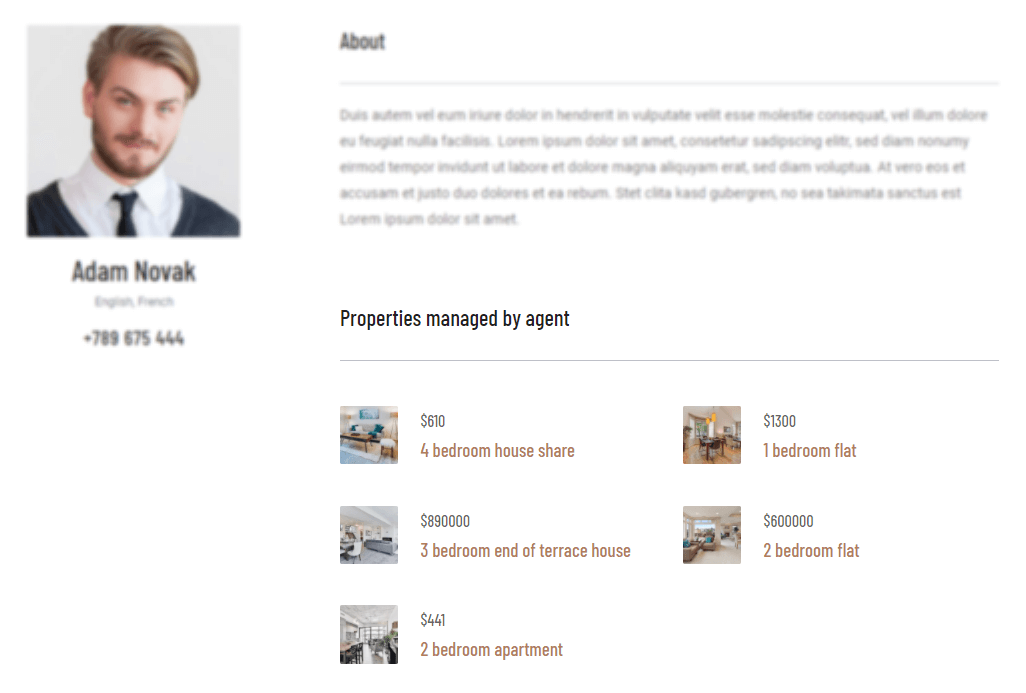
In both these cases you need to display a list of items. To do this, you need to insert the Toolset View block and create a View. In its wizard, all you need to do is select the repeatable field group or the related post type whose items you want to display.

For detailed instructions, check out the lesson about creating and displaying repeatable field groups or the one about displaying related posts.
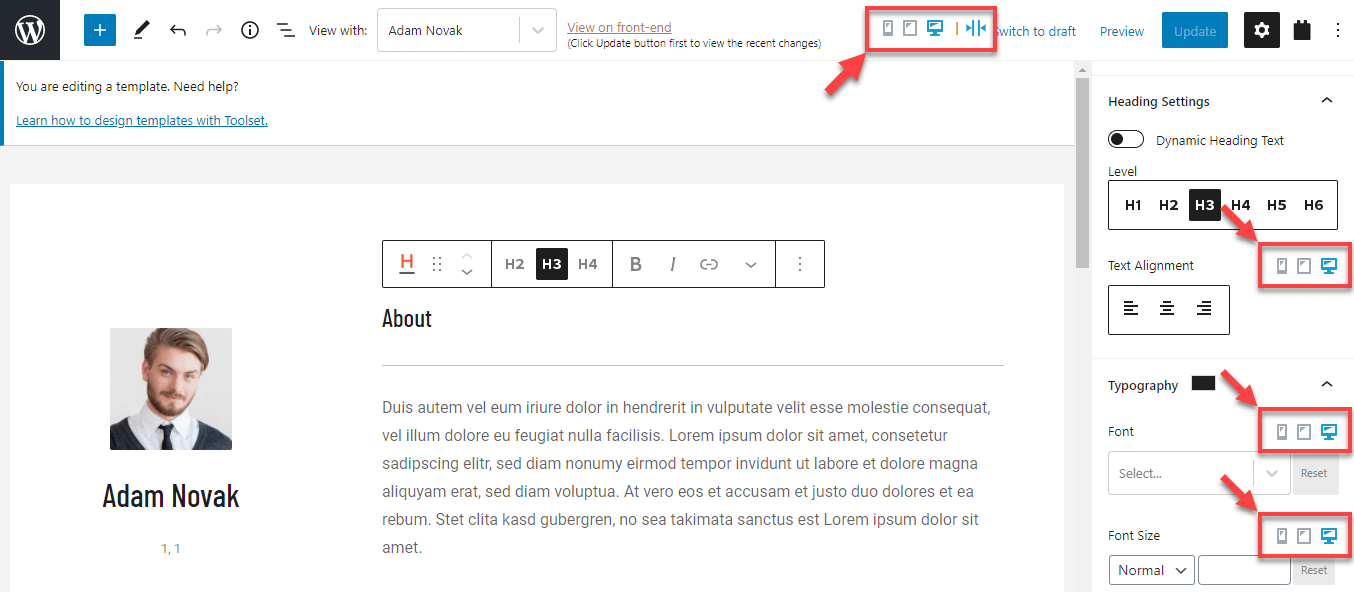
Design responsive templates for PCs, tablets and phones
Toolset provides controls to tweak your designs for different device sizes.
Here’s an example of the same template displayed on a desktop computer and a mobile phone.
In the Block Editor, you can switch the backend preview to a desktop, tablet, or a phone size.
You can find the controls for this at the top of the Block Editor when editing any template or a page. You can also find these controls for many individual designing options in the right sidebar, like typography and styling.
Check out the lesson about creating responsive designs with many useful tips.
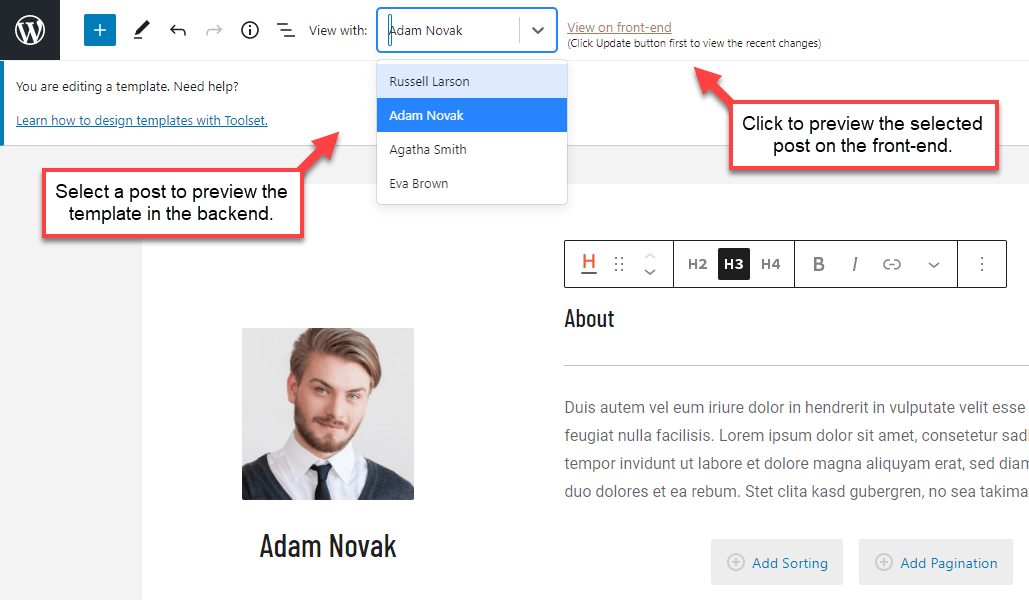
Preview templates on the front-end
When editing a template, Toolset allows you to easily preview it on the front-end. You can also select which post to preview in the backend editor.
For both, simply use the View with and View on the front-end controls at the top of the template editor.
Styling your single-post templates
Creating a template with Toolset is very easy. It’s also not hard to style it to look professional, but you need to follow certain rules and guidelines.
To learn all about this, read the lesson about styling single-post templates.
Main Toolset Block Used in this Lesson

Create custom lists of posts
Related topics
- Styling Single-post Templates
- Assigning Templates to Posts Conditionally
- Adding Custom JavaScript to Views, Templates and Archives
- Display Dynamic Sources Inside all Text Blocks
- YouTube Videos with Advanced Options
- Displaying Form Data
- Creating templates to display members-only content
- Creating and Displaying Repeatable Field Groups
- Displaying a Map on A Single Post Template
- Creating Responsive Columns and Grids
- Display Content Conditionally
Need help?
If you bought Toolset, log-in to your account and post your questions in Toolset technical support.
Not a client yet? Find the account that’s best for you.