You need to place both View and Map blocks on the same page. It is only important that the View has access to the address custom field.
A View will query the database for the posts you select. As it goes through posts, it will output an address for each of them and place a marker on the map.
You can use a View as a source for the map markers even if that View has no visual output. However, if you do display the results, you will see some additional features. For example, if your View uses pagination, as you go through pages, the markers on your map will update.
To add a map that uses a View as the source for the markers you have to:
Add a View block to your page. This View must list posts that feature an Address custom field.
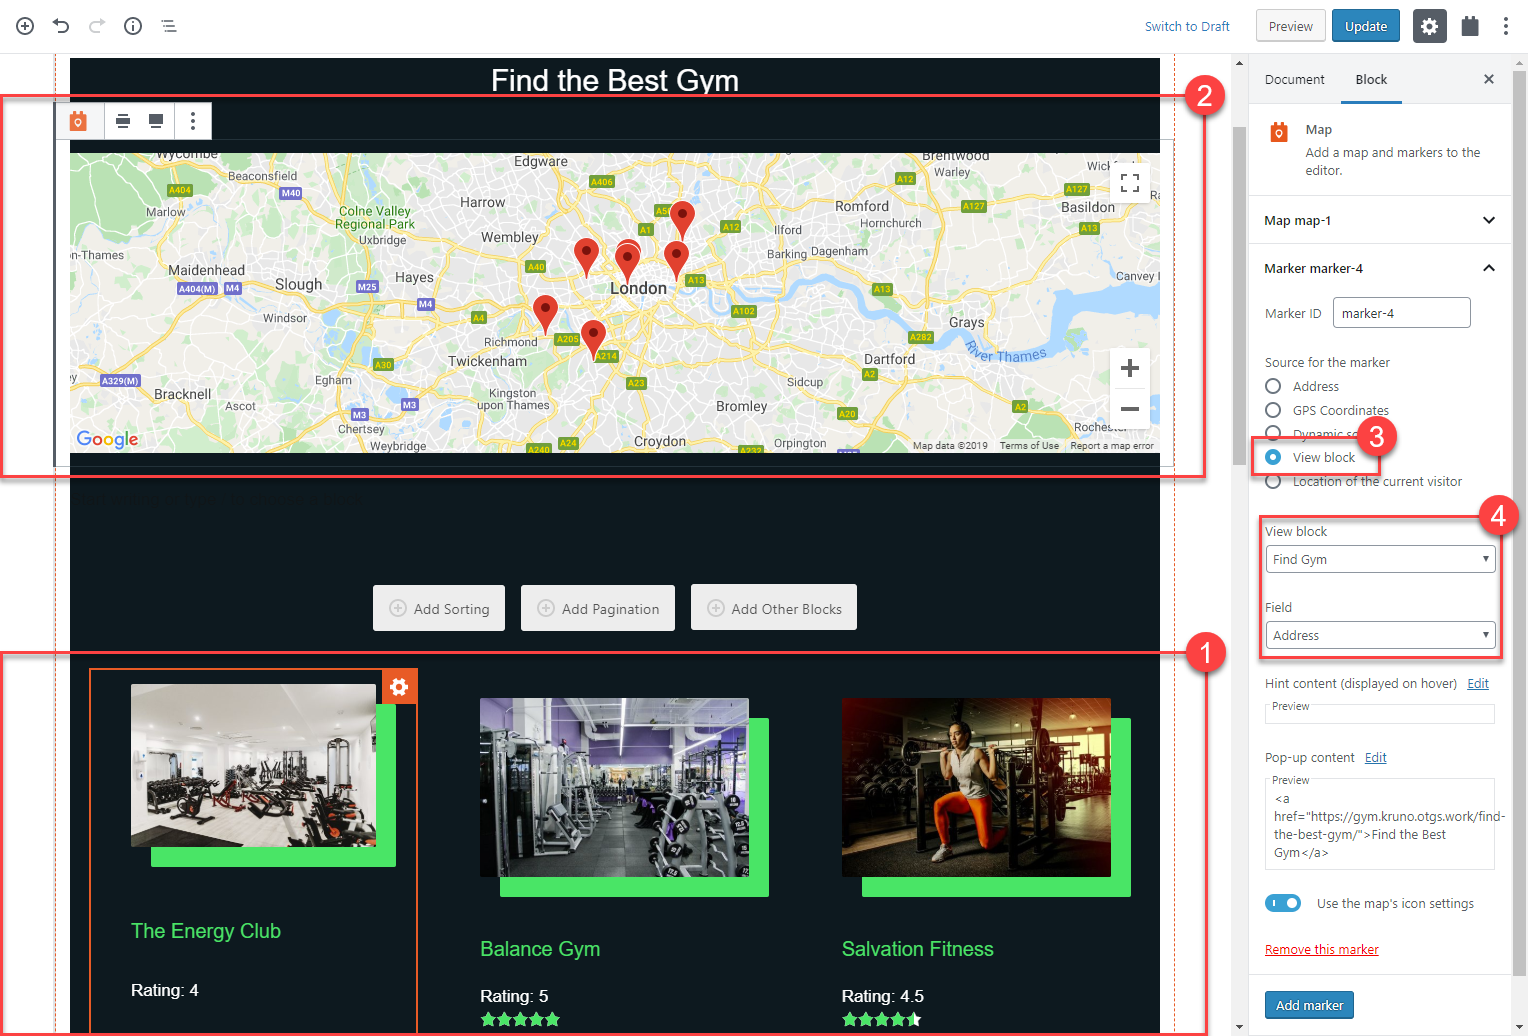
Insert a Map block.
As the source of the markers choose the View block.
In the View block dropdown choose the name of the block you have inserted and in the Field dropdown select the custom field that contains the address.
Settings for the map that uses a View as the source for the markers
That’s it. Now, you can further customize the map by adding marker pop-up and hover content, or display a map side-by-side with a custom search.
You can easily customize the text that appears when someone hovers or clicks on the map markers.
Click to select your Toolset Map block.
In the right sidebar, scroll to the options for your marker.
Click the Edit link next to the Pop-up content section to select what to display when any marker is clicked.
Click the Edit link next to the Hint content section to select what to display when any marker is hovered.
In both cases, a pop-up dialog with a very simple HTML editor opens. You can enter text or click the Add Field button to insert dynamic content like standard post fields or custom fields. As you add dynamic content, the editor shows you a preview of that content, based on one of the marker data.
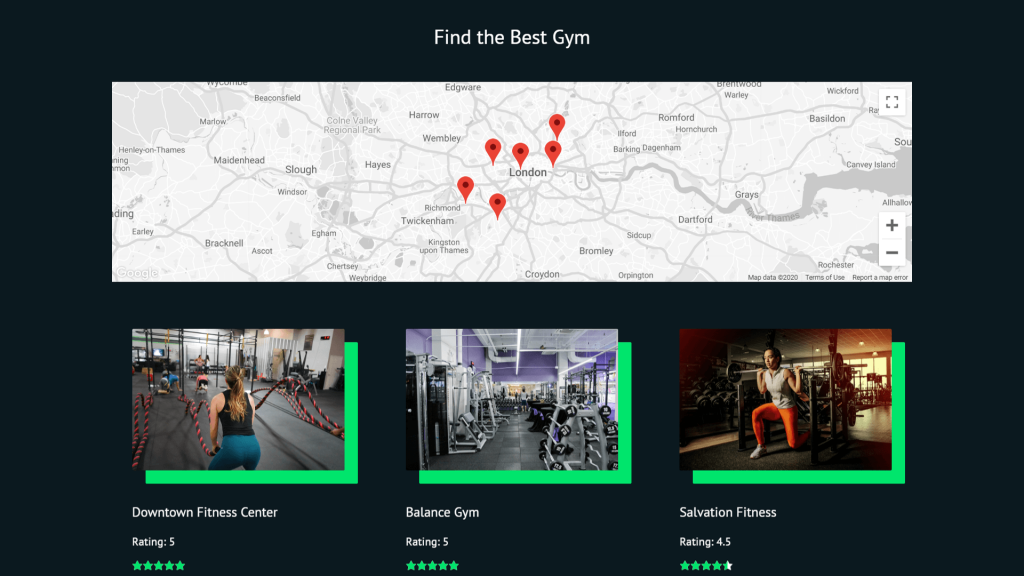
Display a map with a search and a list of posts side-by-side
Displaying a map side-by-side with your custom search and a list of posts is very popular on real estate and travel websites. It provides a great search experience and instant visual feedback to user’s actions.
Create or edit a page and follow these steps:
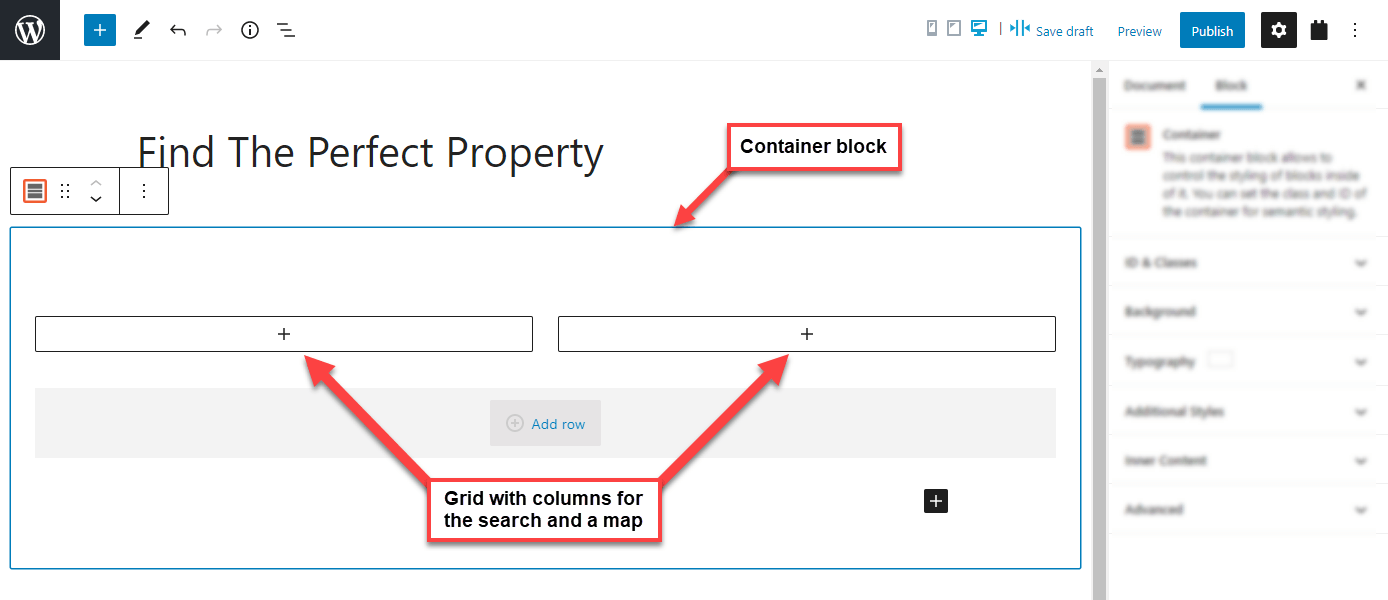
Insert a Toolset Container block. You will use this block to adjust the spacing and alignment of the whole content.
Insert a Toolset Grid block inside the Container. Select the two-column layout. Here’s how it should look like.
Creating a layout for displaying custom search and map side-by-side
Insert a Toolset View block into one Grid column and create a list of posts with a custom search. For detailed instructions, check out the lesson about creating custom searches.
Insert a Toolset Map block into the other Grid column. As explained in the main part of this lesson, make sure to select your View as the source for the map’s markers.
You now have a custom search with a list of posts on one side and the map displaying the posts on the other.
However, this content will probably need some adjustment. Most importantly, you will want it to stretch to the full-width of the page.
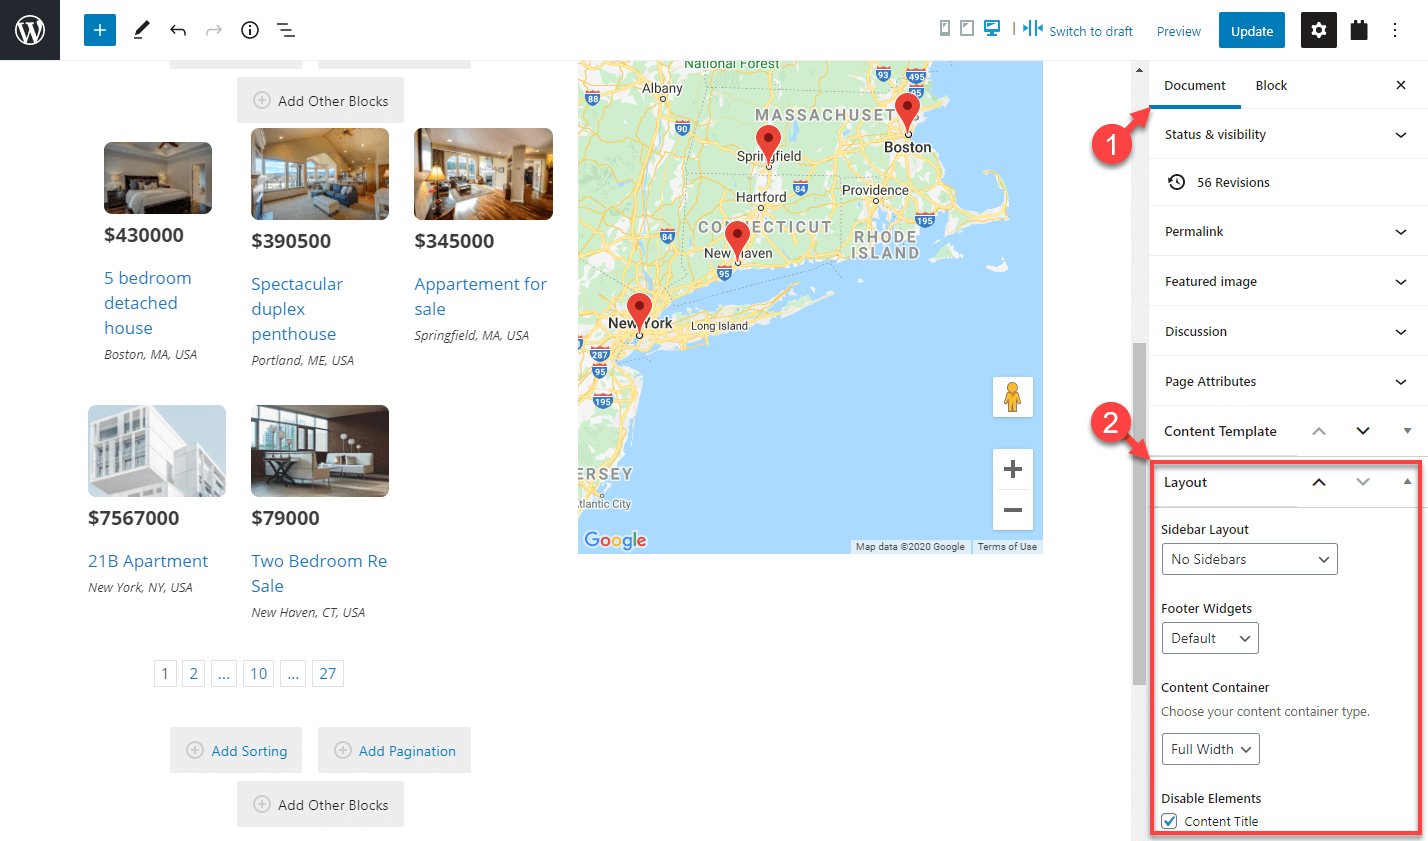
Some themes, like the Toolset-recommended ones, allow you to change the page width right from the Block Editor. They also offer you to use a layout with no sidebars. For recommended themes, you can find these options in the right sidebar, under the Document tab.
Making the page stretch to the full width
Once you make the page full-width and without a sidebar, you can adjust the main container:
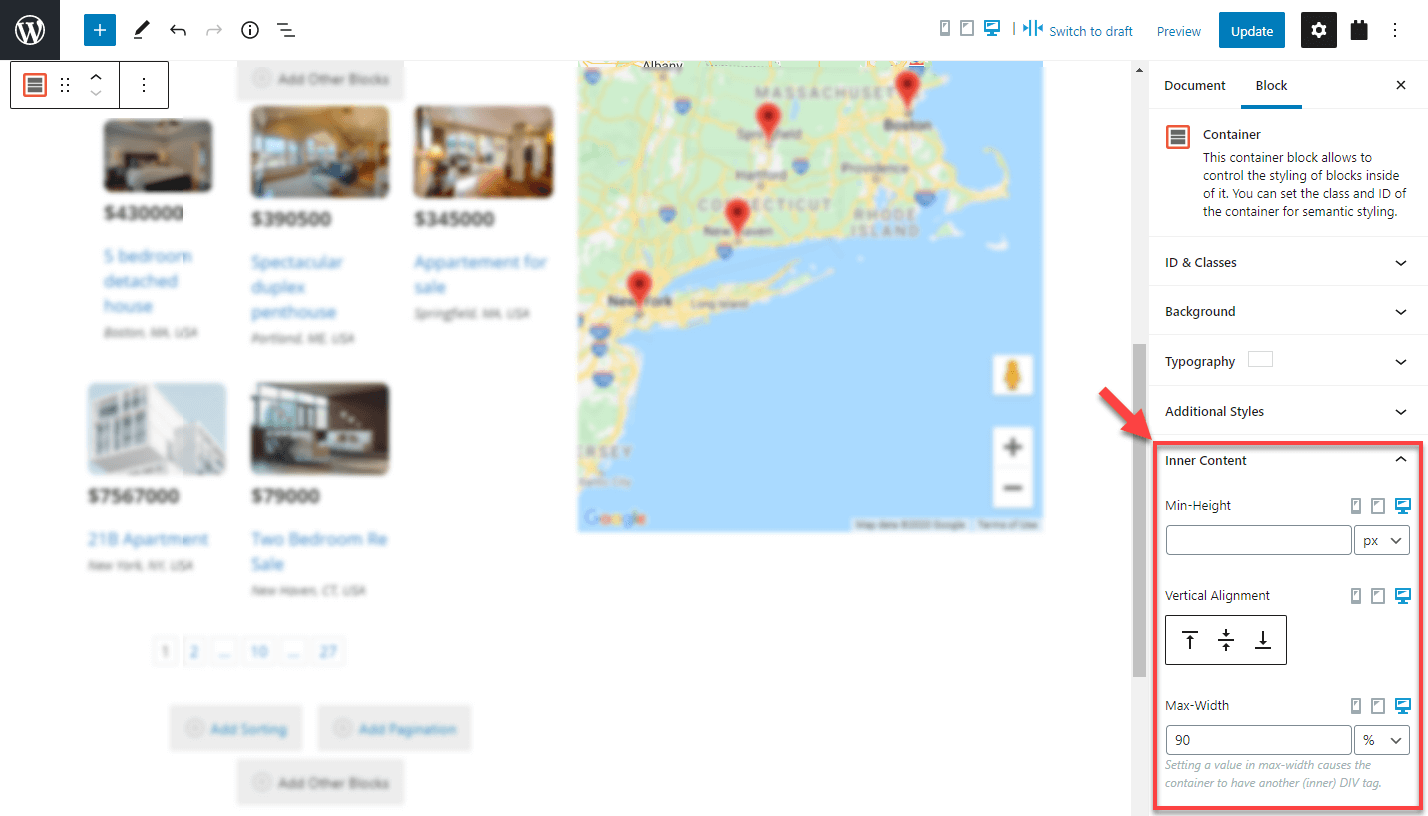
Click to select the Container block you created in the first step.
In the right sidebar, expand the Inner Content section. There, you can customize the Max-width option to your liking. This allows you to set how wide you want the content to appear in relation to the full width of the page.
Adjusting the width of the main container
Use custom map marker icons
Out-of-the-box, Toolset provides you with an array of map marker icons. You can also easily add your own custom ones.
Go to the Toolset → Settings page and click the Maps tab. There, look for the Map markers section and click the Add a new marker button.
We recommend using the following format:
Use transparent PNG or SVG format so the map is visible underneath the marker icon.
Use icons with dimensions of 32 x 32 pixels. This is the dimension we automatically resize the SVG markers to. We don’t scale other image format so if you use them, upload them in the exact size as you want them to appear on the map.