Toolset Access plugin lets you create custom roles for your site's members and give them the correct privileges.
Follow these steps
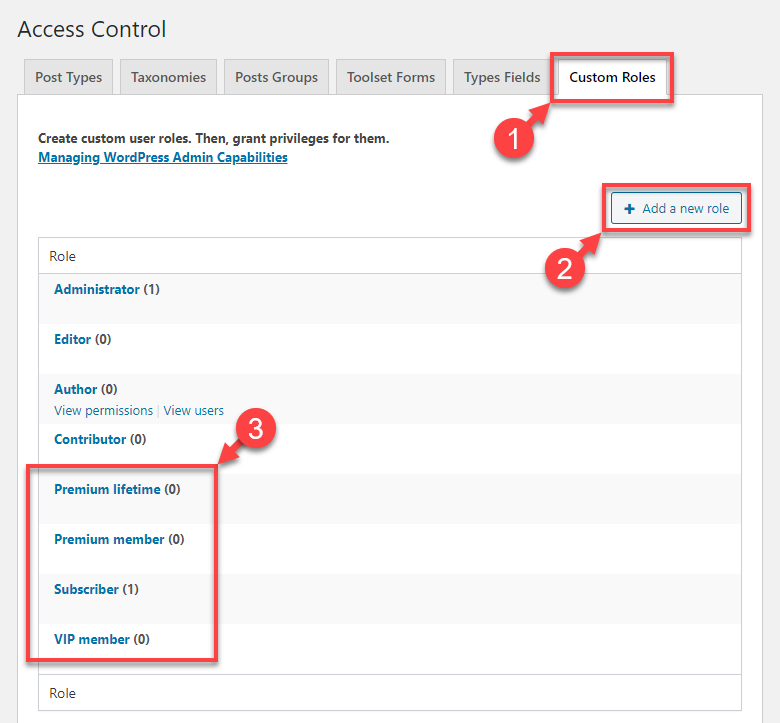
- Go to the Toolset → Access Control page and click the Custom Roles tab.
- Use the Add new role button to add the roles that you need. You can add as many custom roles as you like.
As a starting point, you can copy the default privileges from the Subscriber role. Of course, you can go ahead and set your own privileges for each role.
Toolset saves custom roles the same way as WordPress saves the built-in roles. This means that other plugins will see your custom roles.
Using multiple roles per user
Toolset allows users to have multiple roles. This includes roles that you create and assign as well the ones assigned by other plugins, like WooCommerce, automatically.
Use the following steps to assign multiple roles to a user yourself:
- In the admin, click Users in the main menu. In the list, click the user you want to edit.
- On the Edit User page, scroll to the Name section.
- Use the Role dropdown to select the main user role.
- Use the Additional roles option to select one or more roles.
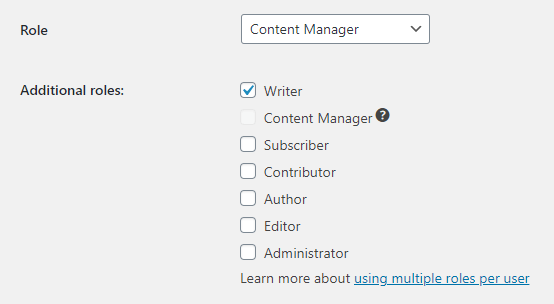
The Role dropdown defines the main user role. This means that when you check against the user’s role, this is the one that will be used first.
For example, if you set up a conditional that checks if current user has a particular permission, Toolset will check the main role first. If the main role doesn’t have the permission, Toolset will check the secondary, additional roles assigned to the user. If any of the roles have that permission, the check will result as true.
Related topics
- Allow users to manage their items
- Restricting access to pages
- Create users and assign them the roles you created
- Grant Privileges to Content Managers
- Creating a “My Account” Page
- Controlling Access to Front-End Forms
- How to Reset Access Settings
- Access Control for Fields
- Access Control for Standard and Custom Content Types
Need help?
If you bought Toolset, log-in to your account and post your questions in Toolset technical support.
Not a client yet? Find the account that’s best for you.