Pagination lets you split large amounts of content into pages with previous and next controls.
WordPress has built-in pagination for blog posts and comments. When you click on the older posts link, in almost any blog, you actually use pagination.
Views lets you add pagination to every list. With Views, you have control over how the pagination works and looks.
Enabling pagination for Views
A View loads content from the database and displays it. Without pagination, the View will load all the matching content and display it together. Pagination lets you break that content into pages and allow visitors to switch between them.
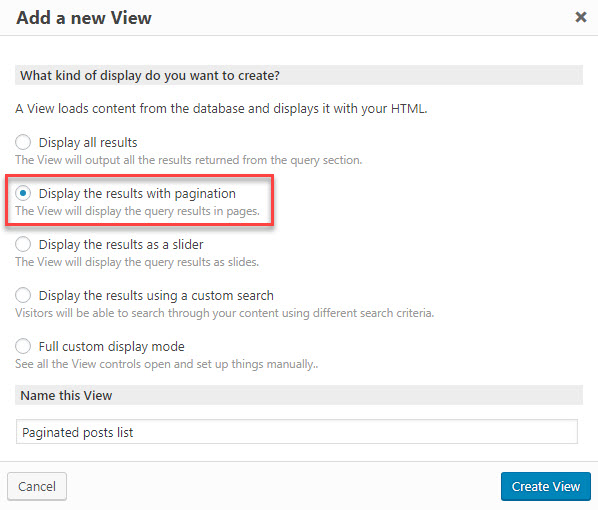
When you create a new View, you choose what it does. If you select Display the results with pagination, the pagination controls will appear in the Views setup.
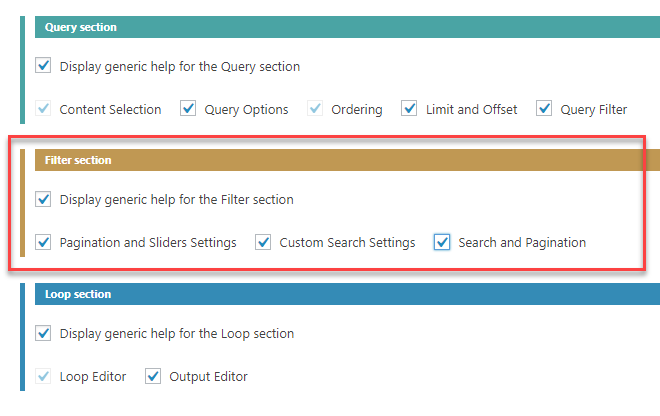
If you want to add pagination to an existing View, first make sure that the pagination section is visible. Click on the Screen options button and enable everything under Filter section.
| 1. Open Screen options | 2. Make sure that the Pagination and Sliders Settings section is enabled |
 |
 |
Now that we have the pagination controls in the View editor, we can actually enable the pagination and style the page transition controls. But before we show it, we need to explain how Views pagination actually works, so you know what’s happening and how to control it.
How Views pagination actually works
There are two parts to Views pagination mechanism:
- Paged content query – where the View loads the correct content from the database, with the right offset and limit.
- Page switching controls – the links to switch pages, which visitors see.
When you enable pagination, you enable the paged content query. Instead of always loading all the content, starting from the first item in the database and ending with the last, the View will load a page of content. Pages have an offset and a limit.
Once pagination is enabled, we need to allow visitors to switch between pages. For this, the View will ask you what “page transition” controls you want to display. It will add the controls that you have selected to the Search and Pagination section, which you can style with HTML and CSS.
Got it? Let’s see exactly how this works!
Pagination Options
Scroll down to the Pagination and Sliders Settings section. Views pagination enables you to create paginated lists and sliders. We explain how to build sliders in detail on the Sliders with Views page page.

In this section, you can choose the desired pagination options. This will determine how the View splits the content into pages.
If you select manual transition using AJAX update, there are some options for setting transition effects. One of them is Infinite Scrolling, which enables navigation without pagination controls. The items of the next page are automatically loaded when the visitor scrolls to the bottom of the current items.
Limitations of using AJAX pagination
There are two important limitations that you should be aware of when using any type of AJAX calls inside Views, Content Templates, and WordPress Archives:
- Toolset forms will not work when AJAX is used.
- Shortcodes from 3rd party plugins (for example, Visual Composer) will not work properly. This limitation includes AJAX calls for both pagination and custom search.
The alternative for both cases is very simple. If you want to use Toolset forms and shortcodes from 3rd party plugins inside your Views, please use “full page reload” pagination instead of the AJAX one.
Browser History Management in AJAX Pagination
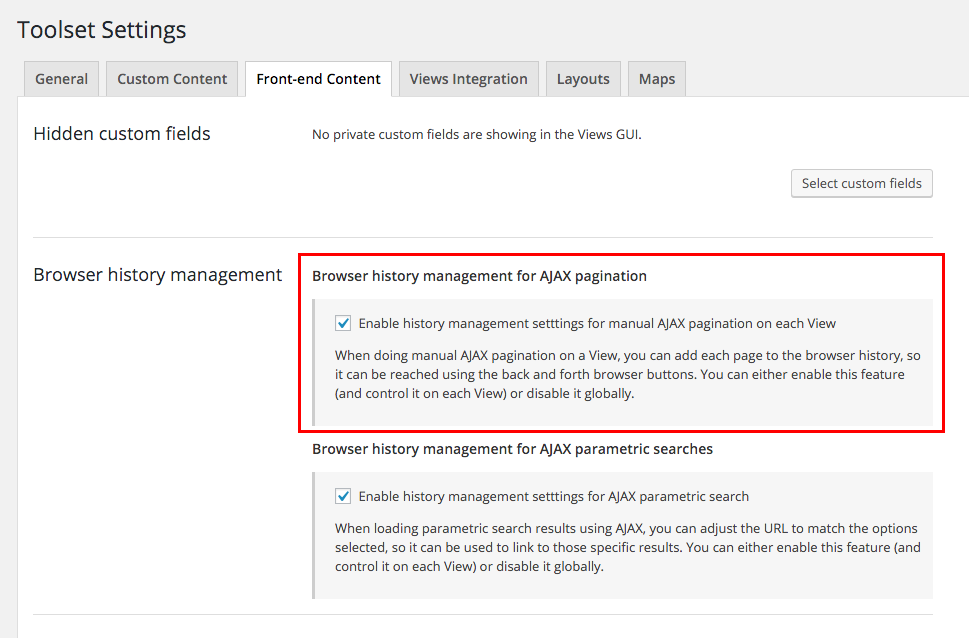
By default, AJAX pagination creates browser history entries, so you can navigate to pages with the browser back and forth buttons. This can be disabled globally on the Toolset -> Settings page, under the Front-end Content tab, or on each View in the advanced pagination settings.
| History management in View’s settings | History management global setting |
|---|---|
 |
 |
This feature allows users to get the unique URL to any Views page.
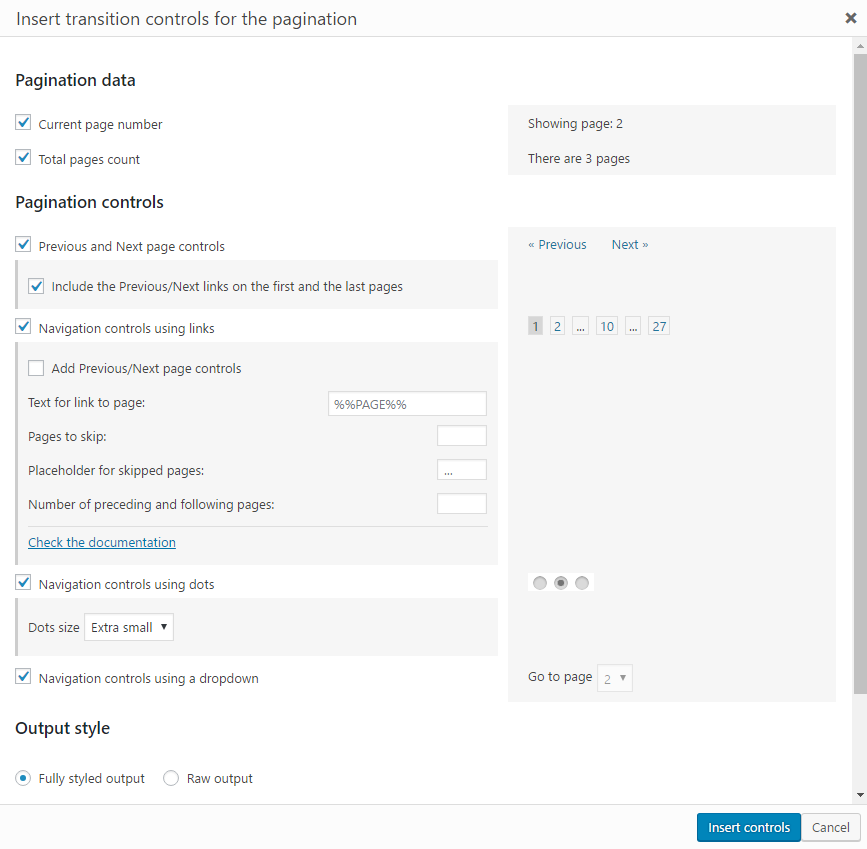
Inserting Pagination Controls
You have now set the options to instruct the View on how to split the content into pages. In order to enable your visitors to navigate between these pages, you can add pagination controls in the Search and Pagination section.
If you are using Infinite Scrolling, you cannot add pagination controls, because the pages are being loaded automatically.
You can choose from different types of controls to insert into your View.
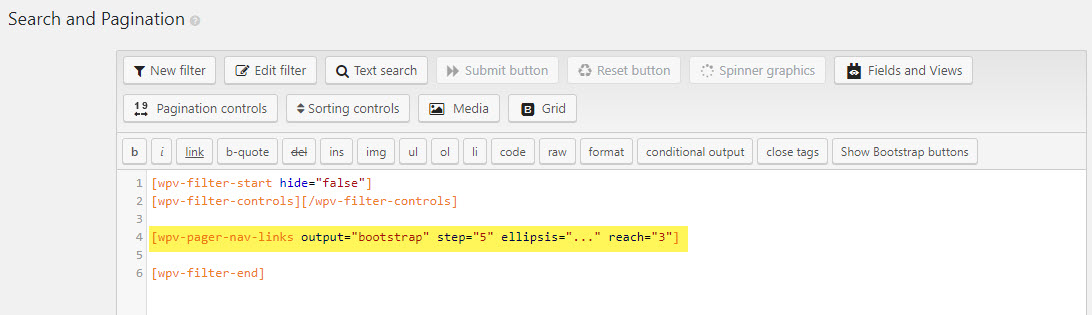
Let us consider an example of navigation controls using links where you:
- display “Page X” instead of the number only
- display a pagination link every five pages
- display a {…} placeholder for the skipped pages
- display two pages before and after the current item
The Pagination controls section of the insertion dialog for this example should look like the following:
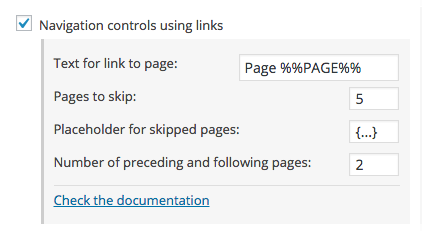
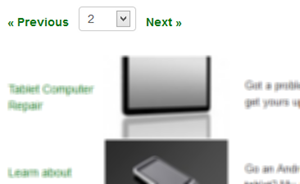
The output for the pagination controls when you navigate to “Page 9” will be similar to the following image:

Once you have completed this step, the View will include pagination. Visitors can switch between pages, and the View loads the correct content from the database. The only remaining task is to style the pagination controls and give them your visual design.
Selecting the output style for pagination controls
When inserting the pagination, you can select how the pagination controls are output.
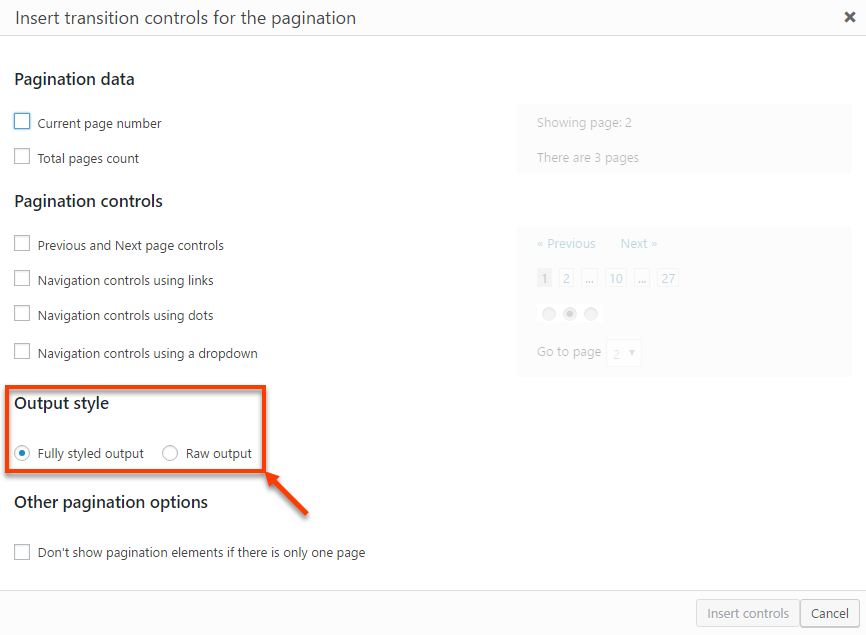
Nice output out-of-the-box
By default, the Fully styled output option is used and pagination controls are output using Bootstrap-compatible output. This makes the pagination control look great out-of-the-box without a need to style them, unless you prefer so, of course.
This output style wraps some types of pagination controls with Bootstrap HTML elements while to others, it simply adds the output=”bootstrap” argument.
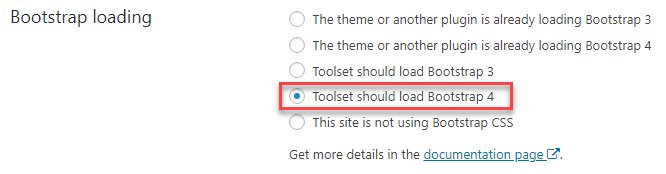
For the Bootstrap-compatible output to work, Bootstrap CSS stylesheet needs to be loaded on your site. If your theme is not using Bootstrap, no problem, Toolset can load it for you. To enable this, simply go to the Toolset -> Settings page and scroll to the Bootstrap loading section. There, select the Toolset should load Bootstrap 4 option.
Raw output for custom styling
If you do not want to use Bootstrap CSS for your pagination output, simply select the Raw output option in the pagination insertion dialog. Then, apply your own HTML and CSS styling for the pagination output.
Styling the pagination controls
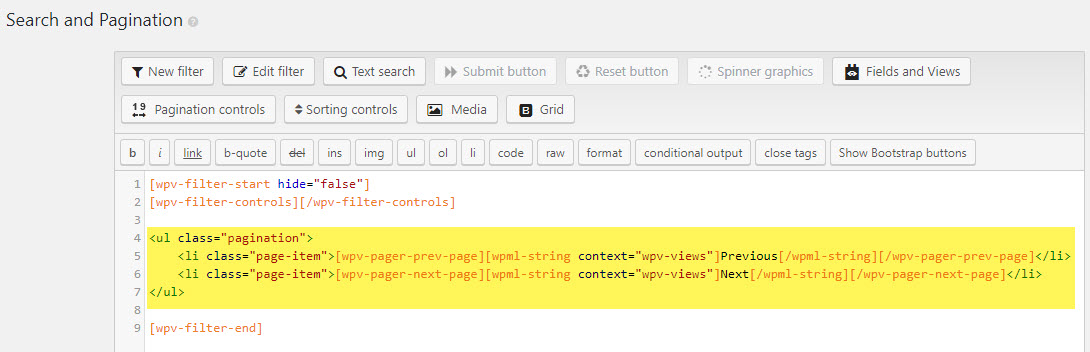
After using the insertion dialog, pagination controls appear in the Search and Pagination section.
The Search and Pagination section appears with the View, alongside the output results. It includes shortcodes for the different pagination controls that you have selected. Like everything else that Views produces, you can style it with custom HTML and CSS.
These are the shortcodes that Views may insert for you (depending on which pagination controls you have enabled):
[wpv-pagination][/wpv-pagination]– This shortcode wraps the pagination controls. Everything between[wpv-pagination]and[/wpv-pagination]will be displayed only if there is more than one page of results.[wpv-pager-current-page]– Displays the current page number[wpv-pager-total-pages]– Displays the number of pages[wpv-pager-prev-page]Previous[/wpv-pager-prev-page]– Displays a Previous link to move to the previous page. You can edit the text between the shortcodes for your own “previous” text.[wpv-pager-next-page]Next[/wpv-pager-next-page]– Displays a Next link to move to the next page. You can edit the “next” text.[wpv-pager-nav-links]– Displays a list of pages, enabling visitors to click on a page. This shortcode may have some parameters, depending on the options you have set.[wpv-pager-nav-dropdown]– Displays a dropdown list with page numbers, enabling visitors to select a page.
Positioning the pagination controls inside the View
When you display a View that includes pagination, the output will include two parts:
- The pagination controls
- The output of the View
You can control how these two parts display, using the Output Editor section, available at the bottom of the View setup page.

Before your edits, the Output Editor section will include these two shortcodes:
[wpv-filter-meta-html]– Outputs the View filter, which includes the pagination controls.[wpv-layout-meta-html]– Outputs the Layout section, which includes the View output.
So, by default, the View first displays the pagination controls and then displays the content. You can change this by switching between these two shortcodes, or you can simply add the pagination shortcodes to the Loop Output section instead. You can also put the pagination controls or View output inside your HTML, for additional styling.