In some cases, themes must display parts on a page that do not use the Bootstrap container or CSS. For example, see the following homepage:
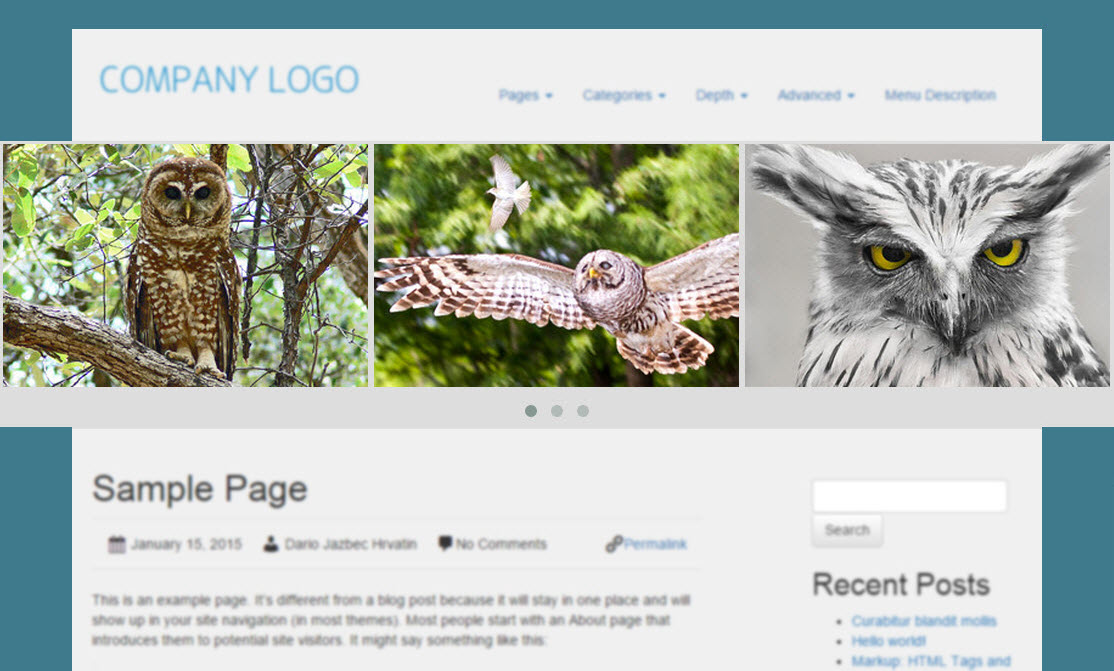
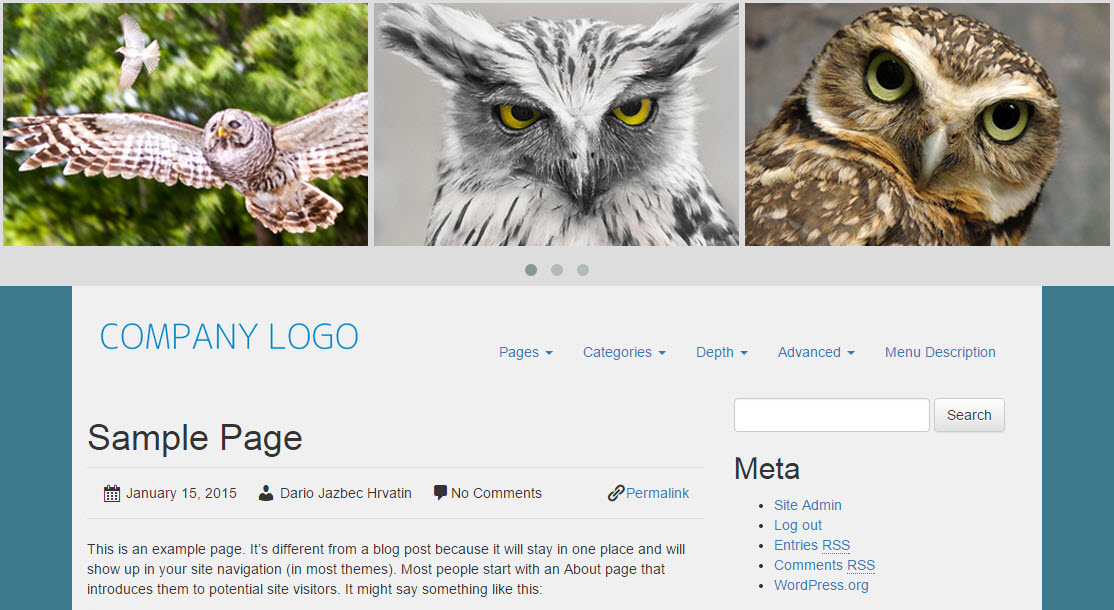
The “birds” slider extends across the entire width of the browser, whereas the Bootstrap grid is contained inside a frame.
Layouts allows the implementation of such structures using Custom Rows. They appear in the Layouts editor as an entire row. They can be moved up and down; however, not left or right.
When a Custom Row is displayed on the front-end, the following occurs:
- The Bootstrap container DIV is closed (after the preceding Bootstrap rows).
- The Custom Row is displayed.
- The Bootstrap container DIV is re-opened (for the following Bootstrap rows).
| Layout with a Custom Row in the editor | Layout on the front-end with the Custom Row highlighted |
|---|---|
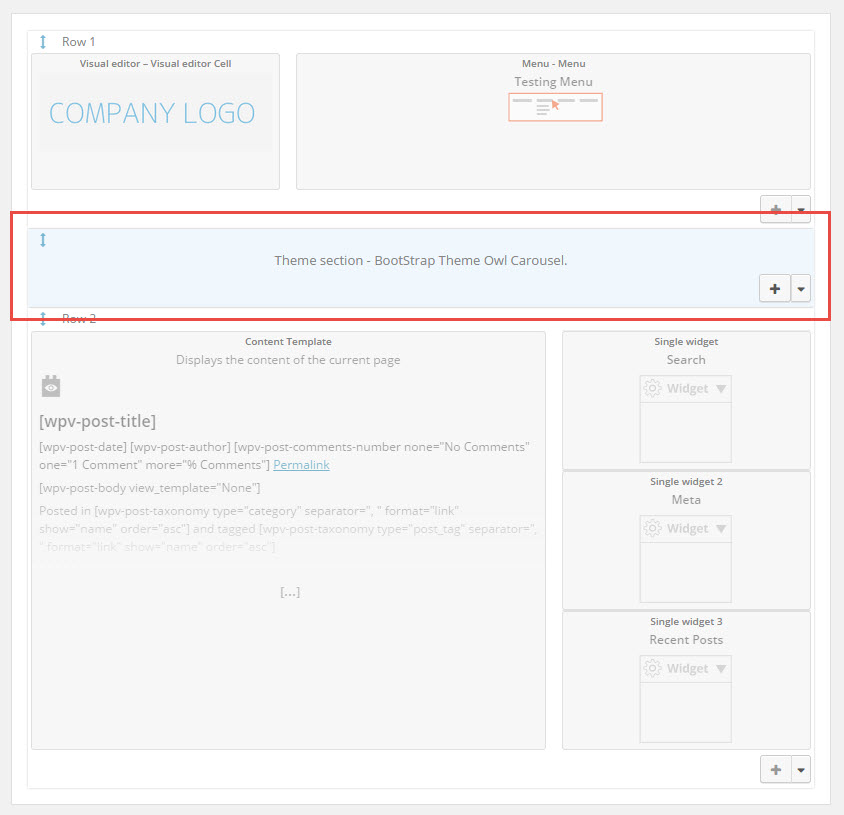 |
 |
Creating a custom Custom Row
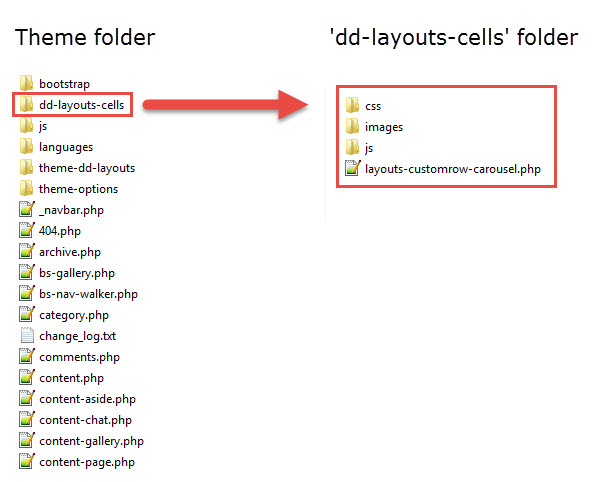
To create a Custom Row, first create a dd-layouts-cells folder inside the theme’s main folder. Inside the dd-layouts-cells folder, create a PHP file for the Custom Row and any other files and folders necessary for the custom functionality (e.g., stylesheets, scripts).
Call register_dd_layout_custom_row() to register the Custom Row:
register_dd_layout_custom_row( $custom_row_type, $args )
Arguments:
- $custom_row_type – String identifier. This is used to identify the new Custom Row.
- $args – Array of arguments:
- name – Name of the Custom Row;
- description – Description of the Custom Row (optional);
- custom-row-content-callback – Function name of a callback function that returns the HTML to be rendered in the front end.
Output:
- true – on successful registration;
- false – when a problem is encountered. Typically, the Custom Row has been registered previously.
An example of this process follows:
function register_custom_row_carousel() {
	if ( function_exists('register_dd_layout_cell_type') ) {

		register_dd_layout_custom_row ( 'register_custom_row_carousel',
			array (
				'name' => __('Owl Carousel', 'wpbootstrap'),
				'description' => __('BootStrap Theme Owl Carousel.', 'wpbootstrap'),
				'custom-row-content-callback' => 'custom_row_carousel_content_callback'
			)
		);
	}
}
add_action( 'init', 'register_custom_row_carousel' );
Now, we must design the output of the Custom Row. We accomplish this using the callback function:
function custom_row_carousel_content_callback($custom_row_settings) {

	wp_enqueue_style ( 'owl_carousel_main_css', get_template_directory_uri() . '/dd-layouts-cells/css/owl.carousel.css', false, NULL);
	wp_enqueue_script ('owl_carousel_row_js', get_template_directory_uri() . '/dd-layouts-cells/js/owl.carousel.row.js', array('jquery'), WPDDL_VERSION, true);

       $content = '<div id="owl-demo" class="owl-carousel">';
	for($x = 0; $x <= 8; $x++) {
		$content .= '<div class="item"><img src="http://owlgraphic.com/owlcarousel/demos/assets/owl' . $x . '.jpg"></div>';
           	}
        $content .= '</div>';

return $content;

}
Adding a custom Custom Row to your layouts
Once created, a Custom Row can be added to a layout.
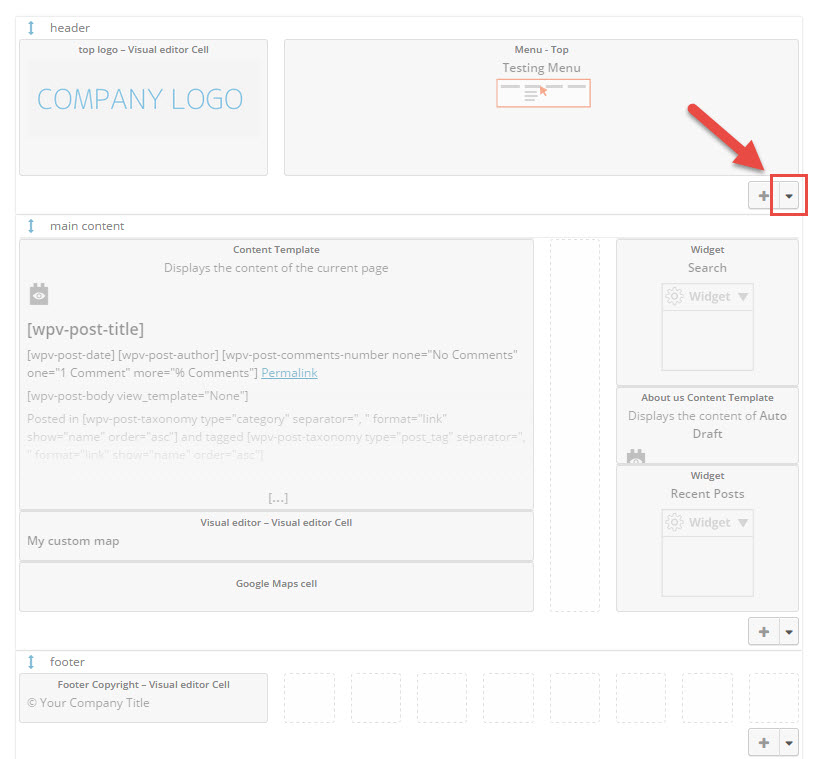 |
1. In the location where you wish to place the Custom Row, click on the “down arrow” next to the “+” icon for adding rows. |
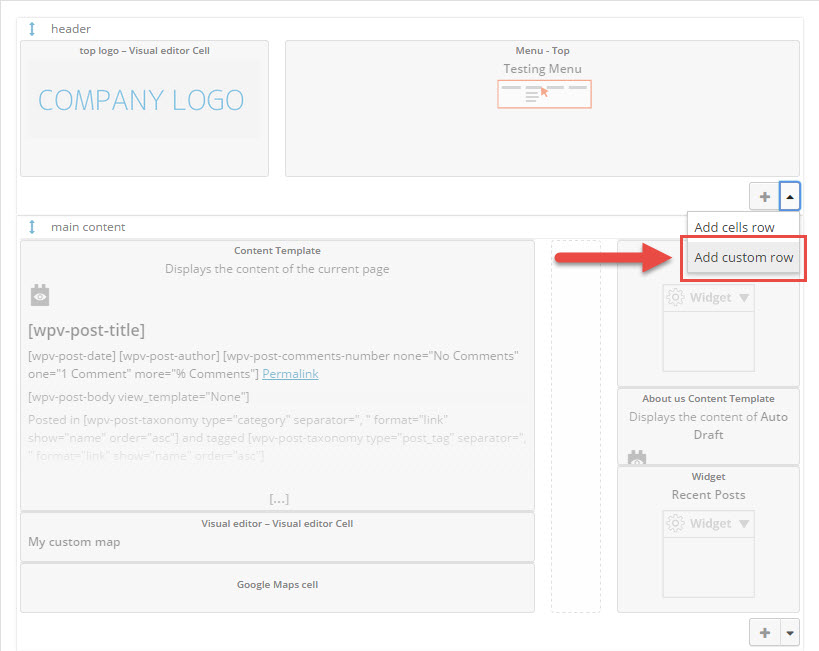 |
2. In the drop-down menu of row options, click on the Add custom row. |
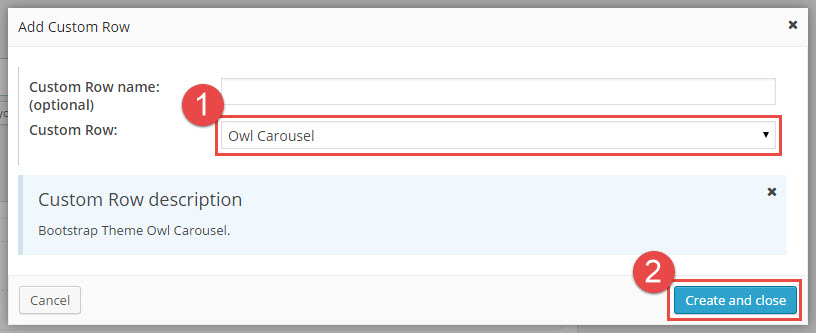 |
3. In the creation dialog that opens, choose your Custom Row in the drop-down menu and then click on the Create and close button. |
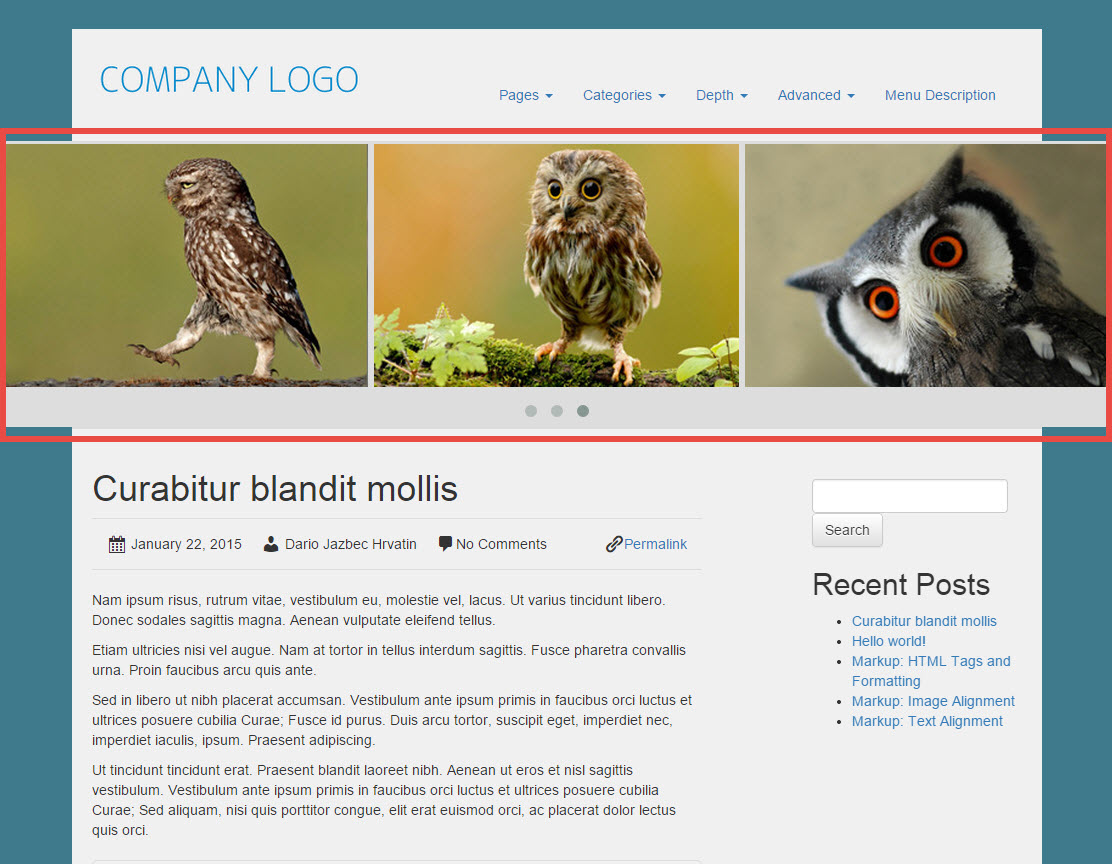
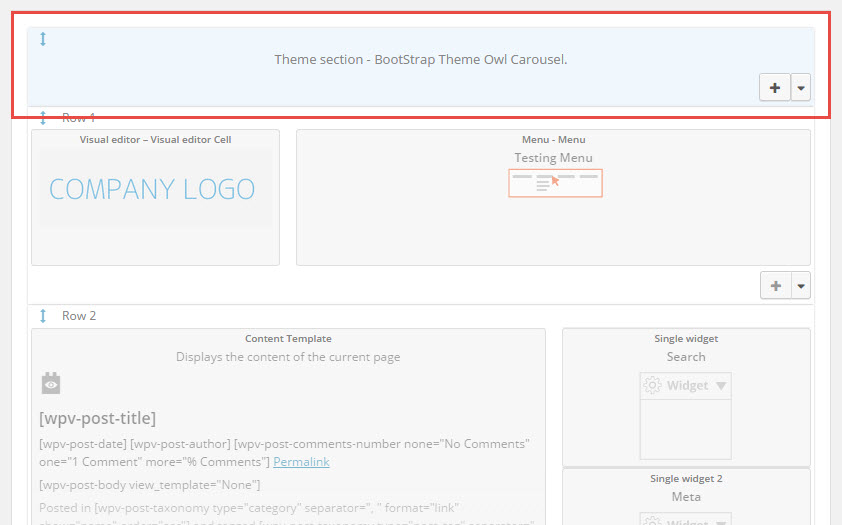
Because a Custom Row is a row, it can be dragged up and down. To demonstrate this on the example, move the newly created Custom Row to the top of the page, before the header.
 |
 |
Moving the Custom Row to the top of the layout and the result on the front-end
Differences Between Custom Rows and Cells
Both Custom Rows and Custom Cells allow the addition of custom functionality and markup to themes. There are, however, important differences:
- Custom Rows display outside the Bootstrap grid. As rows, they can only be moved up and down inside the layout.
- Currently, Custom Rows do not offer a GUI allowing users to set their properties.
- Custom Rows cannot be resized or displayed next to other cells.