The Layouts 1.9 version introduced a new kind of layouts, called content layouts. They are unique, separate designs for the contents of any single post or a page. The Toolset Layouts Migration plugin takes all the existing, standard layouts assigned to a single post or a page, and converts them into separate content layouts.
How the layouts migration plugin works
There is a good chance that the existing sites you built with Layouts feature multiple standard (i.e. template) layouts assigned to individual pages and posts. The purpose of the Toolset Layouts Migration plugin is to help you convert all those standard layouts assigned to single posts and pages, to content layouts.
The plugin performs three basic actions:
- It creates content layouts with the exact same cells based on the standard layouts it is replacing.
- It removes the standard layouts assigned to selected single posts and pages.
- It assigns a new template layout to the page or a post in question.
What about cells that cannot be used in content layouts?
There are certain types of Layouts cells that cannot be used inside content layouts, but only in template layouts:
- WordPress Archive
- Child layout
- Post content
- Comments
- Widget
- Widget area
- Menu
During the conversion, if the migration plugin finds any of these cells, it will simply remove them and leave empty cells in their place. This way you can easily replace them with other cells and content.
Using the layouts migration plugin
The recommended workflow for successfully using the migration plugin is the following:
- Select the posts and pages that you want to use the content layouts.
- Create and select the template layouts that these posts and pages will use.
- Edit the drafts of these generated content layouts, safely, before applying anything.
- Confirm and finish the migration.
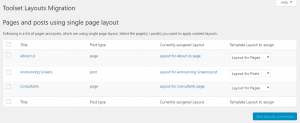
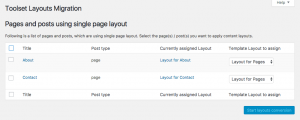
After installing and activating the Toolset Layouts Migration plugin, go to the Toolset -> Layouts Migration page. This page lists all posts and pages that have a standard layout assigned exclusively to them, as displayed in the following image.
Here, you select the pages you want to migrate and the template layout that will be assigned to the given post or a page. You need to make sure to create the appropriate template layouts before doing the migration.
Creating the template layouts
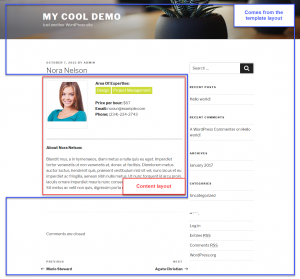
Content layouts are used to design only the content part of the page. Since version 2.0, templates created with Layouts also only affect the content part of the page, in which case the header, sidebar, and footer will be generated by the theme and the template layout you select will be irrelevant because the content layout will override the template layout rather than be nested inside the template layout as shown below.
This is only relevant if you are using a fully-integrated theme, in which case the template layout will generate the header, footer, and sidebar, while the content layout will render the post content itself, as shown in this image.
Once you have the necessary template layout(s) ready, select the pages you want to migrate, the template layouts they should use, and click the Start layouts conversion button.
Editing the content layouts before migration
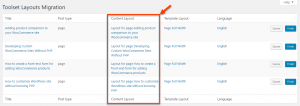
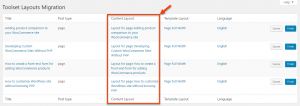
After starting the conversion process, the selected layouts are listed at the top of the page. You can see the post type they belong to and their respective content and template layouts.
At this stage, the content layouts are created but not yet active. This allows you to safely edit them and make sure their output is appropriate, before migration.
In the Content Layout column, clicking the one you want to edit takes you to its editing page.
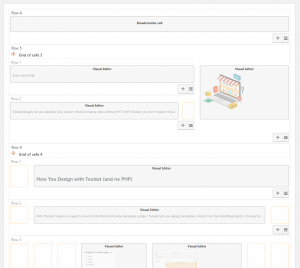
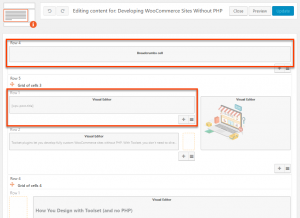
Let’s take a look at an example coming from one of the Toolset’s very own pages, about developing custom WooCommerce sites without PHP. Its content template is displayed in the following image.
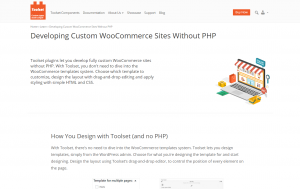
Now, we click the Preview button to see how it looks like on the front-end. Don’t worry about the page looking wrong. Visitors still see the old content (the original layout assigned to the page). You can edit the Content Layout safely and save your edits. Only you can see the edits and only when you click on Preview. Visitors will see these changes only when you are done (the “Finish” step of the migration which we show in a minute).
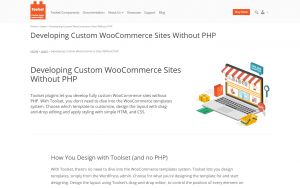
As you can see, the page breadcrumbs and main title are duplicated. This is because both the content layout and the template layout we assigned to the page display these elements.
We can easily fix this, by removing the breadcrumbs cell and the title from the content layout.
After applying this, our page looks good again and we can proceed to finish the migration process for it.
Finishing the migration process
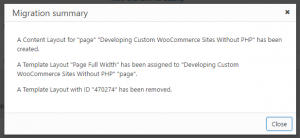
After we are done editing the content layout for our page, we can return to the Toolset -> Layouts Migration page and click the Finish button next to all the pages that are ready for migration. A dialog box with a short summary is displayed and your pages successfully migrated to using content layouts.
Migrating multilingual pages
If you are using WPML, you can also migrate multilingual pages. The process is virtually the same, the only difference being that you have to edit content layouts for all language versions of the given page.
Again, you select the pages to migrate and the template layout to assign, as displayed in the following image.
After clicking the Start layouts conversion button, the second page will display the selected pages in all languages.
As mentioned, WPML creates a separate page for each language version of the content, so you need to edit the drafts of the content layout for all of these pages.
Please note that you can find all these separate content layouts listed on the WPML -> Translation management page, under the Translation Jobs tab. They will be marked as Complete – (needs update).
Finally, because WPML connects all translations of a given page it is not possible to migrate the page only for a certain language. You can either do it for all the page’s languages or cancel.
