A people directory is a great way for your site’s visitors to connect with professionals. But, adding and updating all the user profiles by yourself can be a lot of work. With Toolset, you can allow users to create their own public profiles without accessing your WordPress site’s backend.
There are many different ways you can use a people directory on your website. For example, a real estate agency might want to share a list of all their agents and the areas they cover. An art gallery could introduce the artists for an upcoming event and display their work.
No matter the type of website, a solid directory allows you to:
However, building a directory listing tens or hundreds of people isn’t the easiest task. Additionally, if you were to want each person’s public profile to display custom information, putting the directory together would be even more time-consuming. It would require you to gather each user’s personal information, add this information to the directory, and make updates to it whenever needed.
Giving all these users access to the backend admin area of your website and allowing them to create their own public profiles is an option, but it’s one you may not feel comfortable with.
Wouldn’t it be great if there was a way for WordPress users to create and manage their own public profiles from the front-end? With Toolset, they can.
What You’ll Learn
To create a people directory with public profiles that users can submit from the front-end, you’ll need to follow a multi-step process. Here’s what we’ll cover below:
How WordPress Users Can Create Public Profiles with Toolset
WordPress itself offers many ways of displaying posts. You can choose to display all your posts on one page, specific posts based on their categories, or feature posts with the most comments. If your theme comes with an author info box, you can also show basic information from the author’s WordPress user profile with each post.
But what should you do if you want to display WordPress user profiles on the front-end and let your visitors search through them?
WordPress doesn’t have a template for displaying user profiles on the front-end, which means you can’t use Toolset to create a custom search for user profiles. However, there is something else you can do – let users submit their own public profile posts.
As you may remember from our courses, Toolset Forms allow users to create content from the front-end. This makes it possible for you to enhance your website with different types of user-generated content like articles, product listings, classifieds, and public profiles.
For this, you need to use Toolset Forms to create two separate forms:
A form that registers WordPress users on your website
A post form with custom fields for logged-in users
So, how exactly is the connection between WordPress user roles and post types made? Let’s look at the following image with an overview:
WordPress user profile
Username
Nickname
Biographical Info
Profile photo
Post author of
Public Profile
WordPress post type
Name
Photo
Bio/short description
Contact Information
In WordPress, any user who creates and publishes a post from the site’s backend is automatically made the post author. With the post form, you’re giving your users a way to create, and become the authors of posts submitted through your site’s front-end.
Let’s break this down using our people directory as an example. The post form you create will probably have custom fields necessary to build a public profile, like Name, Image, Biography, and Contact Information. Once your logged-in user fills out the form fields and hits the submit button, Toolset converts the form content into a post – and makes the user the author of it. So, the user is now the author of their own public profile post.
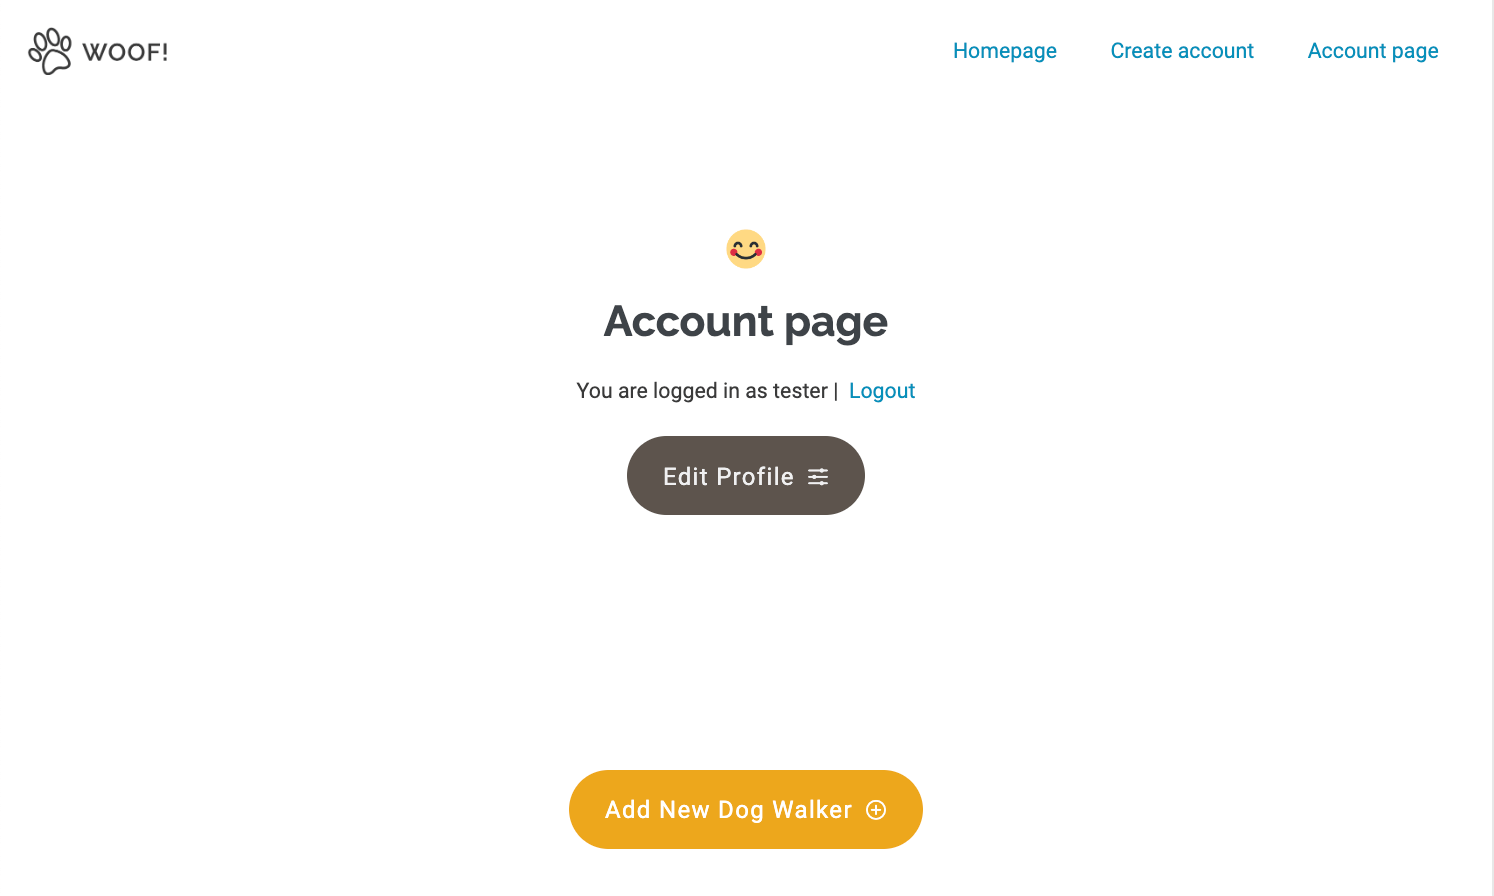
Here, it’s worth noting that Toolset allows you to create account pages for front-end management. By creating another form for editing content, you can additionally make it possible for users to log in and manage their submitted public profiles at any time.
What You’ll Need to Do
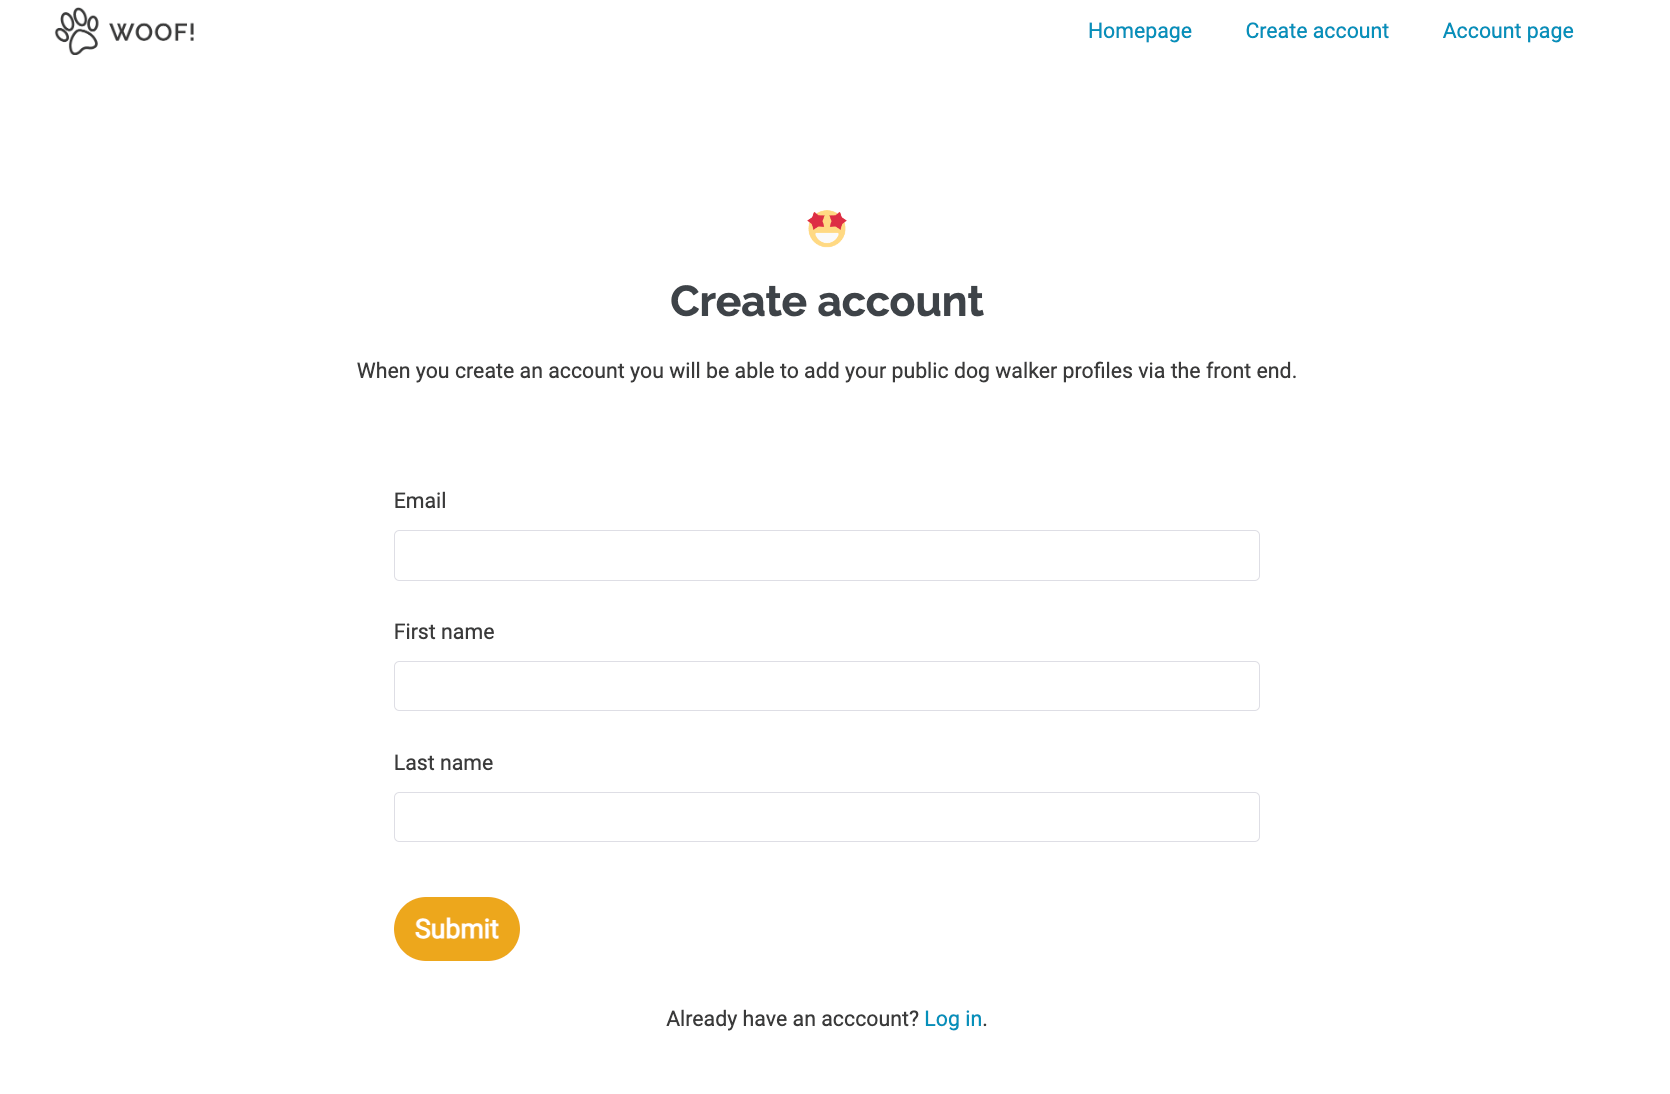
Below, we’ll show you how to let logged–in users create and manage their own public profiles. To make the steps easier to follow, we created a directory site with dog walkers. Our goal is to let each dog walker submit their own public profile.
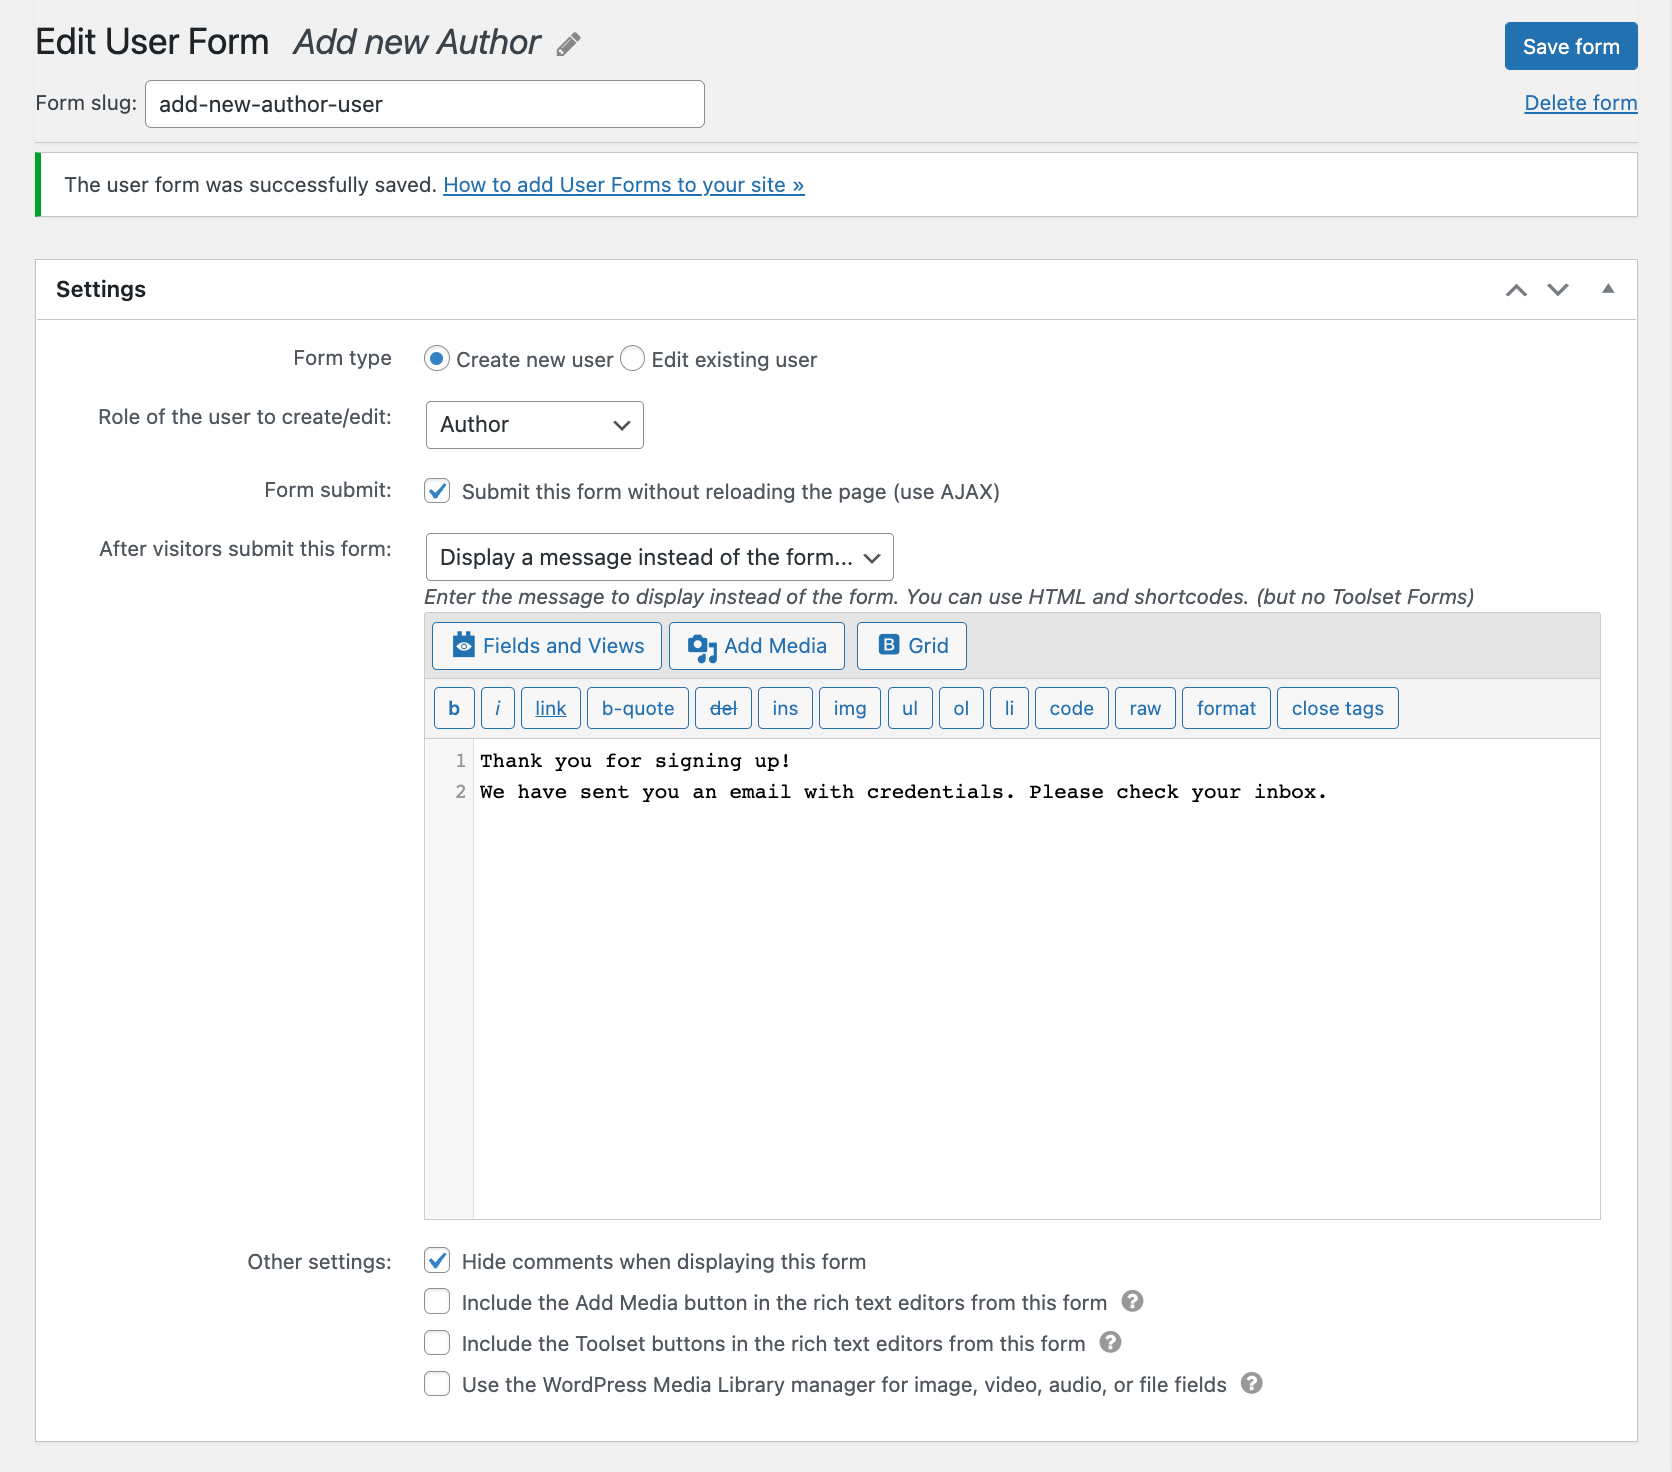
In the Settings section, select the role of the user that the form will register and choose what happens after a user submits the form. For example, you can choose for users to see a message after submitting a form and customize the message content.
An account page and the options for a logged-in user
Step 2: Create the Custom Post Type and Fields
Now, you can begin thinking about what you want users to be able to submit. But before you can create a post form, you need to create a post type. This is because we need to have a post type to connect the form with.
In our example, we have a website that promotes dog walking services, so we’ve created a custom post type called Dog Walkers.
Your custom post type should have some custom fields for each user to add information about themselves. In our case, we want each dog walker to submit a public profile with basic information like their photo, a short description, experience, and location.
So, our Field Group for Dog Walkers includes:
Image
Number (price per hour, years of experience)
Singleline (short description)
and Address custom fields.
Of course, you can adapt these custom fields to your own needs.
Add custom fields to your custom post type
Step 3: Create a Custom Archive Page with a Custom Search
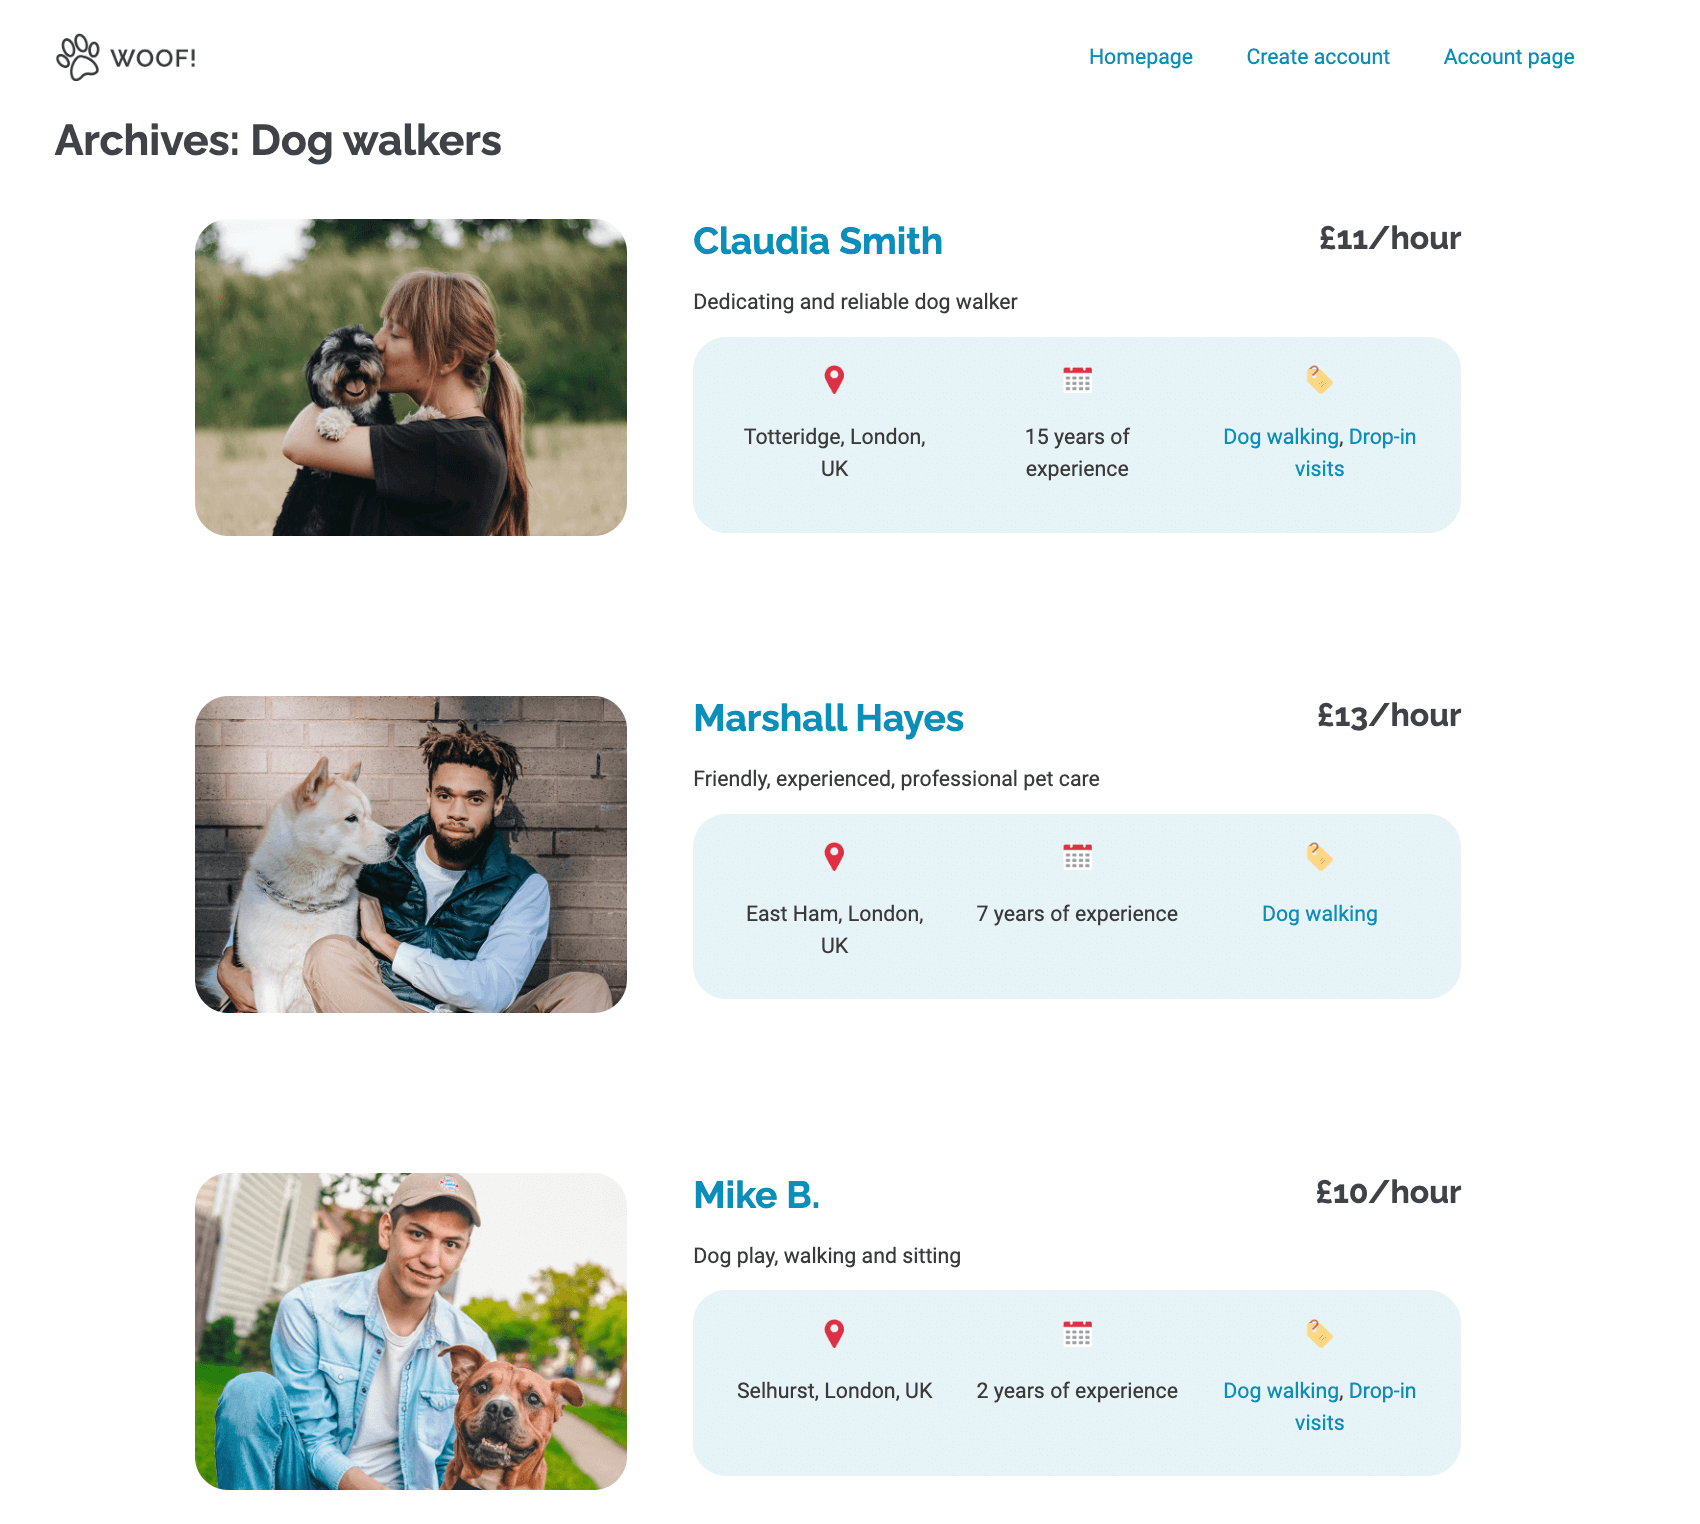
The more users submit their public profiles, the larger your people directory will be. Your website’s visitors should be able to easily scroll through the public profiles belonging to your post type. To make this possible, you can create a custom archive. Your site will look cleaner and you’ll make it easier for visitors to reach older public profiles.
An archive page listing all the dog walker profiles
To further customize your archive page and improve user experience, you can add a custom search. This way, visitors can quickly find exactly what they’re looking for. All they’ll need to do is filter through the public profiles in your directory by using the selection criteria.
A custom search added to the archive page
Step 4: Create the Post Forms
Now, you need to allow your logged in users to add their public profiles to your directory through a front-end post form.
To do this:
Go to Toolset → Post Forms and add a new form.
Once you give the form a name, select the main form options. This includes selecting a post type, setting the status of the post created by the form, and adding the message users see after submitting the form.
Select the main form options
In the Form editor section of the Build Form tab, you should see all the repeatable custom fields assigned to your post type in the Form editor. You can delete or reorder any fields that don’t have a lock next to them. You can also add new fields by dragging and dropping the elements available under Extraelements and Genericfields.
Add and edit the fields you want the post form to include
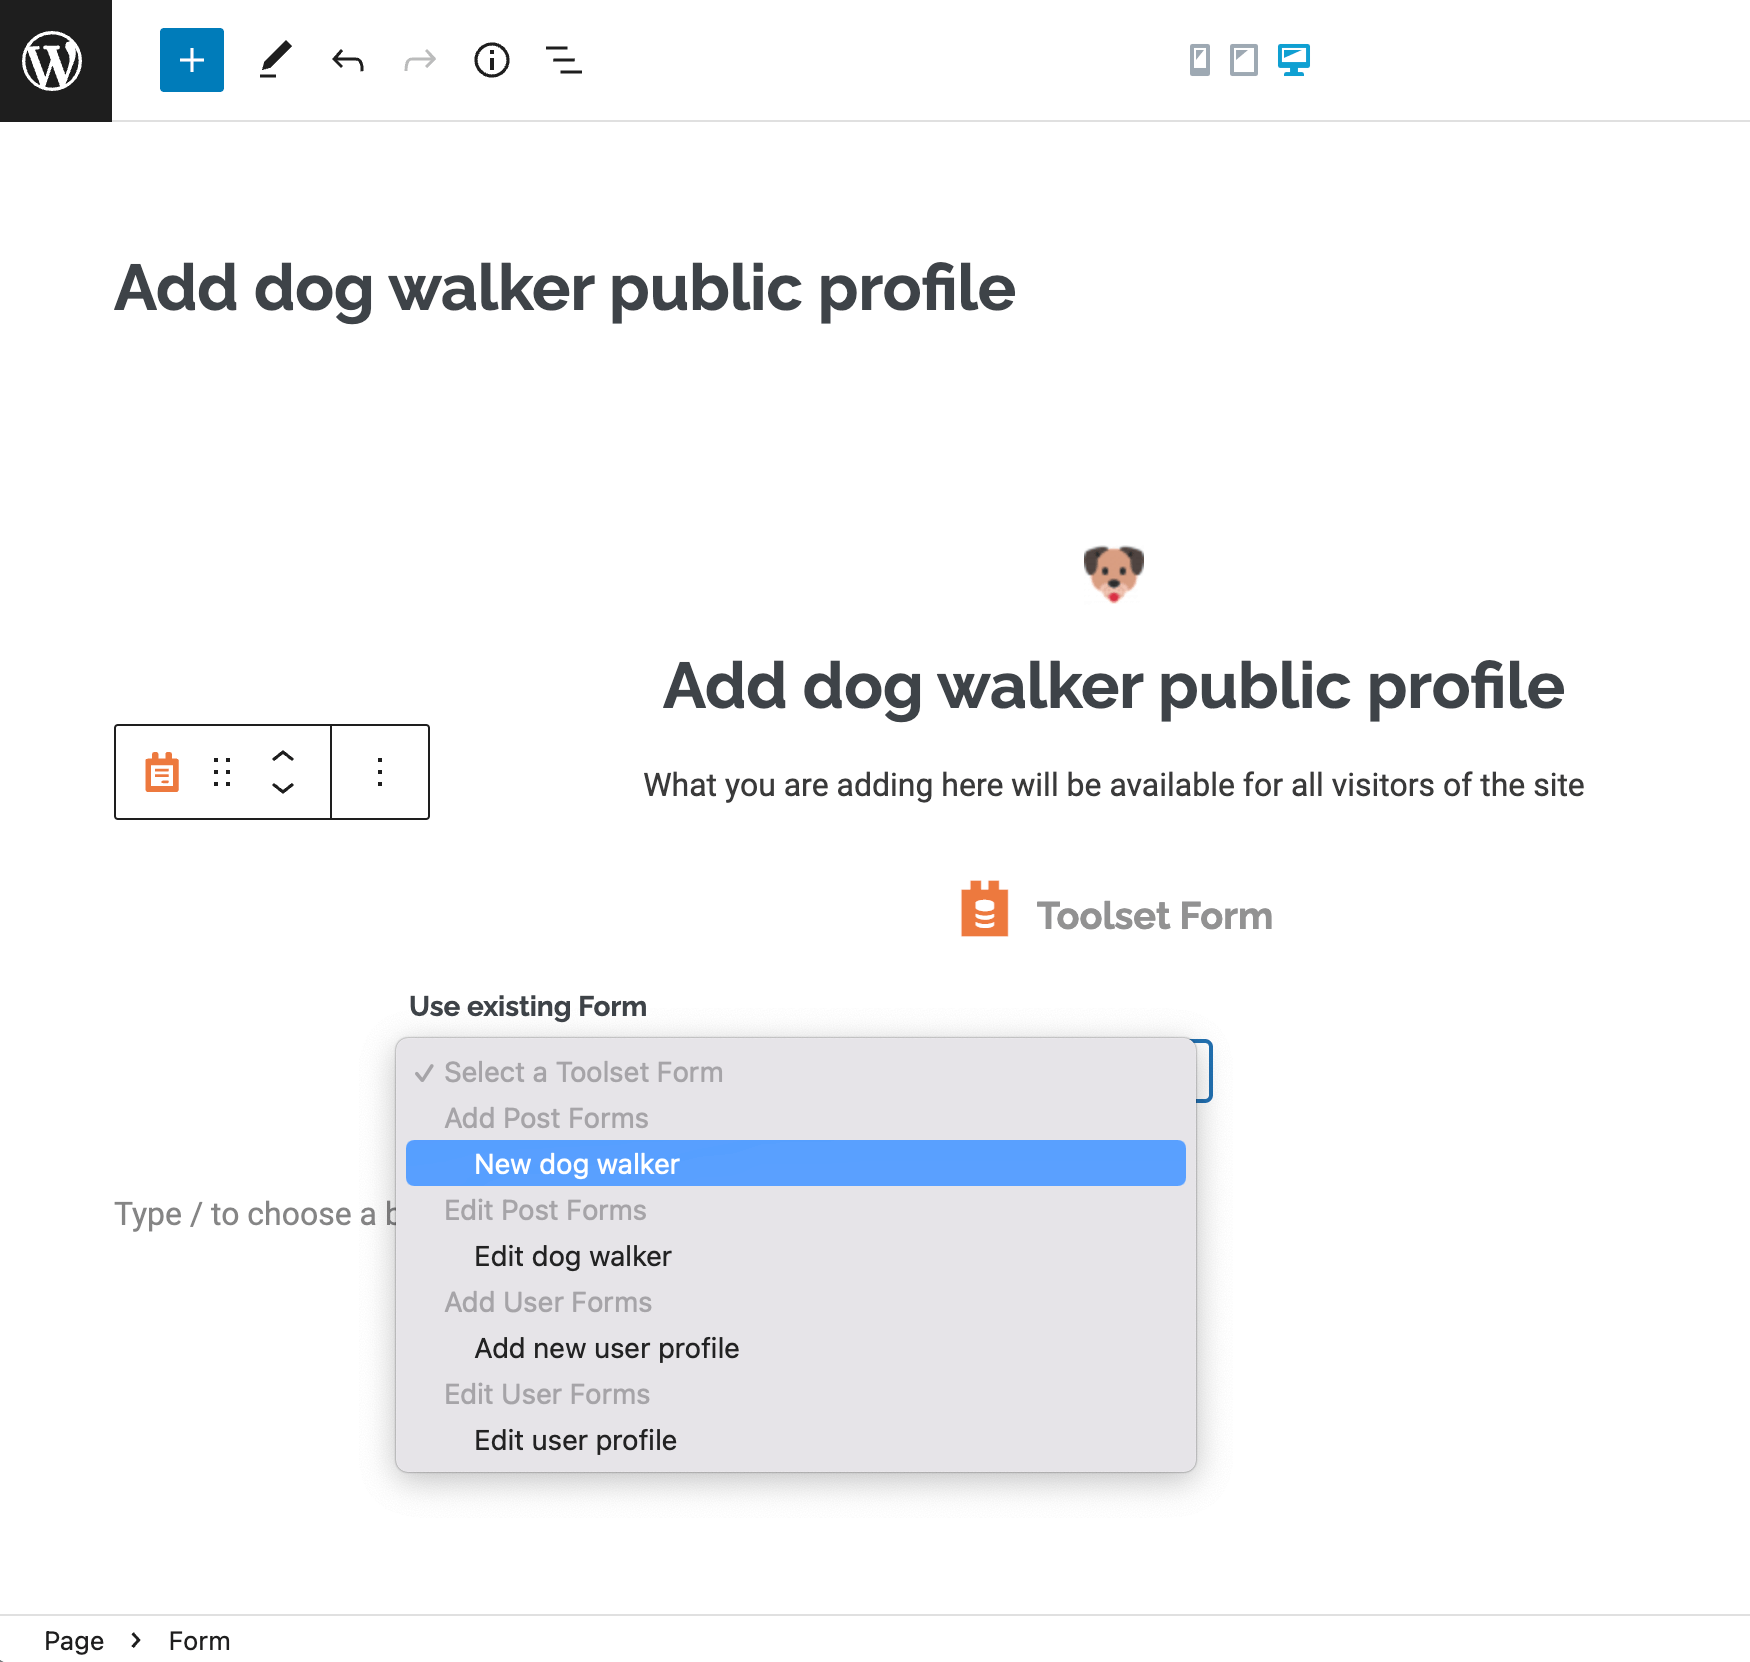
To display the form on the front-end, create or edit a post, page, or template. Then, insert the form into your post type using the ToolsetForm block.
Adding the form to a page using the Toolset Form block
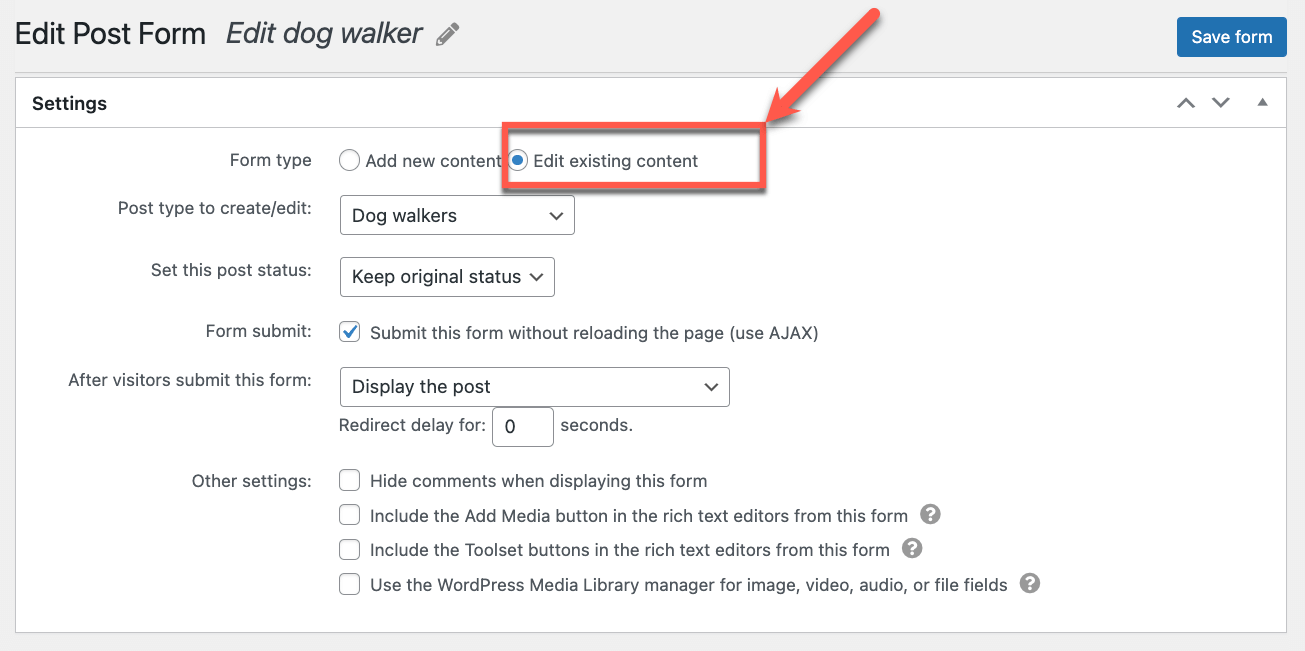
Hint #2 – Create a Form to Edit Content
Once you create a post form that will allow users to submit their content, you can create a separate one that allows users to edit any content they have submitted. Then, use the Toolset Form block to add it into a post or page. This way, users won’t need to rely on site owners or webmasters when they need to make changes to their profile.
A post form allowing users to edit their own existing content
Hint #3 – Set Access Permissions for Toolset Post Forms
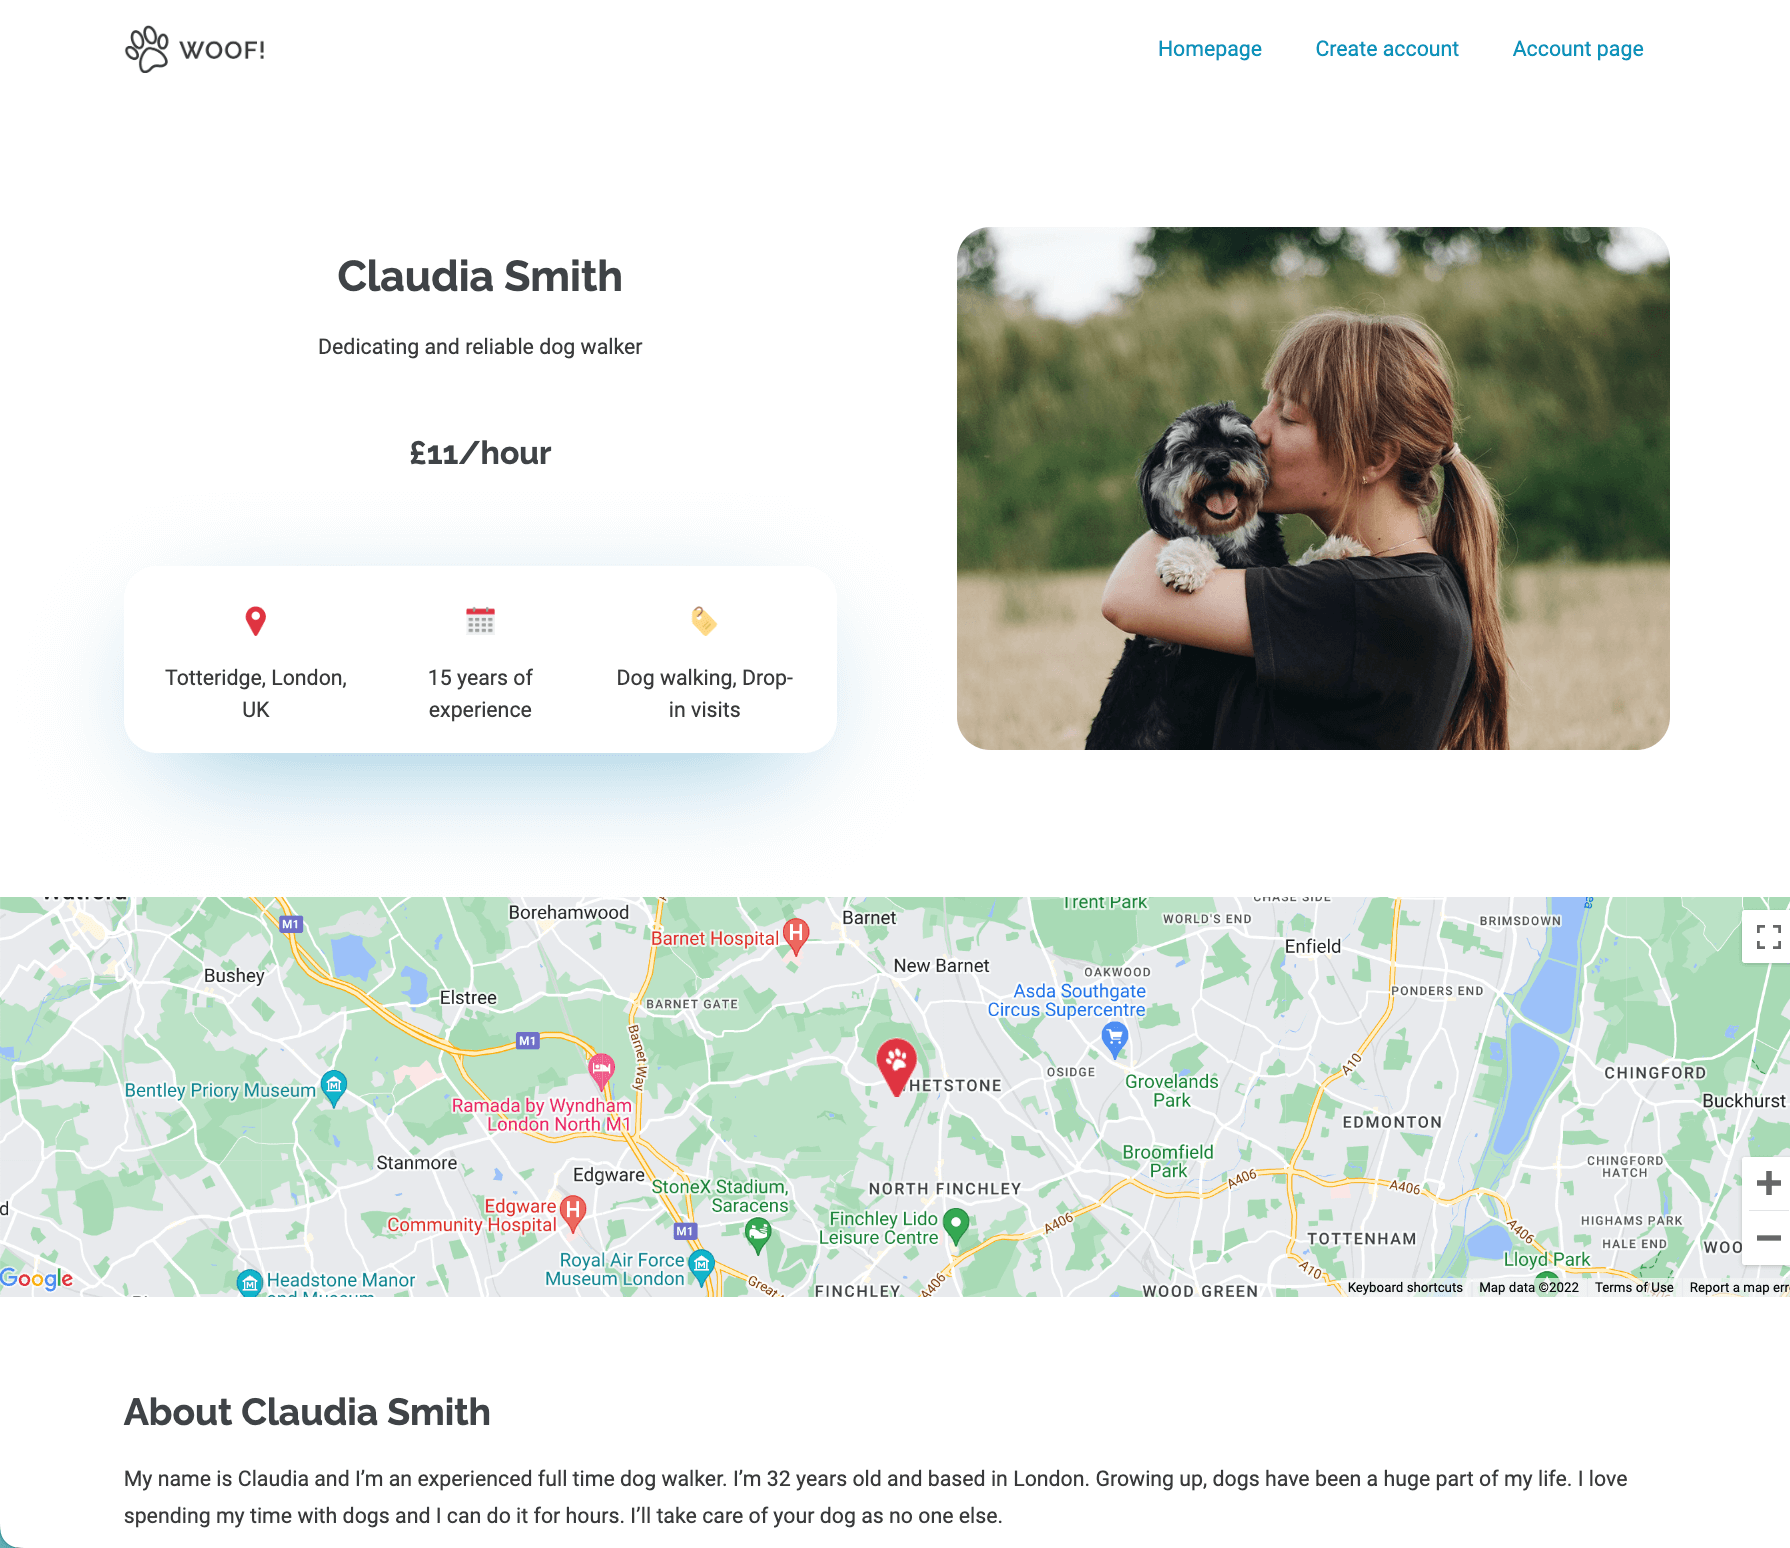
As the last step, you need to create a content template. This will allow you to display single public profile posts on the front-end.
For the purpose of our example, here’s how the content template displaying single Dog Walker profile posts looks like on the front-end.
A single-post template on the front-end
Wrapping Up
A custom people directory can be a powerful asset. It allows your site’s visitors to browse through a list of professionals, find someone with the expertise they need, and even get in touch with the professionals of their choice.
With Toolset, you don’t need to spend days at a time creating public profiles. You also don’t need to give users access to your site’s backend. Instead, you can allow users to create and manage their own profiles by following a few steps:
Create a user registration page
Create a custom post type with custom fields that holds the public profiles
Create a post form for logged-in users to add their own public profiles
Create a content template for single-posts
Do you have a directory site? Did you know that you can use Toolset to allow users create their own profiles through the front-end? Let us know in the comments!
There’s more!
This article is a part of an ongoing series where we present interesting and powerful ideas of what you can build with Toolset. We’re publishing these every few weeks, so stay tuned!
A people directory is a great way for your site’s visitors to connect with professionals. But, adding and updating all the user profiles by yourself can be a lot of work. With Toolset, you can allow users to create their own public profiles without accessing your WordPress site’s backend. There are many different ways you…
Thank you, this is interesting. I’ve been trying to make a membership directory from the user data without much success. Using this method the user creates a post which then makes them a post author, which can be queried!
Hi, John! Can you please share what was the problem? What couldn’t you get to work? Thanks!
This is great. How about a follow-on How To post about how someone can add as a favorite, contact, communicate with, and hire the professional, all through the site. I’ve seen solutions for each of these I think in the forums, but tying them all together would be awesome and super helpful.
Tim
Thanks for your comment, Timothy! That definitely sounds like an in-depth post that could be a useful and interesting read. We’ll look into the topic and consider putting a post like this together.
That’s what I want to do with my site, but I have a few questions:
1) How to limit the number of images a user can post? (We only allow 6 images in the gallery)
2) How to limit the size and dimensions of the images?
3) How to make so admin has to approve the uploaded images when users upload their images? (That prevents people from posting inappropriate images such as nudity, images of minors, etc)
4) Is there a notification system where admin receives a notification when a user makes a change to their posts? (We don’t allow websites on their posts, but they might put it in the description and we would not see it)
5) How about a time limit? The post will be public for 30 days? Or 60 days? And then it would go automatically to draft after those days are gone.
There are so many other things I could post here but I think those are enough to start.
Looking forward to your response!
Hi Felipe! Thanks for taking the time to read the post and send over your questions. I’ll do my best to reply to them:
To limit the number of images a user can post as well as limit their size and dimensions, you can use custom code. In our support forum, you can find some examples of code to validate a repeating image field in a post form. Our Supporters have also shared some custom code to limit the file size and type. I would recommend checking out the codes provided in these replies and seeing if any of them could be modified for use on your site.
The Toolset Form editor gives you the option to set an automatic expiration date for posts created through Toolset Forms. You can also specify what happens to the post after expiration – for example, if the status should be changed to Draft, Pending Review, or put in the Trash, to name a few options.
When it comes to Toolset Forms (and Toolset in general) the possibilities really are endless! 🙂 If you ever can’t find the information you’re looking for in our courses or tutorials, you can open a thread in our Support forum. Our Supporters are extremely knowledgeable and always happy to help with any questions you may have.
Kathy, you are amazing! Thanks for the information. I will renew my toolset membership and get the help I need to make my site the best, most effective, and good looking site on the internet! Thanks to you and Toolset team!
Take care!
Thanks for the kind words, Felipe! I’m sure that you’ll be able to create a good-looking and fully functional site, but feel free to reach out to our team if you need any guidance along the way. Have a great day!


Thank you, this is interesting. I’ve been trying to make a membership directory from the user data without much success. Using this method the user creates a post which then makes them a post author, which can be queried!
Hi, John! Can you please share what was the problem? What couldn’t you get to work? Thanks!
This is great. How about a follow-on How To post about how someone can add as a favorite, contact, communicate with, and hire the professional, all through the site. I’ve seen solutions for each of these I think in the forums, but tying them all together would be awesome and super helpful.
Tim
Thanks for your comment, Timothy! That definitely sounds like an in-depth post that could be a useful and interesting read. We’ll look into the topic and consider putting a post like this together.
That’s what I want to do with my site, but I have a few questions:
1) How to limit the number of images a user can post? (We only allow 6 images in the gallery)
2) How to limit the size and dimensions of the images?
3) How to make so admin has to approve the uploaded images when users upload their images? (That prevents people from posting inappropriate images such as nudity, images of minors, etc)
4) Is there a notification system where admin receives a notification when a user makes a change to their posts? (We don’t allow websites on their posts, but they might put it in the description and we would not see it)
5) How about a time limit? The post will be public for 30 days? Or 60 days? And then it would go automatically to draft after those days are gone.
There are so many other things I could post here but I think those are enough to start.
Looking forward to your response!
Hi Felipe! Thanks for taking the time to read the post and send over your questions. I’ll do my best to reply to them:
When it comes to Toolset Forms (and Toolset in general) the possibilities really are endless! 🙂 If you ever can’t find the information you’re looking for in our courses or tutorials, you can open a thread in our Support forum. Our Supporters are extremely knowledgeable and always happy to help with any questions you may have.
Kathy, you are amazing! Thanks for the information. I will renew my toolset membership and get the help I need to make my site the best, most effective, and good looking site on the internet! Thanks to you and Toolset team!
Take care!
Thanks for the kind words, Felipe! I’m sure that you’ll be able to create a good-looking and fully functional site, but feel free to reach out to our team if you need any guidance along the way. Have a great day!