Hi,
I have a custom field which is a checklist.
How would I add an icon before each item?
Also, can I display both checked and unchecked items but show that the checked ones are checked with the icon?
So a checked box icon for the checked ones and unchecked for the unchecked one?
Also, I have a strange problem.
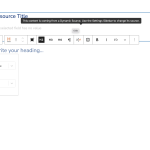
If I insert a container and then add a heading
The box to choose fields is way off to the left so I can't see what the options are:
See screenshots. I'm using Generate Press.
Nothing other than the Toolset blocks have this issue going on.
Also how would I make the items in the checklist appear vertically rather than horizontally on a line?
I have them displayed on the template via the Fields and Text Block so:
Field Display Name: item 1, item 2, item 3
But if I want them like
Field Display Name:
item 1
item 2
item 3
How would I make them vertical like that?
Thanks
Hi,
Thank you for contacting us and I'd be happy to assist.
To suggest the best way to achieve this, I'll need to see how this 'checkboxes' type field and the content template are set up in the admin area.
Can you please share temporary admin login details, along with the link to an example page you'd like to show this list?
Note: Your next reply will be private and making a complete backup copy is recommended before sharing the access details.
regards,
Waqar
I forgot to upload the screenshot and now it's not a private window, I don't want to add it here. The name of the field is in the private reply. There are a few other checkbox fields in that field group as well.
Hi Laura,
Thank you for sharing the access details.
For the list style that you're trying to achieve, the 'Single Field' or any other block won't work, as it won't allow this level of customization control for the checkboxes field's output.
I would add a 'Fields and Text' block, switch to its "HTML" tab, and use the HTML + Types Fields API combination like this:
( ref: https://toolset.com/documentation/customizing-sites-using-php/functions/#checkboxes )
<ul class='list-airport-other-services'>

[types field='airport-other-services' state="checked" option="0"]
<li class='list-airport-other-services-item-1'>Option Title 1</li>
[/types]

[types field='airport-other-services' state="checked" option="1"]
<li class='list-airport-other-services-item-2'>Option Title 2</li>
[/types]

[types field='airport-other-services' state="checked" option="2"]
<li class='list-airport-other-services-item-3'>Option Title 3</li>
[/types]

......

</ul>
Note: this example shows the shortcodes for only the first 3 options, but you can add more for the rest of the options in place of '......'
This way your list will consist of a markup where the 'ul' tag will have the class 'list-airport-other-services' and the individual 'li' tags will have the unique 'list-airport-other-services-item-{number}' class each. These classes will allow you to add custom CSS to show the desired icons/images next to these list items.
As for the alignment of the dynamic source in the heading block, instead of using the inline field option, it would be more convenient to use the 'Dynamic Heading Text' option from the right options panel.
( example screenshot: hidden link )
regards,
Waqar

