In this lesson, you will learn how to add custom fields to any WordPress content. You can add single or repeating custom fields and even groups for fields.
By default, posts and pages come with a set of standard fields like the title, main content, date of publishing, and featured image. Using fields, you can completely customize the editor pages to include any piece of information.
Steps for Adding Custom Fields to Post Types
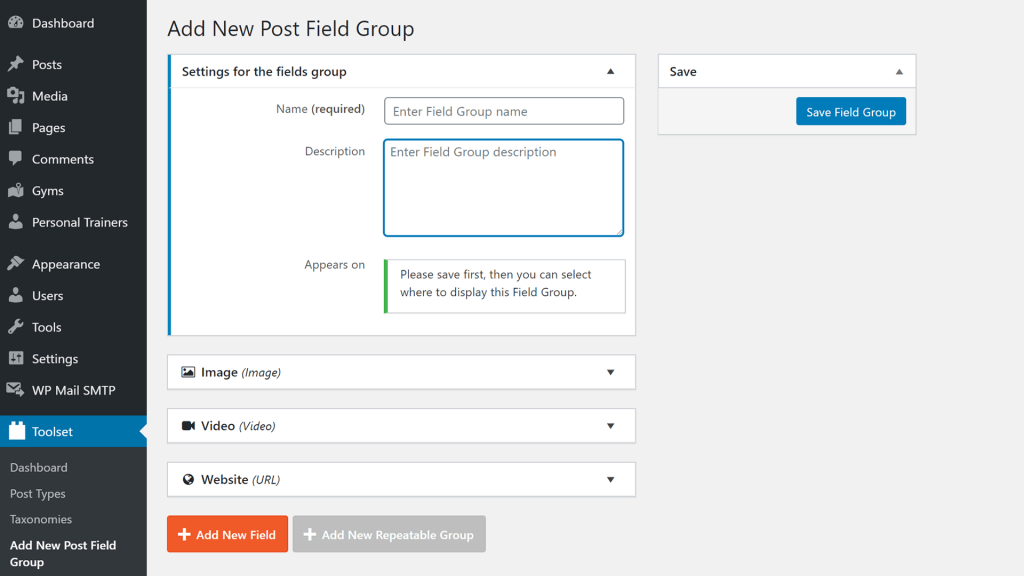
- Go to the Toolset → Dashboard page and click the Add custom fields in the row of the post type you want to add custom fields to.
- Click to select the type of the custom field you want to create first.
- In the dialog that appears, type in the name of your field. Slug is created automatically.
- Set other options for your custom field. Different types of fields have different options.
When you’re done adding a custom field, you can click the Add New Field button to add more.
When you’re done adding all fields you need, click the Save Field Group button.
Your group of custom fields will now appear when creating or editing posts of the selected post type.
You can also make repeatable custom fields, repeatable groups of custom fields, add Address custom fields, conditionally display custom fields in the admin, and more.
Displaying Custom Fields
You can easily display your custom fields on the front-end with Toolset.
All Toolset blocks allow you to use a “dynamic source” for their output. Turning this option on allows you to select a custom field for that block to display.
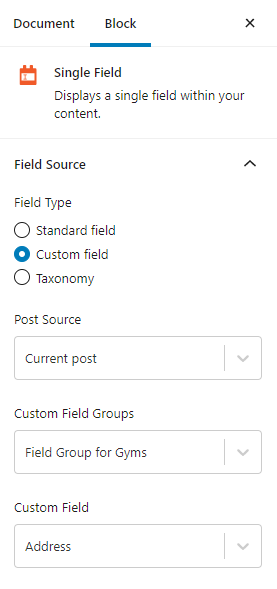
Here’s an example of custom fields used in a template to display single posts:

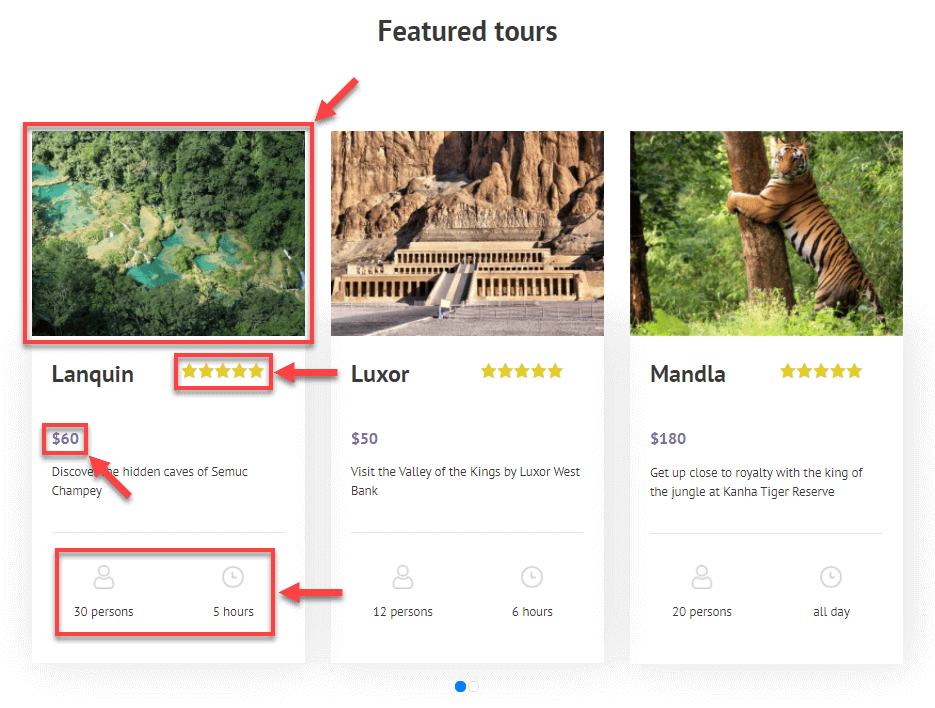
And here’s an example of custom fields used in a custom list of posts:
Check out the related lessons on how to display custom fields in your single-post templates, custom lists of posts and archive pages.
Making individual fields repeatable
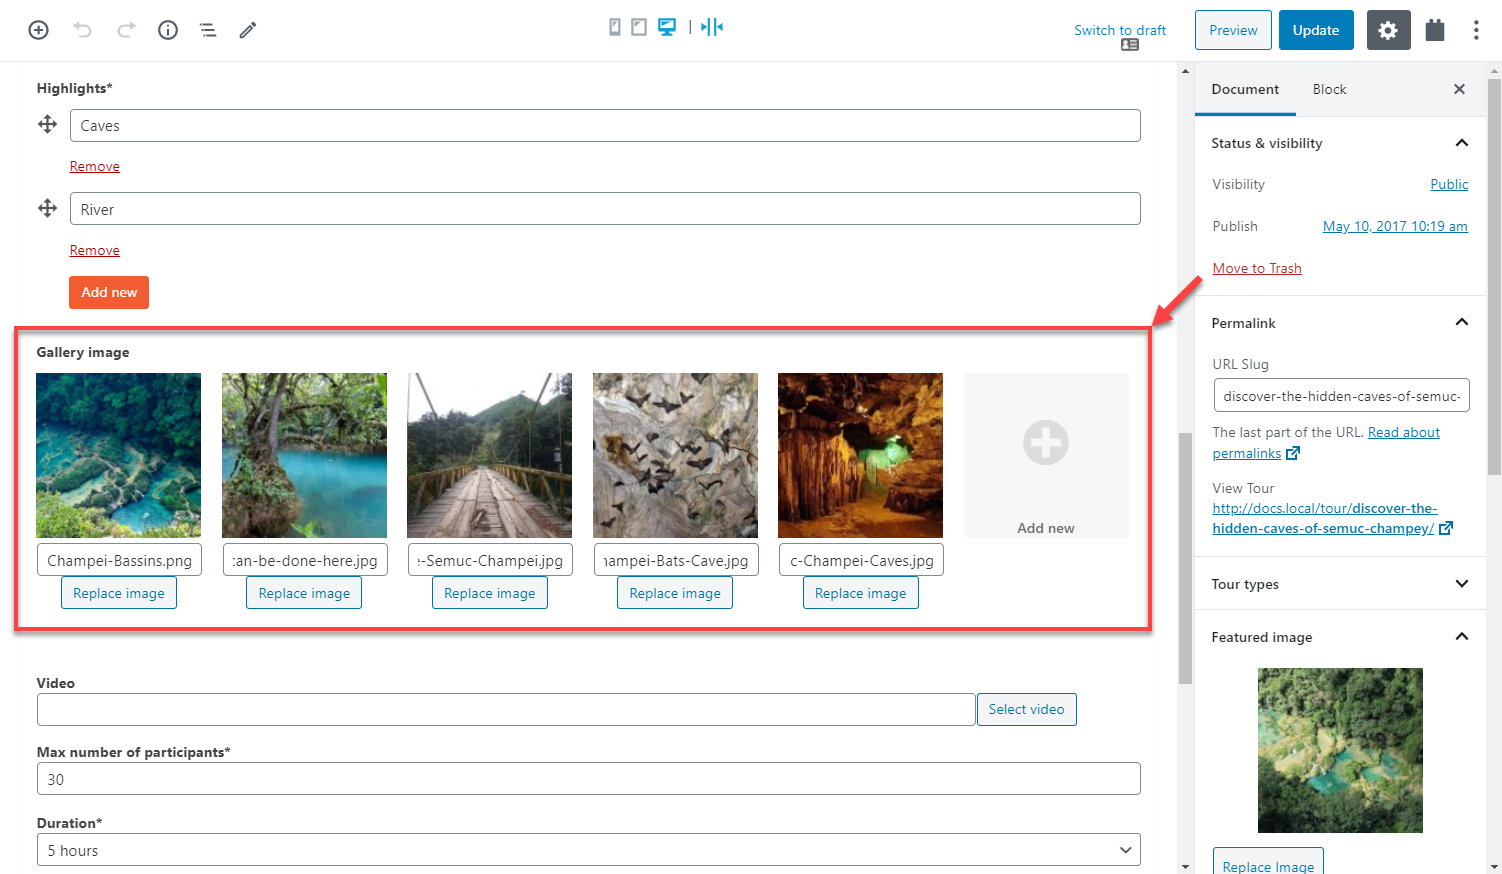
By default, each custom field can have one value. However, sometimes you will want to have multiple values for one field.
For example, using a repeating image field allows you to easily add galleries and sliders.
To enable this option:
- Edit the single field in question.
- Look for the Single or repeating field option.
- Select Allow multiple instances of this field.
Please note that not all types of fields can be repeating ones.
Later, when you learn about displaying custom content, we’ll use one of these blocks to display repeating individual fields:
- Single Field – use this block to display “non image” repeatable fields
- Slider / Gallery – use these blocks to display image repeatable fields
Making groups of fields repeatable
You can make an entire group of fields “repeatable”. For example, if you’re making a cooking site, you could store the “ingredients” which have “name” and “quantity”, as a repeatable fields group.

To create a group of repeatable fields:
- Go to the Toolset → Custom Fields page and click on Add New custom fields group.
- Select to create a post field group.
- Name your main field group and save it.
- To be able to insert a repeatable group of fields, your main group needs to be assigned to a single post type. Click on the Edit button in the Where to include this Field Group section and select one post type.
- Click on the Add New Repeatable Group button, name the repeatable group, and start adding fields to it.
To display repeatable field groups, you’ll need to create a View.
Learn all about this in the lesson about creating and displaying repeatable field groups.
Conditionally display custom fields in the admin
Sometimes, you will want to display a custom field based on different conditions.
For example, if you have custom fields about different rooms of a property, it makes no sense to display them for a property of the “land” type.
You can conditionally display a single field or a whole group of fields.
Learn how to easily do this in the lesson about conditionally displaying custom fields in WordPress backend.
Add a Post Reference Field to Connect Two Posts
Toolset allows you to add a Post Reference custom field to your content. This field allows you to connect two posts and then display information from one another. For example, you might connect an “room” post to a “house” post (each room can belong to one house). When you display a room, you can also easily display fields that belong to the house.
You can find detailed information about using this field in the lesson about using the Post Reference custom field.
Add the Address custom field
Toolset allows you to display posts on Google or Azure maps. For this, you need to add an Address custom field to the post type.
Please note that the Address custom field is only available if you have the Toolset Maps plugin installed and active.
Related topics
- Using Custom Fields vs. Taxonomy
- Conditionally Display Custom Fields in WordPress Backend
- Adding a Custom Taxonomy to WooCommerce Products
- Using Post Reference Field to Set-Up One-to-Many Relationships
- How Content is Displayed
- Adding Custom Posts
- When and Why You Should Use Custom Types
- Creating a Custom Taxonomy
- Creating a Custom Post Type
- What Are Custom Types and How They Work
- Convert existing custom types and fields to Types control
- Limitations on HTML Content in Post Fields