Skip Navigation

[Resolved] Using flexslider 2 with Toolset

This support ticket is created 5 years, 5 months ago. There's a good chance that you are reading advice that it now obsolete.

This is the technical support forum for Toolset - a suite of plugins for developing WordPress sites without writing PHP.

Everyone can read this forum, but only Toolset clients can post in it. Toolset support works 6 days per week, 19 hours per day.

Sun Mon Tue Wed Thu Fri Sat
8:00 – 12:00 8:00 – 12:00 8:00 – 12:00 8:00 – 12:00 8:00 – 12:00 - -
13:00 – 17:00 13:00 – 17:00 13:00 – 17:00 13:00 – 17:00 13:00 – 17:00 - -

Supporter timezone: America/New_York (GMT-04:00)

This topic contains 8 replies, has 2 voices.

Last updated by Christian Cox 5 years, 5 months ago.

Assisted by: Christian Cox.

Author
Posts
#1297087
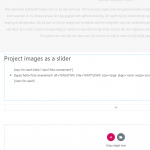
error-stacked-photos.PNG
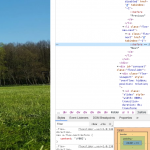
screenshot-toolset-content-template.PNG
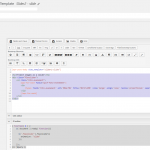
html-fail.PNG

Hi there. So I am trying to add a slider to my site using the steps that are giving in this article: https://toolset.com/forums/topic/how-to-display-the-pics-i-uploaded-as-a-slider/#post-518295.

I made a custom field with repeated images. I want them to show as a slider.

However, it is not working (as you can see on: hidden link). I've been struggling quite some hours with it now. I could really use your help with this. I'll try to be as specific as I can on what I did. What I did is this:

1. I added this piece of code to my functions.php file in my childtheme:

function enqueue_flexslider(){

if ( !is_admin() ) {

wp_enqueue_script( 'flexslider-js', get_theme_file_uri( '/flexslider/jquery.flexslider-min.js' ), array( 'jquery' ), '1.0' );
wp_enqueue_style( 'flexslider-css', get_theme_file_uri( '/flexslider/flexslider.css' ), array(), '1.0' );

}

}
add_action( 'wp_enqueue_scripts', 'enqueue_flexslider' );

2. I created a folder called "flexslider" within my child theme (map: /public_html/wp-content/themes/child-theme-astra)

3. I pasted two files from the woocommerce flexslider 2 zipfile to my folder "flexslider", called: "flexslider.css" and "jquery.flexslider-min.js".

4. I created a Toolset content template called Slider2 (slug; slider2-slide), where in the template the code is:

[wpv-post-body view_template="None"]

<h2>Project images as a slider</h2>
<div class="flexslider">
<ul class="foto-evenement">
[wpv-for-each field="wpcf-foto-evenement"]

  • [types field='foto-evenement' alt='%%ALT%%' title='%%TITLE%%' size='large' align='none' resize='proportional' separator=', '][/types]
  • [/wpv-for-each]

    </div>

    And in the js editor I've put:

    ( function( $ ) {
    $( document ).ready( function(){

    $('.flexslider').flexslider({
    animation: "slide"
    });

    });
    })( jQuery );

    Now the weird thing is that when I copy paste the html on my site (as you can see in the screenshot) nothing happens. However, when I change the name of the template to slider2-slide and add this as a shortcode to the page (as you can see in the other screenshot), the photo's are stacked under each other. And I get an error that says: " content not displayed because it produces an infinite loop. the wpv-post-body shortcode was called more than once with the attribute view_template="slider2-slide" over the post "8-weekse Mindfulness MBSR training", triggering an infinite loop. I'll upload a screenshot of this too.

    I'm getting pretty desperate here. Please help me :). I want to use the "Slider with Carousel Slider as Navigation", shown at the flexslider website: hidden link.

    #1297853

    Okay if you'd like to use the thumbnail-style display, you should update the markup as well as the JavaScript file you created. Here is the updated markup you can copy + paste:

    <!-- These are the large images -->
    <div id="slider" class="flexslider">
      <ul class="slides">
        [wpv-for-each field="wpcf-foto-evenement"]
            <li>
                [types field='foto-evenement' alt='%%ALT%%' title='%%TITLE%%' size='large' align='none' resize='proportional' separator=''][/types]
            </li>
        [/wpv-for-each]
      </ul>
    </div>
    
    <!-- These are the thumbnails -->
    <div id="carousel" class="flexslider">
      <ul class="slides">
        [wpv-for-each field="wpcf-foto-evenement"]
            <li>
                [types field='foto-evenement' alt='%%ALT%%' title='%%TITLE%%' size='thumbnail' align='none' resize='proportional' separator=''][/types]
            </li>
        [/wpv-for-each
      </ul>
    </div>
    

    You may want to adjust the size attribute for the thumbnail images. For now, I'm using the standard WordPress thumbnail size.

    Here is the updated JavaScript code:

    ( function( $ ) {
    $( document ).ready( function(){
     
    $('#carousel').flexslider({
    animation: "slide",
    controlNav: false,
    animationLoop: false,
    slideshow: false,
    itemWidth: 210,
    itemMargin: 5,
    asNavFor: '#slider'
    });
    
    $('#slider').flexslider({
    animation: "slide",
    controlNav: false,
    animationLoop: false,
    slideshow: false,
    sync: "#carousel"
    });
     
     
    });
    })( jQuery );
    

    Let's start with those changes and see how it looks.

    #1298073

    Ok, I applied the changes and it's not working. Here's a link. I really appreciate the help!!! : hidden link

    #1298095

    Okay can you provide login information for me? I'll need to take a closer look. Thanks!

    #1299573
    Screen Shot 2019-07-24 at 8.56.43 AM.png

    1. How can I make the big image like 50% smaller without making the little pictures smaller too? I tried changing the proportion from large to medium but that only seems to decrease the quality of the photo's.
    I would edit the text editor element in the Elementor builder and cut out the entire 2nd wpv-for-each block. Then I would create another text editor element just below the first element. Paste the 2nd wpv-for-each here. Then I would modify the first text editor's width in the Elementor builder by dragging the edges to adjust the width. This should shrink the top image without affecting the bottom image.

    What css ID should I use to change the way the images look?
    To target the big images, try the following selector:

    #slider .slides > li > img {
      /* your image css goes here */
    }
    

    To target the thumbnails, try the following selector:

    #carousel .slides > li > img {
      /* your image css goes here */
    }
    

    3. How can I make sure there's a "next" and "previous" button on the big image? Again, if you could instruct me on how to find the right CSS ID or Class that would be awesome. For some reason when I use inspect element I never get the right one.
    The CSS selectors for the left and right nav "a" tags on the big image are:

    #slider .flex-direction-nav .flex-nav-prev a {
      /* your left (previous) custom css here */
    }
    
    #slider .flex-direction-nav .flex-nav-next a {
      /* your right (next) custom css here */
    }
    

    The arrows that are supposed to appear are added to the :before pseudo selector. See the attached screenshot. If you look in the console you can see that the font files are missing, that's why the strange open block character appears instead of an arrow.

    flexslider-icon.woff:1
    - Failed to load resource: the server responded with a status of 404 ()
    flexslider-icon.ttf:1 
    - Failed to load resource: the server responded with a status of 404 ()
    
    #1299707

    Thank you!

    1. How can I make the big image like 50% smaller without making the little pictures smaller too? I tried changing the proportion from large to medium but that only seems to decrease the quality of the photo's.
    I would edit the text editor element in the Elementor builder and cut out the entire 2nd wpv-for-each block. Then I would create another text editor element just below the first element. Paste the 2nd wpv-for-each here. Then I would modify the first text editor's width in the Elementor builder by dragging the edges to adjust the width. This should shrink the top image without affecting the bottom image.

    I tried this but the slider seems to break when I do this. I tried it again with another block, so I can leave the working one alone. However, the working slider broke to now!

    2
    #slider .slides > li > img {
    /* your image css goes here */
    }
    To target the thumbnails, try the following selector:

    #carousel .slides > li > img {
    /* your image css goes here */
    }

    I tried to add this but it didn´t work :(.

    3. I tried to upload the missing files in the flexslider folder but it didn;t work! Still no navigation but that's maybe because the slider broke again.

    #1299813

    I tried this but the slider seems to break when I do this. I tried it again with another block, so I can leave the working one alone. However, the working slider broke to now!
    I broke these up into two separate text editors for you. Please try again now. I think I should have explained more carefully how to break this up, and using the Visual tab isn't a good idea to do that. I'm not good enough with Elementor to understand how to shrink the size of something horizontally.

    I tried to add this but it didn´t work 🙁
    Where did you add this code? What did you add inside the template code I provided? How do you know it didn't work? Can I see this on the site somewhere?

    3. I tried to upload the missing files in the flexslider folder but it didn;t work!
    Check the browser console. It still says those font files are 404, which means they were put in the wrong directory, or they were not uploaded to the server yet. The paths should be as shown here:
    hidden link
    hidden link

    #1300233

    Thank you a lot Christian! There was a problem with the slider. The slider broke the backpanel of my wordpress site. I couldn't create other pages with elementor and I also couldn't change toolset views. It was because of the flexslider code in my function.php. Your colleague told me about a plugin he made. I installed it now and removed the code from my function.php. Since he made it, I think it's best if I discuss it more with him. The additional code for worked great by the way. So thanks again for all the effort and maybe speak to you somewhere in the future :). Have an awesome day.

    #1300581

    Good luck with your project!