Hi Jeffrey
Let me walk you through the steps and hopefully you will be able to do this on your site.
Firstly, you are going to need to add a little PHP code to your site, which you can add to the end of your theme's functions.php file, but if you are not comfortable editing that you can use a plugin such as Code Snippets and add (and activate) a snippet with the code there.
The PHP code is needed to add the flexslider library code and CSS to your site.
Go to hidden link and use the download button.
That will download a zip file, which you need to expand. We only need two files: jquery.flexslider-min.js and flexslider.css. Go to the folder for your theme (e.g. wp-content/themes/twentyseventeen) and make a new folder called flexslider and copy those 2 files into that folder.
Now add the following PHP:
function enqueue_flexslider(){

	if ( !is_admin() ) {

		wp_enqueue_script( 'flexslider-js', get_theme_file_uri( '/flexslider/jquery.flexslider-min.js' ), array( 'jquery' ), '1.0' );
		wp_enqueue_style( 'flexslider-css', get_theme_file_uri( '/flexslider/flexslider.css' ), array(), '1.0' );

	}

}
add_action( 'wp_enqueue_scripts', 'enqueue_flexslider' );
If you are using Code Snippets, make a new Snippet and give it a title (e.g. "Enqueue flexslider files"), specify it is only required on the front end and save and activate.
If you were to visit the front-end of your site you should find that the two flexslider files above have been added to the page.
So now your task is to create the output of the image fields used for the slider so that it has the required format to work with flexslider.
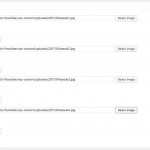
On my local test site I have a custom post type of Projects and I created a custom field group for Projects which includes a repeating image field ('slides') so that I can add multiple images to a Project to be displayed in the slider. You can see an example post where I have added several images in the screenshot slides.png.
So now I create a Content Template for single Projects.
The template looks like this:
[wpv-post-body view_template="None"]

<h2>Project images as a slider</h2>
<div class="flexslider">
    <ul class="slides">
        [wpv-for-each field="wpcf-slides"]
        <li>
            [types field='slides' alt='%%ALT%%' title='%%TITLE%%' size='large' align='none' resize='proportional' separator=', '][/types]
        </li>
        [/wpv-for-each]
    </ul>
</div>
Note my image field is called slides and so I'm using 'wpcf-slides' in the Views shortcodes above, you will need to edit these for the slug of your image field.
That will output the images with the required markup, so all that is left is to initialise the flexslider code.
In the JS editor of your content template add the following code:
( function( $ ) {
	$( document ).ready( function(){

      $('.flexslider').flexslider({
        animation: "slide"
      });

    });
})( jQuery );
Now when you view your posts on the front end the images will be displayed in the slider.
When you look at the flexslider page at hidden link you will see that you can modify the options for how the slider looks and works, and there are examples of how to change the options on those pages which you can use to modify the Javascript we added in the last section.
Good luck!


