How to Automatically Import Content to a Post Type With WP RSS Aggregator
Custom post types help you store custom content in your WordPress site, and Toolset helps you create custom post types and design custom layouts to display them to visitors.
However, you still need to manually add the actual content to your custom post types, which isn’t always the best solution, especially if you’re trying to aggregate any type of information.
It doesn’t have to be that way, though! With the right setup, you can put your custom post type content on autopilot, and we’re going to show you how.
Specifically, we’re going to show you how to automatically import content into the custom post types that you’ve created with Toolset using a tool called WP RSS Aggregator.
So you’ll be able to:
- Create a custom post type with Toolset Types
- Control how that post type looks with Toolset Layouts and Views (without needing to know any HTML/CSS/PHP)
- Automatically import content with WP RSS Aggregator and display it on the front-end according to your Layouts/Views
And as a little bonus, you can also make things multilingual with WPML, though that’s totally optional.
For this example, we’re going to use the idea of automatically importing videos from a YouTube channel and embedding them in a “Video” custom post type.
However, you can apply the basic principles that you’ll learn to pretty much anything. Some of the many possible use cases are:
- Job listings
- News curation sites
- Blogger communities
- A regularly-updating portfolio of your own work
- Podcast listings
- Etc.
Basically, if the content you want to import into a custom post type has an RSS feed, you can follow this tutorial!
What You’ll Need to Follow This Tutorial
To follow this tutorial, you’re going to need the following tools:
- Toolset – specifically, we’ll rely on the Types, Layouts, and Views components the most, but the other components can come in handy, too. For example, you could use Forms to also allow visitors to submit their own content, in addition to the content that you automatically import via RSS feed.
- WP RSS Aggregator – this is the free core plugin that lets you import RSS feeds.
- Advanced Feeds Bundle – this is a premium add-on for WP RSS Aggregator that lets you import RSS feed items as actual WordPress post types. You’ll need the Feed to Post add-on at a minimum, but the Advanced Feeds Bundle gives you some extra functionality (and includes Feed to Post).
- WPML – optional – if you want to make everything multilingual you’ll need WPML. This ohttps://www.wprssaggregator.com/extension/advanced-feeds-bundle/nly applies to translations, though, and is totally optional.
Beyond that, you’ll also need the RSS feed of the content that you want to automatically import. This WP RSS Aggregator knowledgebase article shares some general tips for finding RSS feed URLs, and tools like FetchRSS can help you create custom RSS feeds for services like:
- YouTube
- SoundCloud
- Amazon
- Etc.
Step-by-Step: How to Automatically Import Content to a Custom Post Type on WordPress
To give you an idea of how you’re going to apply these tools, here’s a bird’s eye view of the entire process (we’ll cover each step in detail, don’t worry):
- Create a custom post type with Toolset Types
- Add any relevant custom fields
- Add any relevant custom taxonomies
- Tell WP RSS Aggregator to automatically import an RSS feed to that post type
- Create a Layout for individual feed items
- Create a View and Layout to display the archive of all your feed items
- Set up WPML to make everything multilingual (optional)
As we mentioned above, we’re using the example of a “Video” post type that automatically imports videos from a YouTube channel. As such, we’ll use that terminology in the tutorial. But remember – you can apply these basic principles to any content with an RSS feed.
Ready to get started? Let’s dig in!
Step 1: Create a New Custom Post Type
First up, you need to create the basic custom post type that will house your YouTube videos.
To do that, go to Toolset → Post Types and click Add New:

Then, enter the basic details for your post type. For this example, that’s “Video”.
You can also choose whether or not to use the default WordPress categories and tags with your post type, as well as which sections of the editor to display. This last one isn’t super important because we’ll be automating everything, but you might want to enable the Featured Image as it lets you create better-looking archive pages:
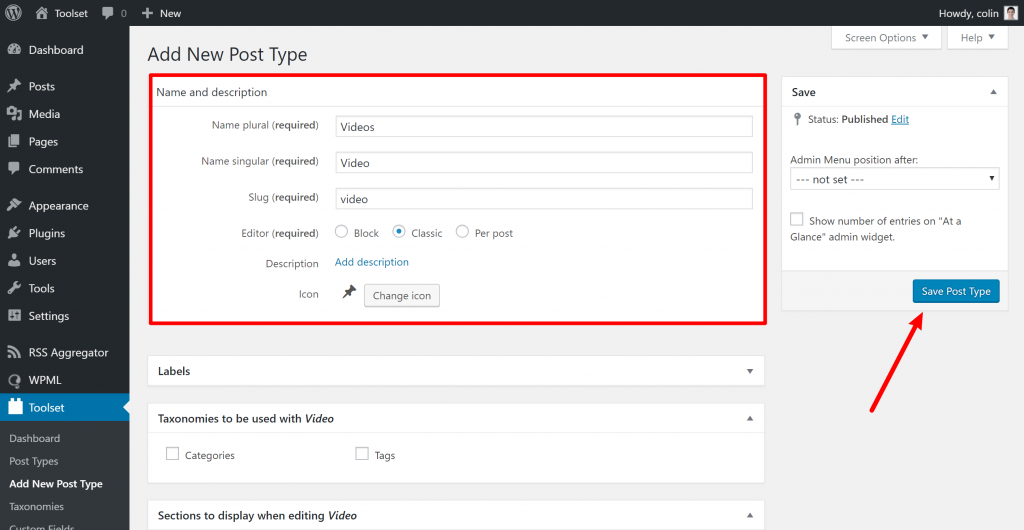
Once you’ve made your choices, click Save Post Type.
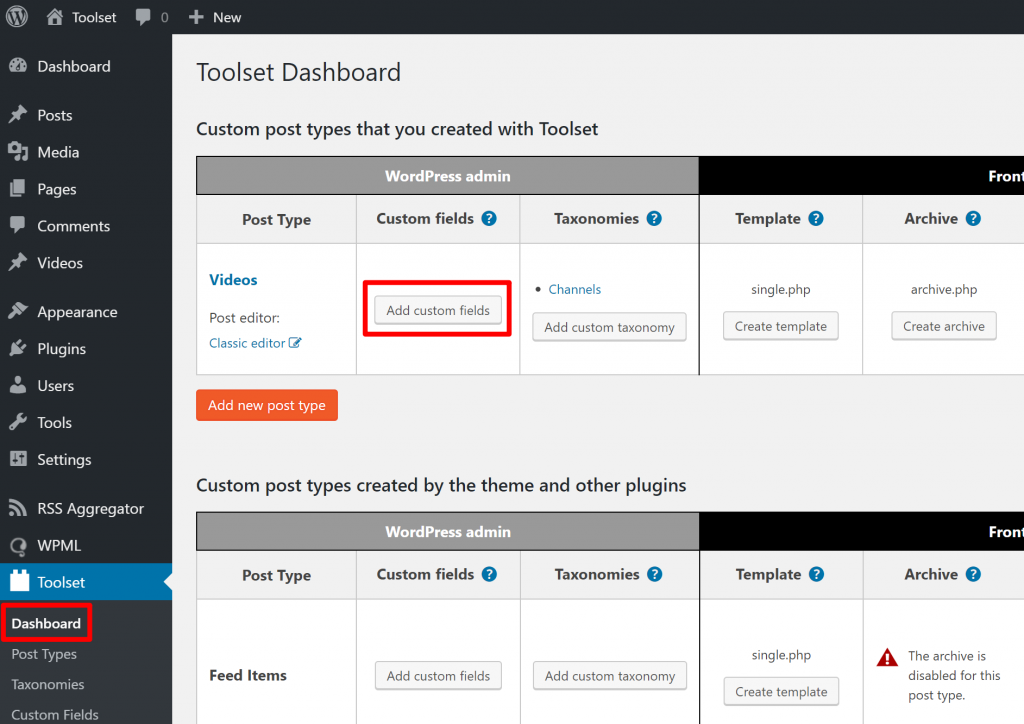
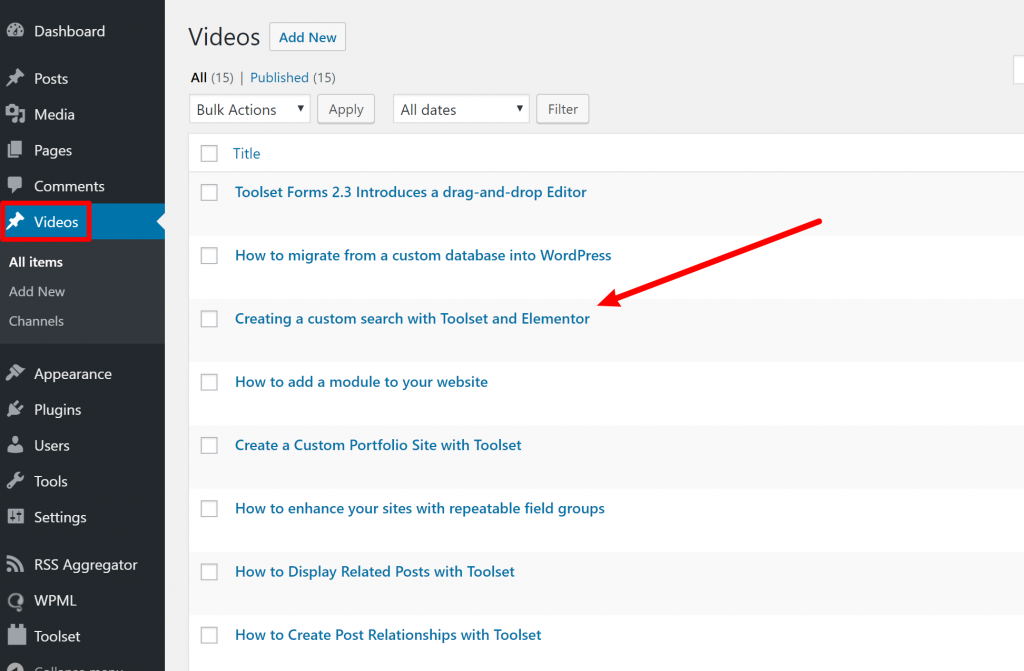
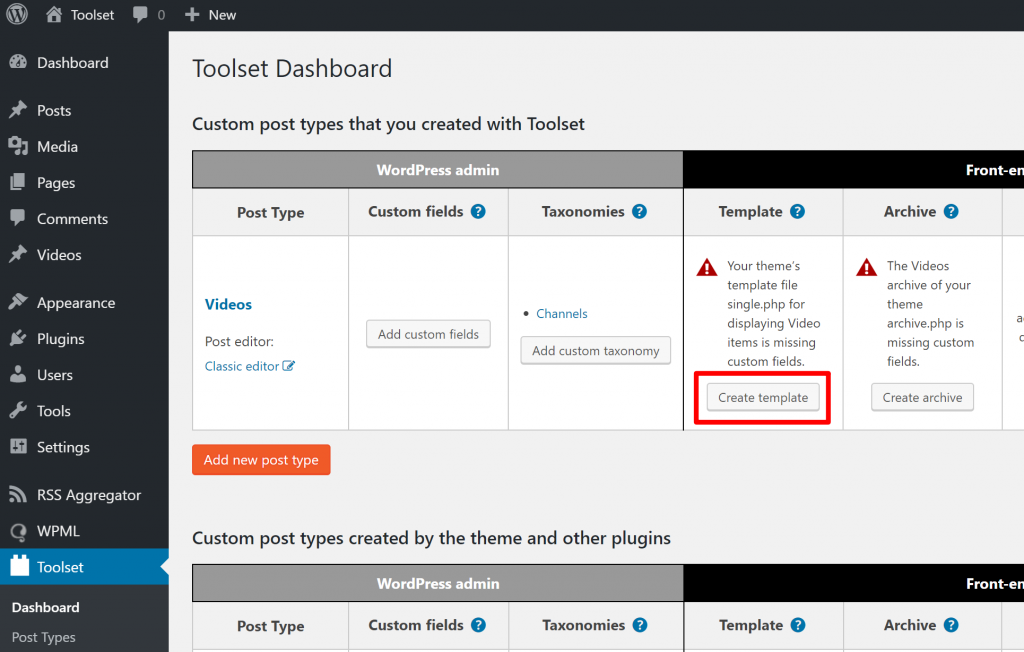
Then, you should see your new Videos post type in your WordPress dashboard, as well as the Toolset dashboard:

Step 2: Add Any Custom Fields
Custom fields help you store additional information about your post type. Later on, WP RSS Aggregator will let you map information from your RSS feed to the custom fields that you add to your post type.
So – as long as the information shows up in the RSS feed, you can map it to custom fields that you create with Toolset.
Our YouTube example doesn’t really require any custom fields because the only extra information YouTube gives is the view count and rating…which aren’t very useful for a brand new video!
However, if you want to add custom fields, you can do that by clicking on Add custom fields from the Toolset dashboard:
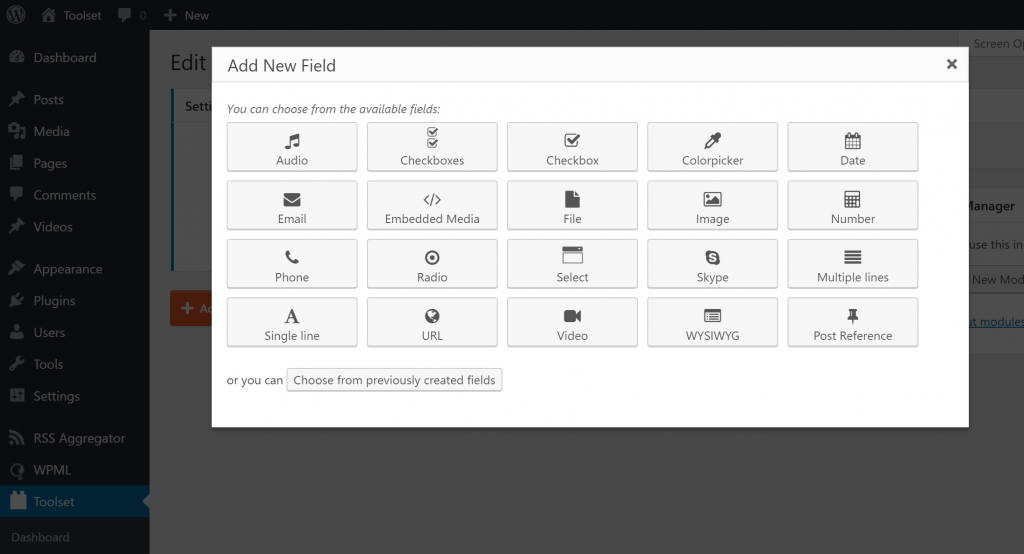
There, you can add as many custom fields as needed:

Step 3: Add Any Custom Taxonomies
Beyond custom fields, you might also want to use custom taxonomies to organize your imported content.
For example, let’s say that you want to import YouTube videos from more than one channel. It would be helpful to let visitors filter out videos by channel, right?
To give them that ability, you’d use a Channel custom taxonomy.
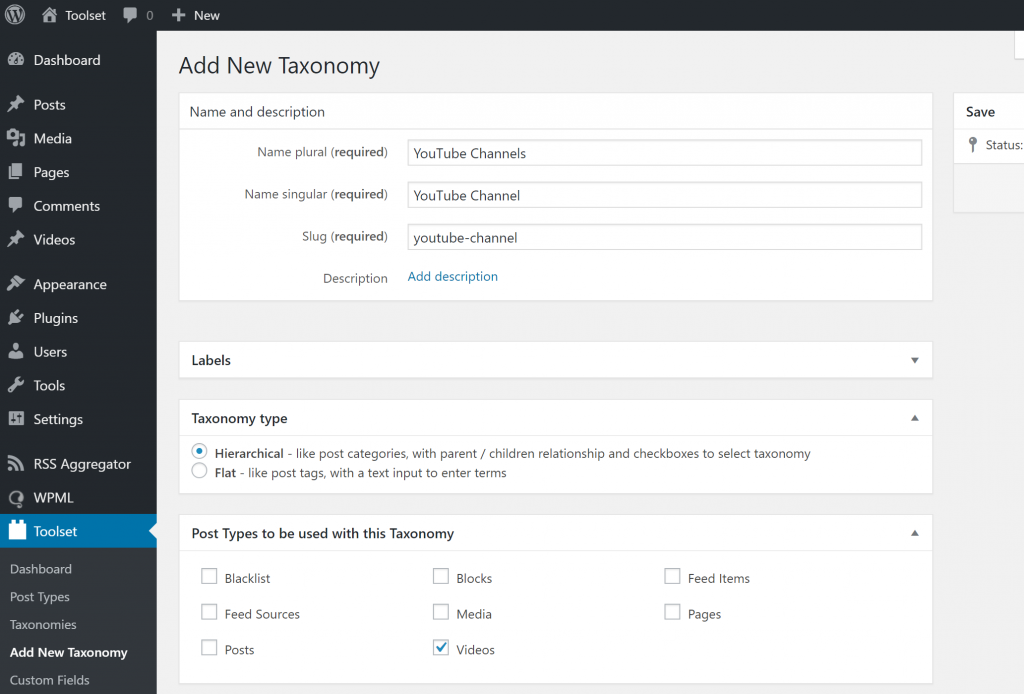
You can create a new custom taxonomy from the Toolset dashboard by clicking on Add custom taxonomy:

There, you can enter its name and also choose its type:
- Hierarchical – like a blog post’s category.
- Flat – like a blog post’s tags.
Step 4: Set Up WP RSS Aggregator
Now that you have your custom post type, custom fields, and custom taxonomies set up, you’re ready to start adding content with WP RSS Aggregator and its Feed to Post add-on.
To do that, go to RSS Aggregator → Add New.
First, give your RSS feed a title and enter the RSS feed URL. After you add your feed URL, you should see a preview of the last 5 feed items appear on the right-hand side:

For YouTube channels, you can use this format: https://www.youtube.com/feeds/videos.xml?channel_id=channel_id, where channel_id is the part that comes after /channel/ in a channel’s URL.
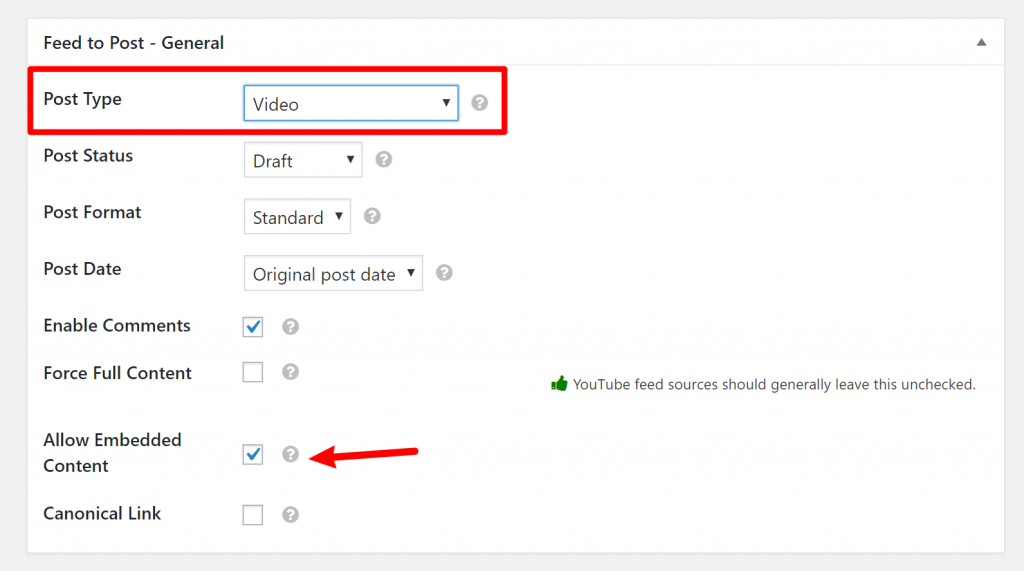
In the Feed to Post – General settings, you need to choose the post type that you created from the Post Type drop-down. For this example, you want the Video post type.
Below that, you also need to choose the default status (e.g. draft vs published right away). And for this YouTube example, you also need to check Allow Embedded Content so that WP RSS Aggregator can embed the actual YouTube video player in the post body:
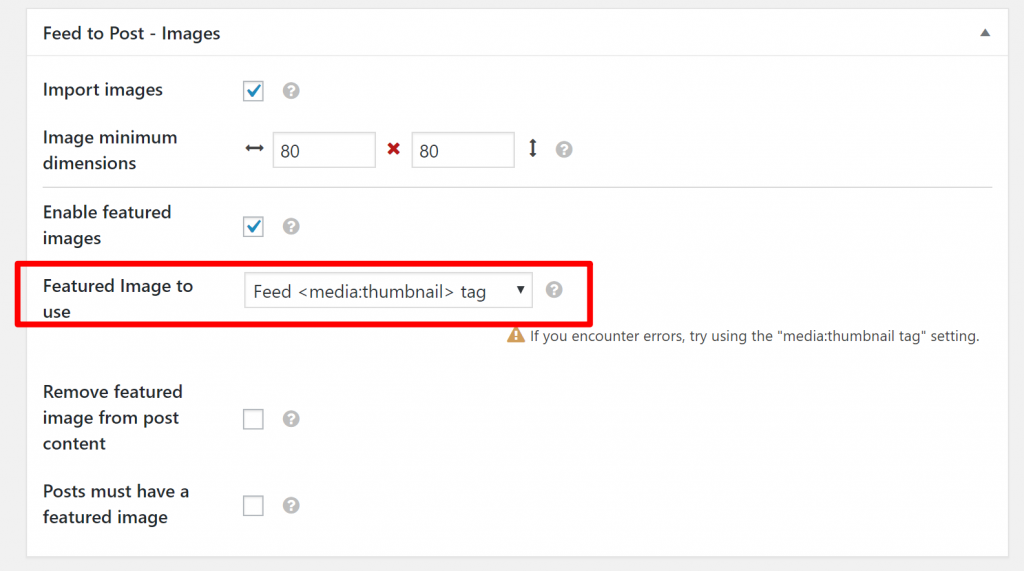
Below that, you can choose how to handle images. For YouTube videos, you’ll want to choose the media:thumbnail option under Featured Image to use. This tells WP RSS Aggregator to automatically set the WordPress featured image as the thumbnail that YouTube provides:
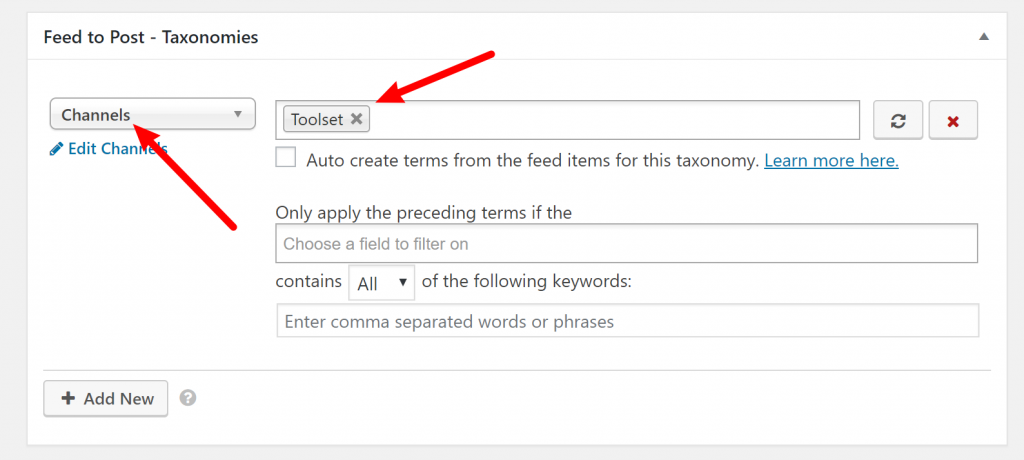
Then, the Feed to Post – Taxonomies section lets you connect your feed to the custom taxonomy you created in the previous step.
Because this is the RSS feed for the Toolset YouTube channel, you can just set the Channels taxonomy to be equal to “Toolset” for every video imported from this feed.
For other use cases, however, you can also automatically create terms from data in the RSS feed:
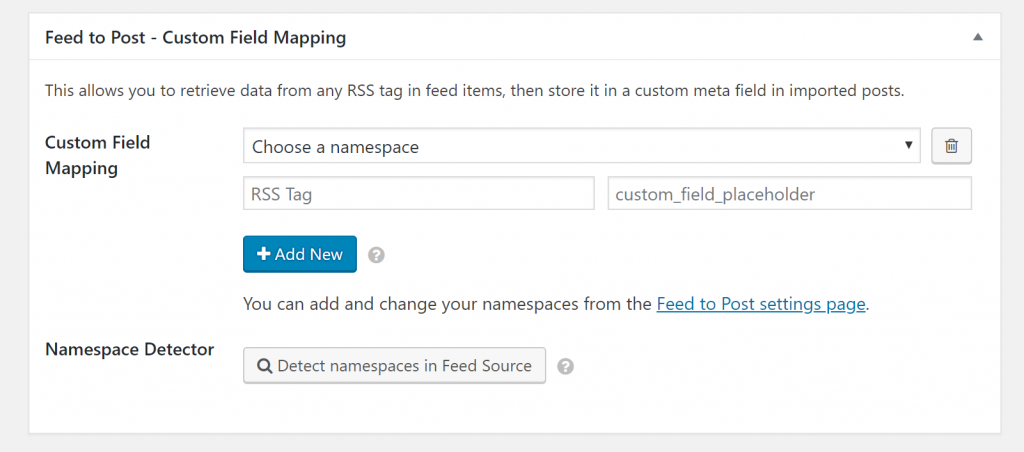
Finally, there are the Feed to Post – Custom Field Mapping options. If you want to map RSS feed data to custom fields that you’ve created with Toolset, this is where you’ll do it.
To set things up, you’ll need to look at the raw RSS feed to find the information that you want. Then, you can enter the namespace and RSS tag, as well as the WordPress custom field that you want to associate that information with:
Feel free to configure other settings, as well!
For example, you can prepend or append content to the feed information, or you can use Extraction Rules to remove unwanted information from a feed.
Once you’ve finished making your choices, click the Publish Feed button to start importing content.
After, you’ll need to repeat the process for any other feed sources you want to use. For example, you could mix in content from a different YouTube channel.
Now, if you go to your Videos custom post type, you should see all your imported content:
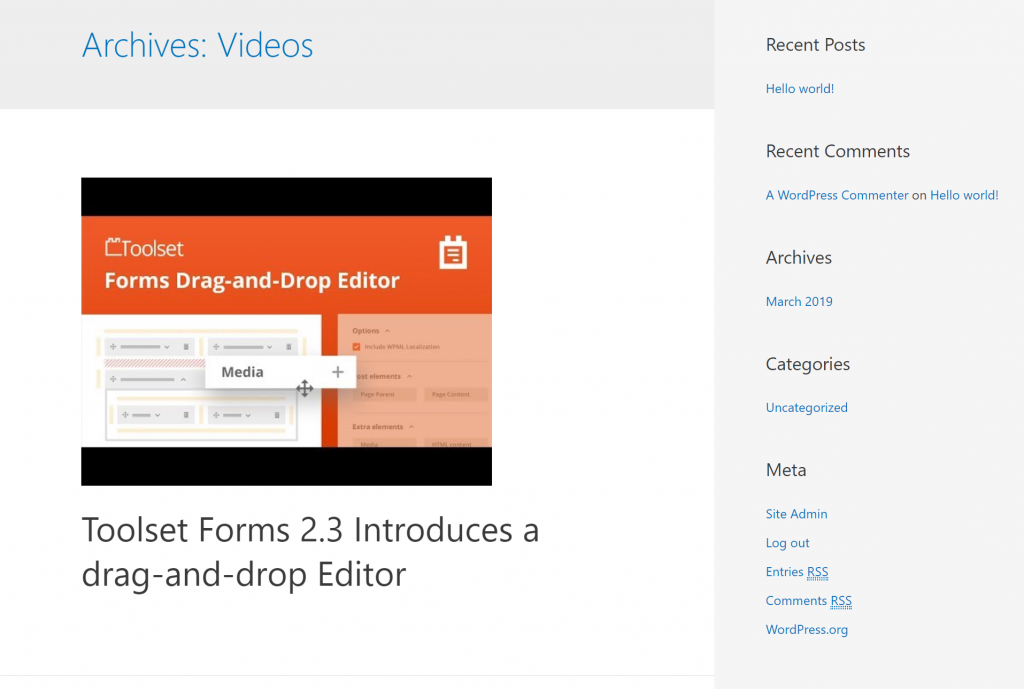
However, if you actually look at the front-end design of an individual video, it’s not very user-friendly right now (this is using the default Astra theme):

That’s where Toolset Layouts come in!
Step 5: Create a New Layout for Single Videos
Your Layout controls how your custom post type looks on the front-end. One of the advantages of the Toolset Layouts component is that you can build a layout for your custom post type without the need to use any custom HTML/CSS/PHP.
To create a more user-friendly layout for single videos, go to the Toolset dashboard and click Create template for your post type:
This will create a new Layout for your post type:
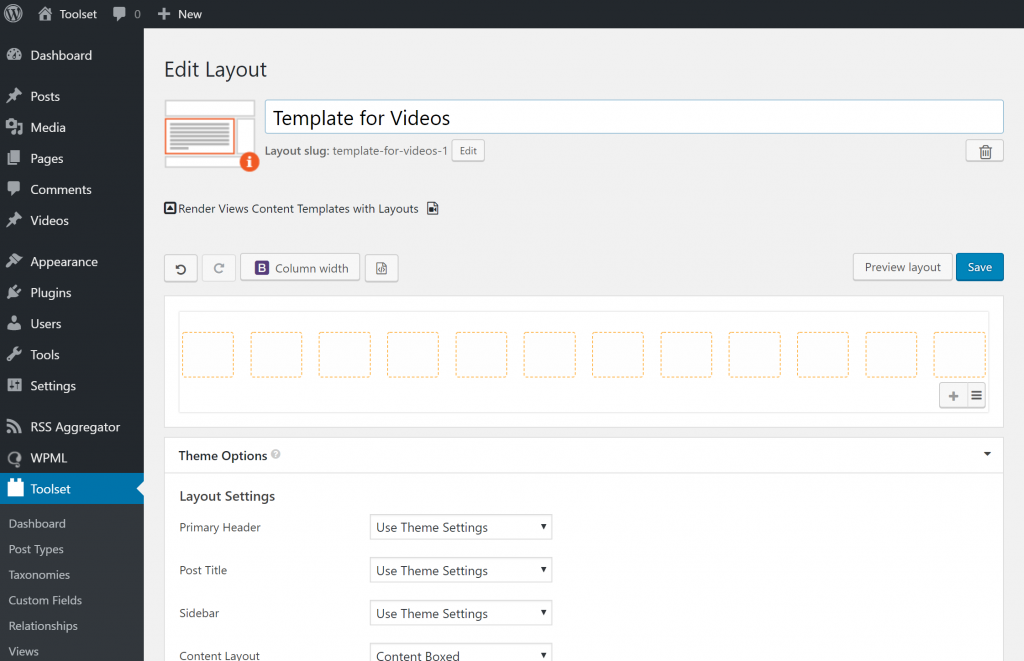
You can use the editor and the theme options to design the layout of your page.
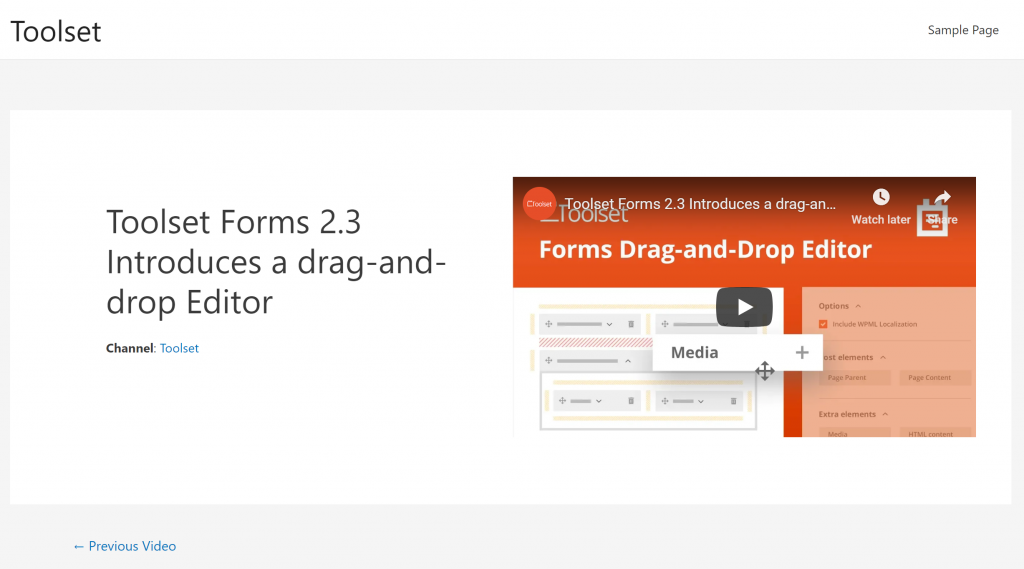
For example, here’s a simple layout where the video title and channel taxonomy are displayed on the left (using Toolset’s shortcodes inside of a Visual Editor cell), and the embedded video is displayed on the right (using the Post Content cell, because WP RSS Aggregator imports the video player into the main content area):

On the front-end, here’s how the single video layout looks now:
Using the Toolset shortcodes, you could also include plenty of other information (including custom field data).
Step 6: Create a New View and Layout for Your Video Archive Page
The Layout above handles how a single video looks, but you’ll still have the issue of an odd-looking archive page (the page that lists all your videos).
For example, here’s how the archive page looks with Astra’s default settings:
To fix that, go to the Toolset dashboard and click Create archive:

This will open a new Layout for your archive page, where you can use a View to loop your video content. That is, to display multiple videos at a time (learn more about Views):

Toolset lets you create a View from within the Layouts interface by inserting a View cell. The example above is just a simple View that loops the:
- Video title
- Channel taxonomy
- Embedded video player

Here’s what the loop looks like in a basic two-column layout:
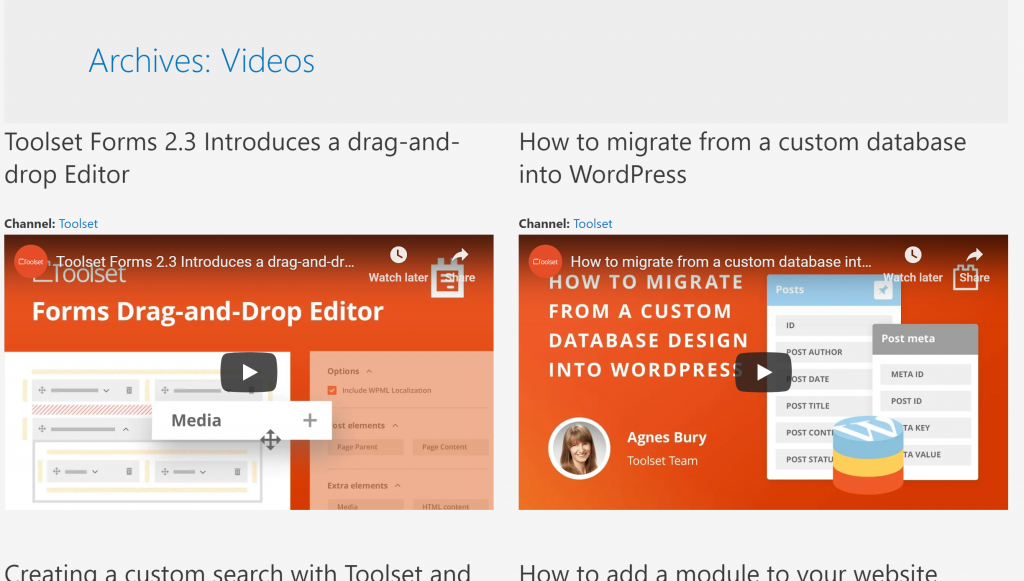
And with a single layout and an archive layout, you’ve got all the basics out of the way!
Any new feed items that WP RSS Aggregator imports will automatically display according to the Layouts and Views that you’ve created with Toolset.
Step 7: (Optional) Translate Everything With WPML
If you want to take things one step further, you can use WPML to translate all the content that you automatically import with WP RSS Aggregator. You can even take advantage of the new automatic machine translation functionality in WPML’s Advanced Translation Editor to save time.
To do that, you’ll first want to go to WPML → Settings and make your video post type and taxonomies translatable:

WP RSS Aggregator also gives you the option to set the default language for your feed source when you add a new RSS feed source or edit an existing one:

From there, you can translate your imported content like you would any other type of content.
Where Can You Go From Here?
At this point, we’ve covered the basics of how you can automatically import content to a custom post type with WP RSS Aggregator and then use Layouts and Views to control how that content displays on the front-end.
With other Toolset components – like Forms and Access – you can go even further.
For example, let’s say that you’re using this approach for a different use case – automatically importing job listings.
There are a few ways you could go with this.
One direction would be to use the Toolset Access component to create a restricted site and make a private community for curated job listings. You could even charge for access in order for job-seekers to join your site and view the jobs.
Another approach would be to charge employers to submit their own job listings to mix in with the job listings that you’re automatically importing via WP RSS Aggregator. To do this, you could use the Toolset Forms component to create a front-end form that lets businesses submit their own entries to the job listings custom post type.
The Toolset Reference sites are a great resource here. You could use many of those as a good baseline and then enhance them by automatically importing fresh content with WP RSS Aggregator.
Final Thoughts
Toolset helps you store content in custom post types and custom fields and control how that content looks on the front-end of your site.
However, the one thing Toolset can’t help you with is creating that content in the first place.
That’s where WP RSS Aggregator comes in. It lets you automatically import any content from an RSS feed and slot it into the custom post types, custom fields, and layouts that you create with Toolset.
Combine the two, and you can create a customized site that’s ready to display whatever content you want to import. Give it a try and build something awesome!
I wasn’t aware of this plugin. I’ve compared it to my standby WP All Import which appears to be more powerful and the Pro versions cost less. The UI on this one may be nicer though.
WP Import All was previously written about on this blog.
https://toolset.com/2018/10/wp-all-imports-integration-with-toolsets-types-fields-and-post-relationships-makes-it-easy-to-import-your-data/
https://toolset.com/documentation/user-guides/how-to-import-content-into-wordpress-using-csv/how-to-import-data-from-a-csv-file-using-the-wp-all-import-toolset-types-add-on-plugin/
Fantastic post, thank you very much for taking the trouble to write it and publish it, it will do me a lot of good for a job I have to do on a client’s website this week. Thanks again.
I used WP RSS Aggregator for a few years and was frustrated with it. I found the WordPress Automatic plugin and haven’t looked back. It’s way cheaper too.
https://codecanyon.net/item/wordpress-automatic-plugin/1904470