8 Ways to Improve the User Experience of Your WordPress Admin
He says he gets drunk to test your website, and he will charge you 500 bucks for it. Does this sound like a joke? No, this is how an experienced UX professional advertises himself to attract more customers. “Your website should be so simple, even a drunk person could use it,” he explains. We do not know how successful he is, but judging by the feedback that we are receiving from our case study interviewees, UX is a hot topic these days and your customers are willing to pay for improving it!
So why not simplify your customer’s life and earn more money? Both sides will be happy. Today, we show how you can do this by improving the UX of your WordPress dashboard. Stay with us to see real life examples coming from our customers’ sites!
Great UX of your site: not only your front-end matters
 User Experience (UX) involves a person’s behaviors, attitudes, and emotions about using a particular product. This is what Wikipedia says.
In real life, great UX comes down to the “Don’t make me think” rule. The more user friendly your interface, the more positive emotions it triggers, and that is the point!
If you are a web developer, you have probably heard hundreds of golden rules on how to improve your site’s front-end to make the visitors of your site happy.
However, a WordPress-based site is not only the front-end. The WordPress user is not only the site’s visitor. In most cases, your project initiator will become the end user of your WordPress site. In most cases, they are all non-techies. That is why they came to you instead of developing the sites themselves.
If you forget to please this particular user, there are two possible outcomes:
- Your site’s carefully crafted front-end will turn into a disaster sooner or later.
- You will be harassed by emails and calls with hundreds of questions from the poor user, who is quaking in terror for fear of damaging something when changing the contents.
To avoid such problems, build your site keeping in mind that UX applies also to your WordPress admin. Here, we share some simple but effective practices regarding how to improve the UX of your Dashboard.
Tip 1: Separate your contents using Custom Post Types
A basic thing that you can do to improve the UX of your WordPress admin is to organize the contents well. Fortunately, the times when WordPress posts were organized only by categories and tags are gone.
Launching Custom Post Types was like a revolution for WordPress. Indeed, it is a much smarter way to separate your contents, especially if you deal with different kinds of data.
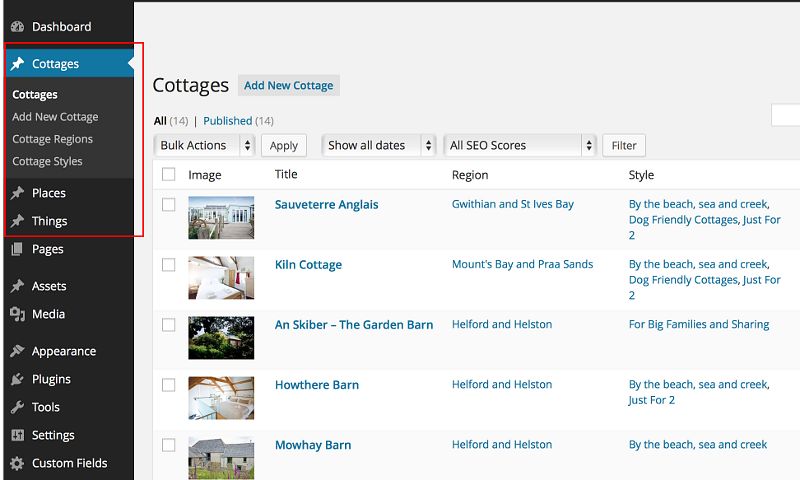
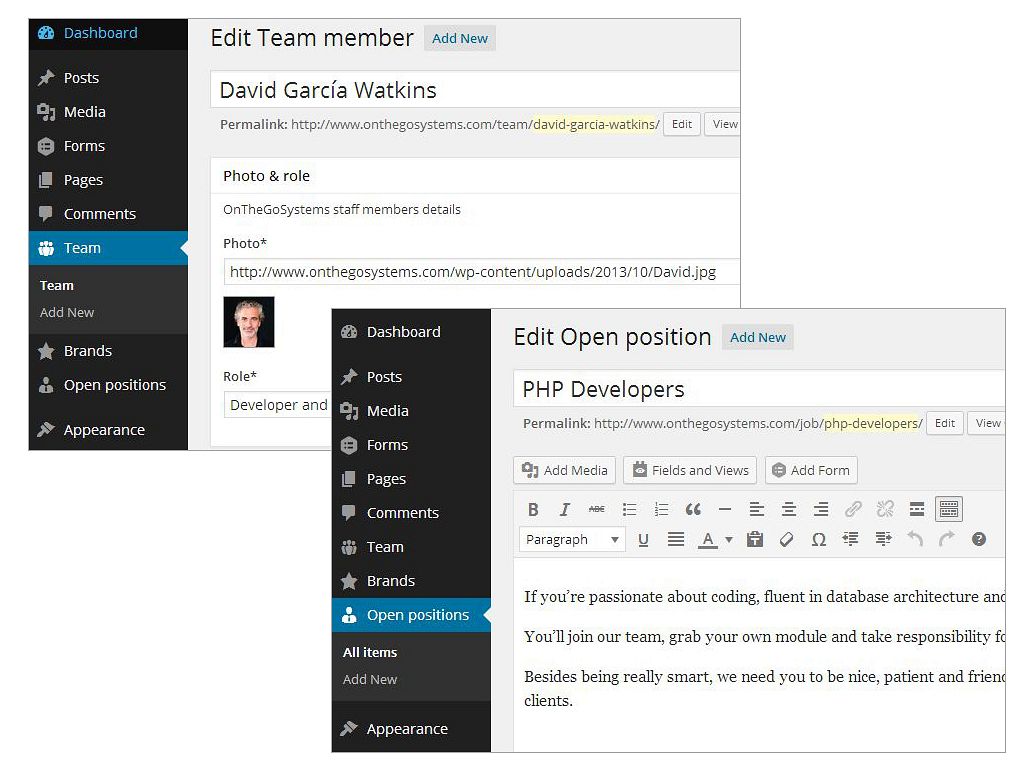
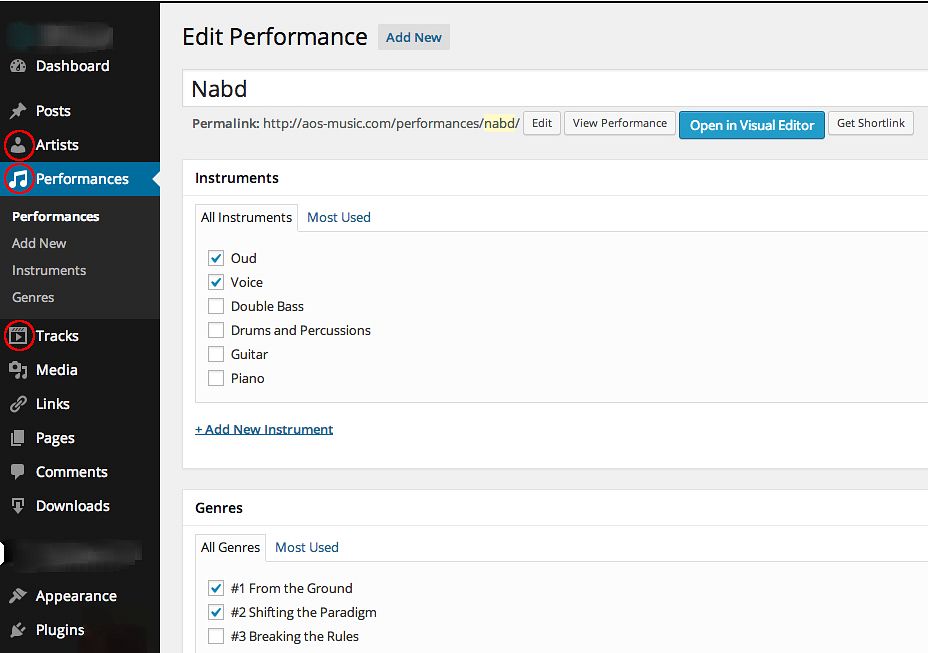
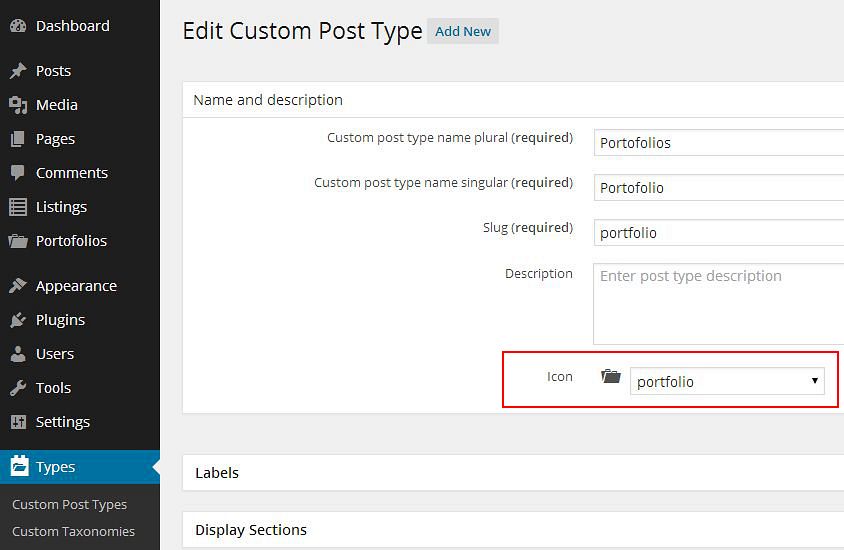
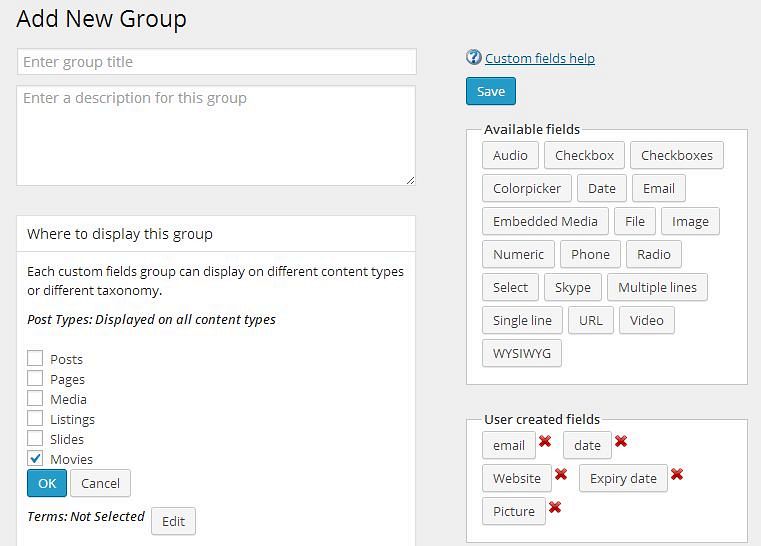
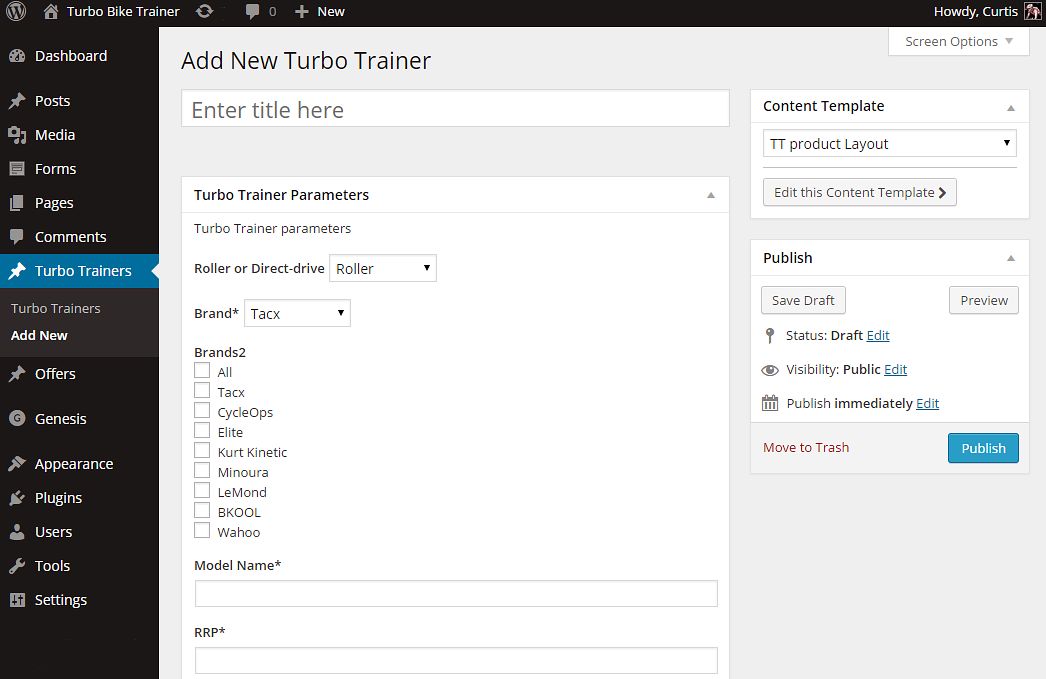
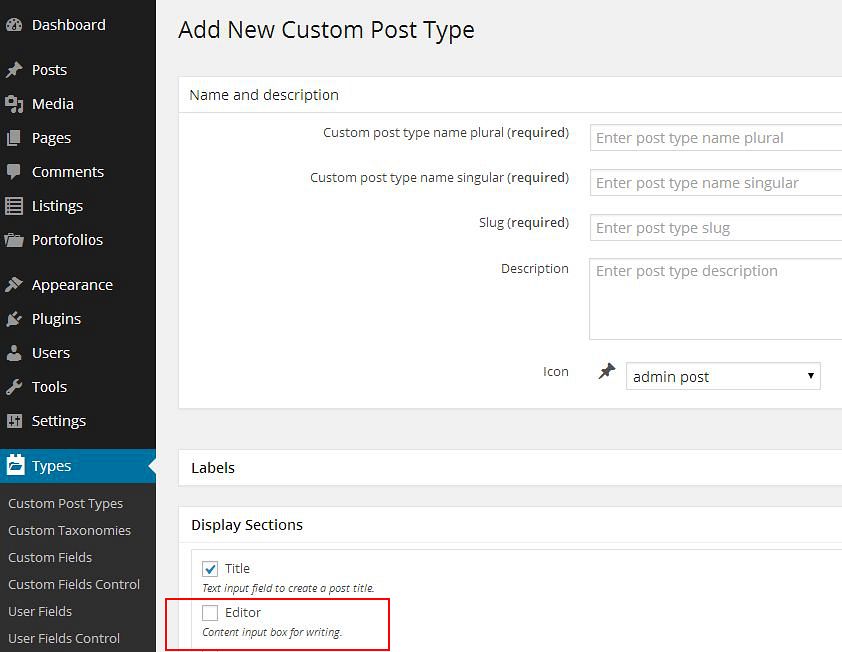
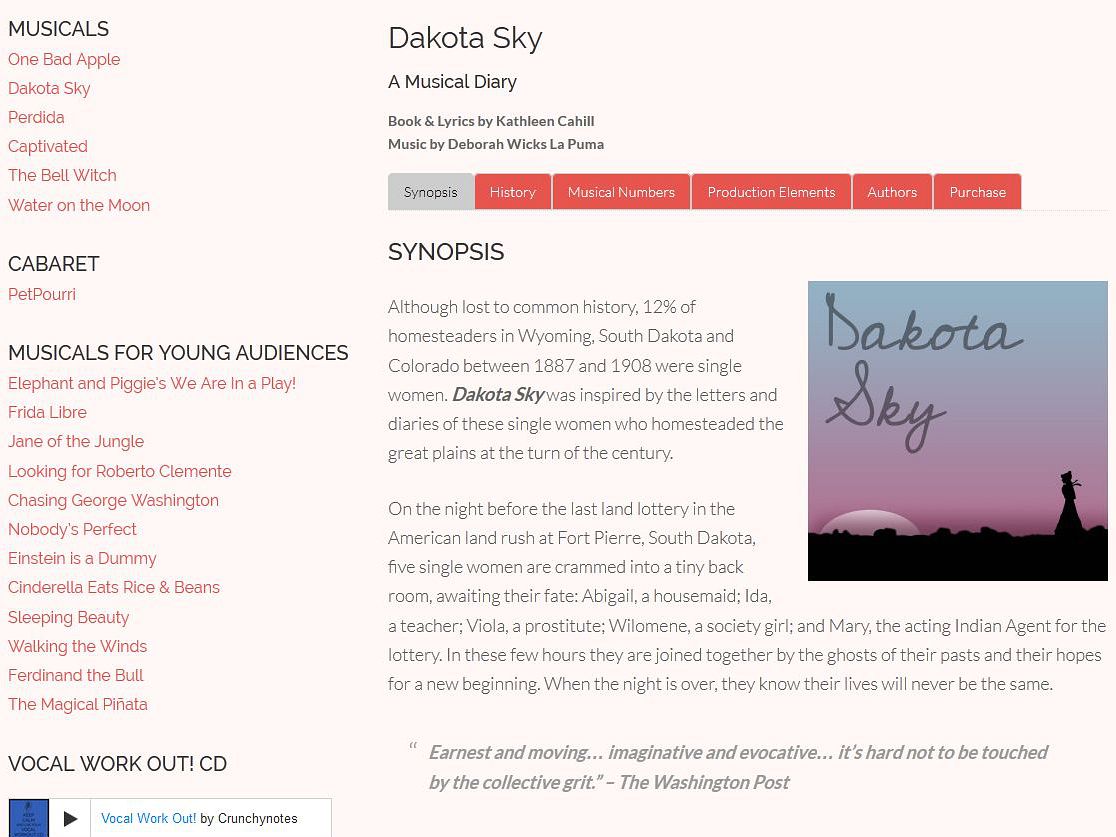
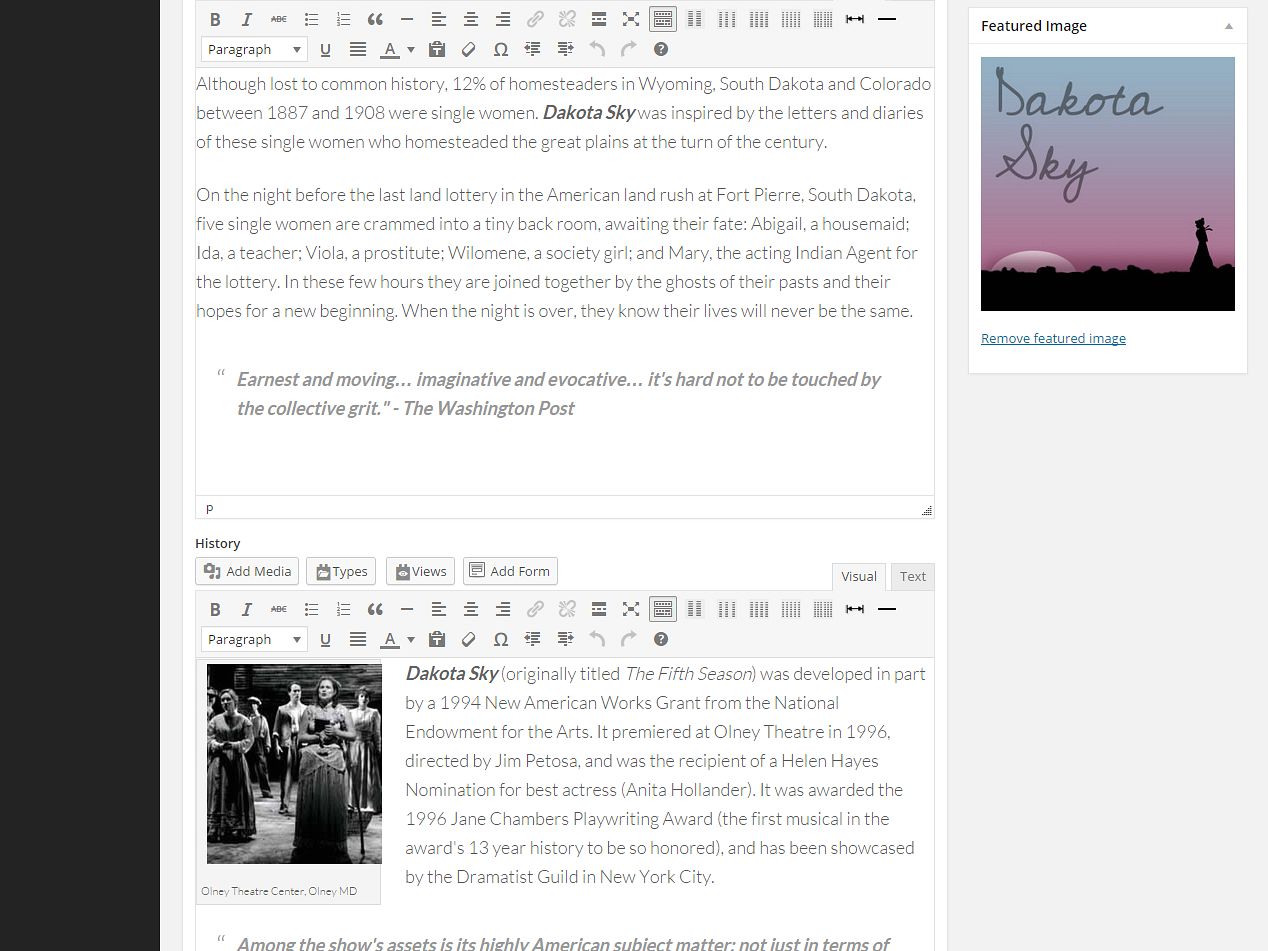
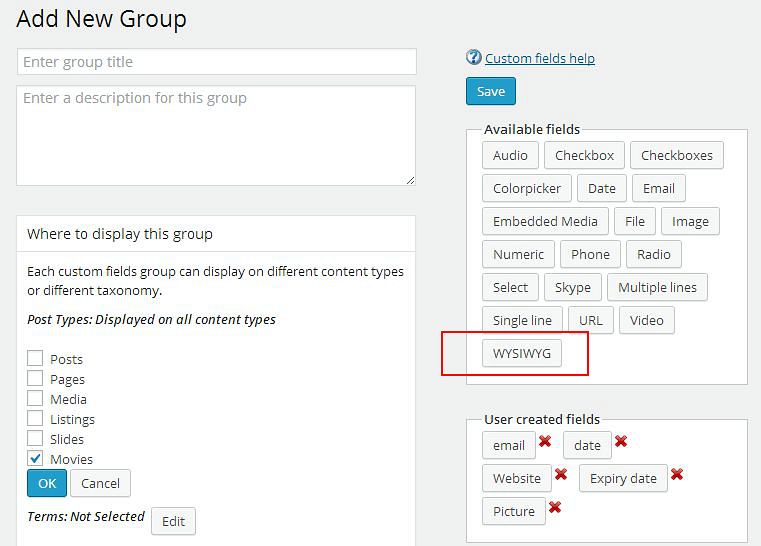
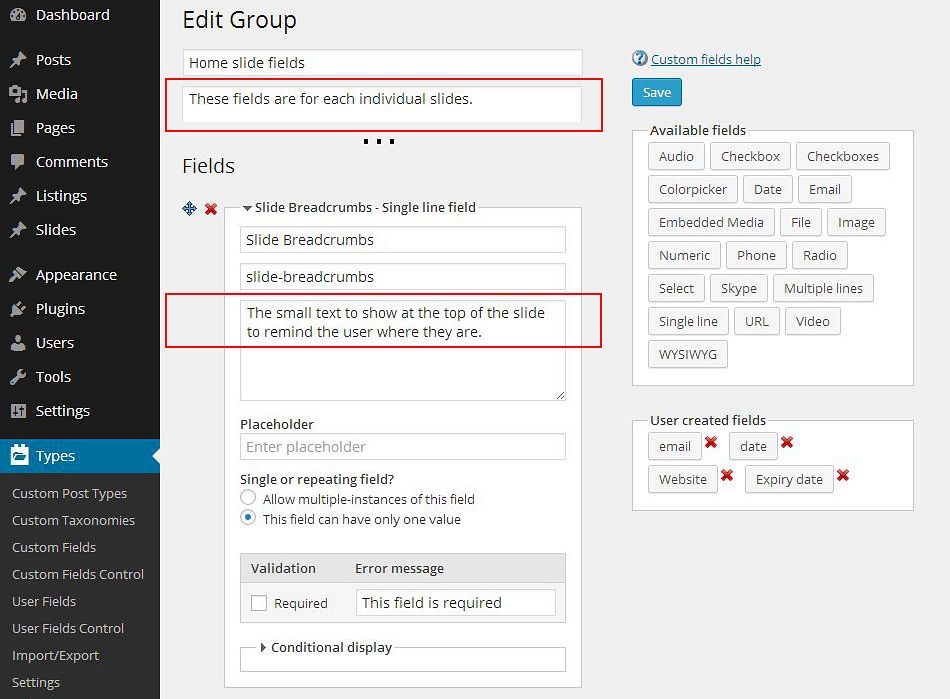
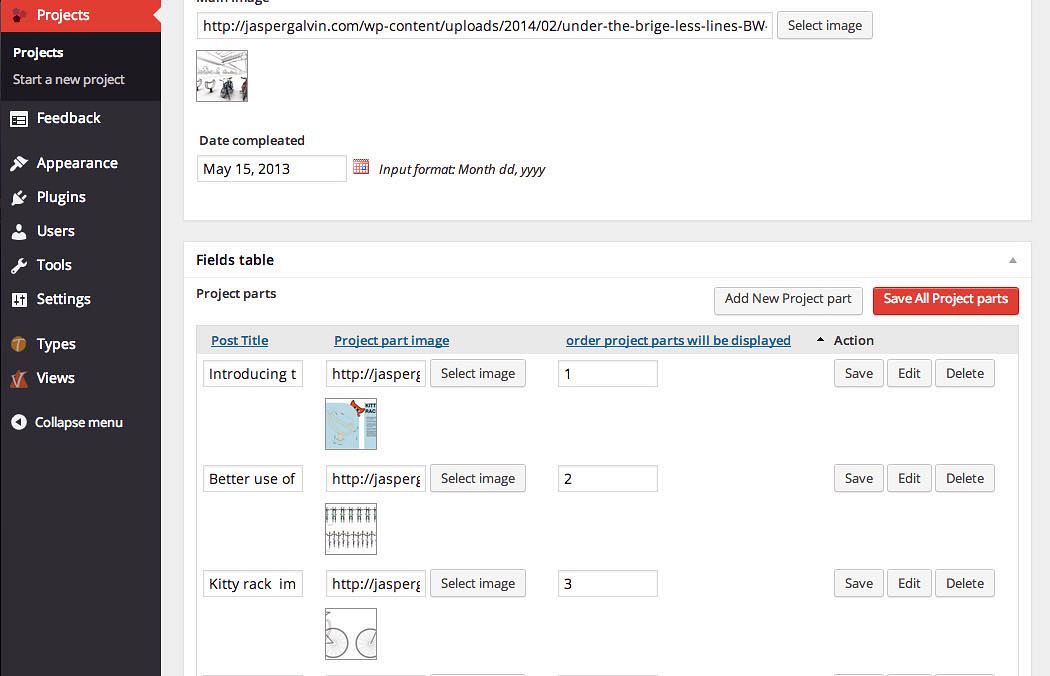
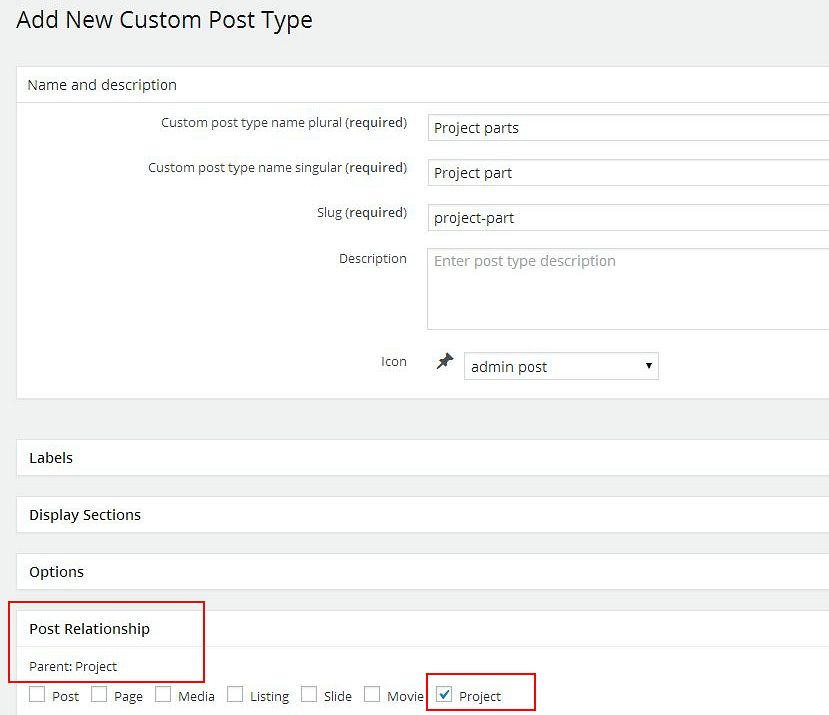
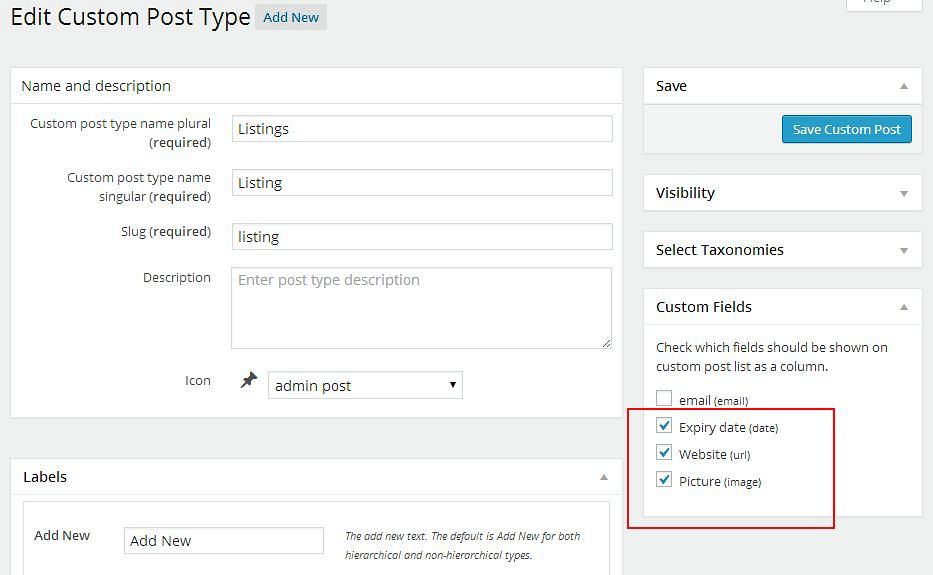
Custom Post Types provided a strong basis for Darren Stevens’ site, one of our first case study interviewees. He created Cottages and Places as Custom Post Types to sort out the real estate data (see Example 1). It has been over a year now since he built the site, and it is still doing fine. Source: WordPress back-end of our OnTheGoSystems.com site To separate your posts, use the Types plugin (a free component of Toolset) and create appropriate Custom Post Types. You can bind it with some taxonomies (to categorize) and a group of custom fields. Example All new Custom Post Types are registered with a default icon, a pin, which is the same as that used for regular WordPress posts. However, you can assign a custom icon for each Custom Post Type. See Example 3. Michael Seminatore used the Music Note Icon to represent Performances and a User Icon for the Artists. In the Types plugin go to Types > Types and Taxonomies > Edit your Custom Post Type and use the Icon field. To enter your Custom Post details, you can, of course, use the big edit field (Editor) under your post title, but why not take advantage of using custom fields? This is what Natalia Casado did, for her site “La Agenda Cultural.” In the picture on the left, you can see that movie information consists of movie details, such as duration and director. The picture on the right shows how the data are sorted out in the WordPress Dashboard, using custom fields. In the Types plugin go to Types > Custom Fields and create a new group of fields. Associate it with a desired Custom Post Type and add fields. Less is more. If you do not need to use the Editor, hide it, as did Neil Curtis, the author of turbotrainer.com. Look at Example 7: there is no Editor field. It wasn’t needed, so why keep it? In Types plugin go to Types > Custom Post Types and in the add/edit Custom Post Types screen scroll down to the Display Section. Clear the Editor field. Look at Example 9. It comes from the crunchynotes.com site for a music theatre composer. The owner needed to present a lot of information about each show but did not want to overwhelm visitors. David Zack used tabs to improve the front-end UX. Sure, that is smart and nice, but how about the back-end? Take a look at the following examples. You will see that the information presented in the back‑end fully reflects the structure presented to the front-end visitor. In addition, the back-end user can use a separate WYSIWYG Editor to edit each tab. The Types plugin allows you to add customer fields of the WYSIWYG type: Editors of the larimerworkforce.org site must fill out some information for the homepage slider: This is how a single slide looks from the editor’s perspective: As you can see, the back-end contains prompting hints so that the editor will know exactly which fields correspond to which values displayed on the front-end. Zach Swinehart, the author of the site, proved that he knows how to make the end user’s life simple. Go to Types > Custom Fields and fill out the description fields, both for the whole Edit Group, as well for the individual fields. See the following screenshot. If you are using Custom Posts that are related to each other, think about making one of them a parent of the other, as Jasper Galvin did in his site. Jasper’s projects consist of project parts, each of which was added as a separate post, but the data were linked. See Example 15. Go to Types > Add New Custom Post Type and scroll down to the Post Relationship section. Use the Parent or Child section (depends what CPT you are editing) and select the desired Custom Post Type. This is a brand new feature of our Types plugin so we do not have any real life evidence to show it in action (be the first to share and apply to our case studies). However, this is something that definitely makes your customer’s life easier. Look at the example. The page of your WP Dashboard that lists all your Listing Custom Posts displays some custom fields as columns. Go to Types > Custom Post Types. Provided that you have already associated a Group of Fields with this Custom Post Type, locate the section entitled Custom Fields on the right side. Select the fields you want to show as columns. That’s it! For example, if you used a custom field to include a post in a slider, displaying it as a column will help your user to find all featured posts faster and will eliminate the need to go inside each one to see whether it was featured. Our set of tips and hints is fairly large, but it is by no means exhaustive and we are eager to see more examples. How do you improve the UX of your WordPress admin? Please help us to enrich this list with your case. Share your experience with us and with other WordPress users.
How to
 Hint. If you fall in love with CPTs, there is a danger that you will create new ones for every new object that appears on your site. That is not good. Keep related objects together. If they share the same behavior, it is better to put them all under one Custom Post Type and categorize further using a taxonomy.
Tip 2: Add relevant icons
Source: How to use Toolset and Easy Digital Download plugin to build an e-commerce siteHow it improves UX
How to
 Hint. Do not use random icons. The list of icons available in Types is huge. Spend a few minutes to select the one that corresponds to the purpose of the Custom Post Type. This investment will pay off.
Tip 3: Organize your data details using custom fields

How it improves UX
How to
Tip 4: Get rid of unnecessary stuff
Source: How to use Types and Views plugins to build a site that earns moneyHow this improves UX
How to
Example 8: The Types plugin—Switching off the Editor field for Custom Post Types.Tip 5: Take advantage of using multiple WYSIWYG Editors

How it improves UX
How to
Tip 6. Add meaningful descriptions


How it improves UX
How to
Tip 7: Use parent-child relations
How it improves UX
How to
Tip 8: Show custom fields as columns

How it improves UX
How to
 Hint. Do not include every custom field as a column. Too much information will overwhelm your end-user instead of helping him or her. Choose only those fields that hold values that you will be frequently checking.
What is your way to improve the UX of the WordPress Dashboard?
Excellent post!
I love the features that allow me to put custom fields on the backend list pages for my custom types, and the ability to add the quantity of these custom types to the “At a Glance” section of the WP Dashboard. These would be good additions to a post like this.
Thanks for your hint Ian! To make it clear for all Types users I’m sharing two screenstots illustrating what you are talking about:
At a glance section
Types GUI
Thanks again for sharing your experience.
As you guys stated above, “The list of icons available in Types is huge.“. So… I would love for you guys to have a reference page on your site showing the icons in big grid like http://genericons.com does. That way I can easily find the icon I want to apply w/o hunting and pecking through your lengthy list in the admin.
I also can’t state how much Toolset has changed my development with WordPress. I’m able to offer so much more to my clients and take on new jobs I was never comfortable with in the past. Thank you!
Good point! I will add it for our Types todo list. Thanks for your comment David!
Great tutorial. Thank you.
Wow! The Toolset just keeps on giving. 🙂
Thank you so much for such a thorough overview of possibilities.
Great article. I just started using Toolset and am very pleased with what I can do with it so far. Keep up the great work.
Thank you for all your comments. Nice to read you like the article. Comments helps us to understand what stuff you find useful. Any feedback always appreciated.
Good stuff and thanks .These tips are very clear and useful.