For this you can add a generic select field to your form, and then populate the select options with the output of a View.
If you add a generic select field to a form with a few dummy options, you can see the format required for your View output, e.g.
[cred_generic_field type='select' field='wpcf-some-field']
{
"required":0,
"default":[],
"options":[{"value":"one","label":"Label One"},{"value":"two","label":"Label Two"},{"value":"three","label":"Label Three"}]
}
[/cred_generic_field]
That's from the expert mode where you can see the shortcodes. If you want to save the value of this select field you'll need to use expert mode so that you can add the "persist": 1 parameter to the above, which isn't available in the GUI.
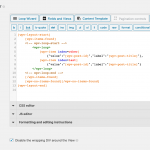
Create the View to display the posts. You can use the "List with separators" output format in the Loop Wizard to help generate the required markup that automatically disables the wrapper div (screenshot), which you will in any case need to edit manually so that you end up with something like this:
[wpv-layout-start]
	[wpv-items-found]
	<!-- wpv-loop-start -->
		<wpv-loop>
			[wpv-item index=other]
				{"value":"[wpv-post-id]","label":"[wpv-post-title]"},
			[wpv-item index=last]
				{"value":"[wpv-post-id]","label":"[wpv-post-title]"}
		</wpv-loop>
	<!-- wpv-loop-end -->
	[/wpv-items-found]
	[wpv-no-items-found][/wpv-no-items-found]
[wpv-layout-end]
You can then edit your form and in the GUI insert the wpv-view shortcode for this View to provide the options, or, if using expert mode so that you can add the persist option, use the wpv-view shortcode as per my example below:
[cred_generic_field type='select' field='wpcf-some-field']
{
"required":0,
"options":[ [wpv-view name="Form options"] ],
"persist":1
}
[/cred_generic_field]
