Custom taxonomy lets you organize your custom post types. It’s like categories and tags for posts, but used for any custom type that you define.
Steps for Creating Custom Taxonomy
- Go to the Toolset → Dashboard page and click the Add custom taxonomy button in the row of the post type you want to add a custom taxonomy to.
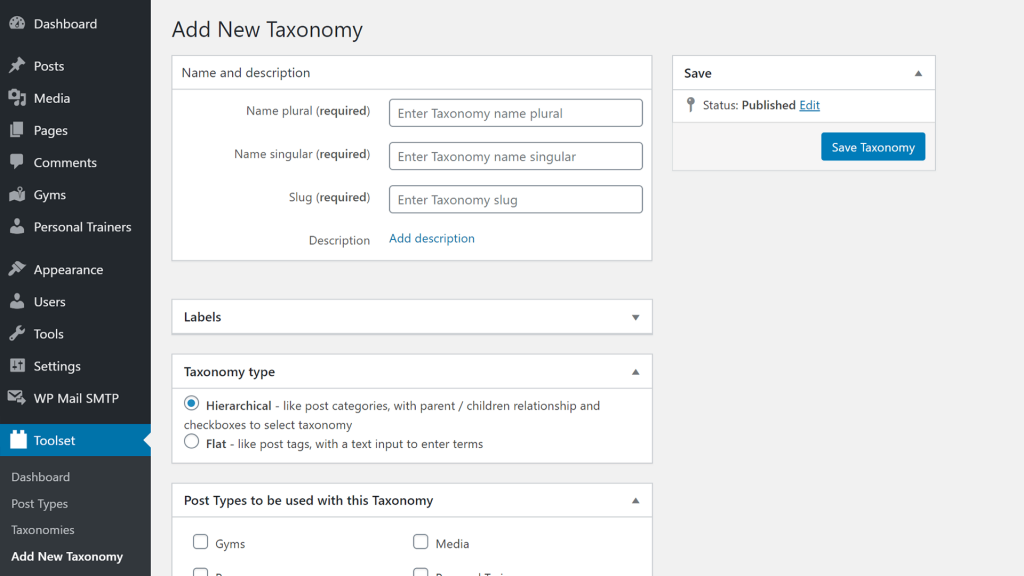
- Enter the plural and singular name for your taxonomy. Slug is created automatically.
- Click the Save Taxonomy button.
Your new taxonomy will now appear in the main WordPress admin menu. It will be under the post type that you added this taxonomy for.
Go to this taxonomy page to add your actual categories to it. These categories are called taxonomy terms.
Using hierarchical or flat taxonomy
When you edit a taxonomy, use the Taxonomy type section to set whether it is hierarchical or flat.
Hierarchical taxonomy can have a structure with children and parent taxonomy terms, just like the standard post categories.
Flat taxonomy has no structure and works like standard post tags.
Adding a Custom Taxonomy to WooCommerce Products
With Toolset, you can add custom taxonomies to your WooCommerce Products. This allows you to further organize your products.
For example, you can use standard product categories to classify products by types (vinyl, tape, CD, etc. for used music records) and use a custom taxonomy to classify your products by condition (mint, very good, good, fair, etc.).
To learn more, check out the full lesson about adding custom taxonomies to WooCommerce Products.
Related topics
- Using Custom Fields vs. Taxonomy
- Conditionally Display Custom Fields in WordPress Backend
- Adding a Custom Taxonomy to WooCommerce Products
- Using Post Reference Field to Set-Up One-to-Many Relationships
- How Content is Displayed
- Adding Custom Posts
- When and Why You Should Use Custom Types
- Creating Custom Fields
- Creating a Custom Post Type
- What Are Custom Types and How They Work
- Convert existing custom types and fields to Types control
- Limitations on HTML Content in Post Fields