After its launch in 2020, Barn2’s WooCommerce Wholesale Pro plugin has quickly grown into one of the most popular solutions for building a wholesale store in WordPress. Let’s see how to use it with Toolset to build a wholesale store.
How wholesale stores work
Wholesale sites are obviously about Business-to-Business (B2B) transactions.
Wholesale buyers aren’t interested in pretty pictures of your products and fancy words. Instead, they want to see a quick order form listing all the relevant technical data about each product. This way, they can quickly add the products they want to purchase to their shopping cart.
By using it alongside Toolset, you can create quick wholesale order forms with different pricing for each user group and extra fields of data about your products. This helps B2B buyers find what they want quickly and easily, helping to make your WooCommerce wholesale store a success.
Introducing WooCommerce Wholesale Pro
The WooCommerce Wholesale Pro plugin lets you create wholesale pricing with different prices for public shoppers and each B2B user group. You can use it to create as many wholesale user roles as you’d like and offer discounts.
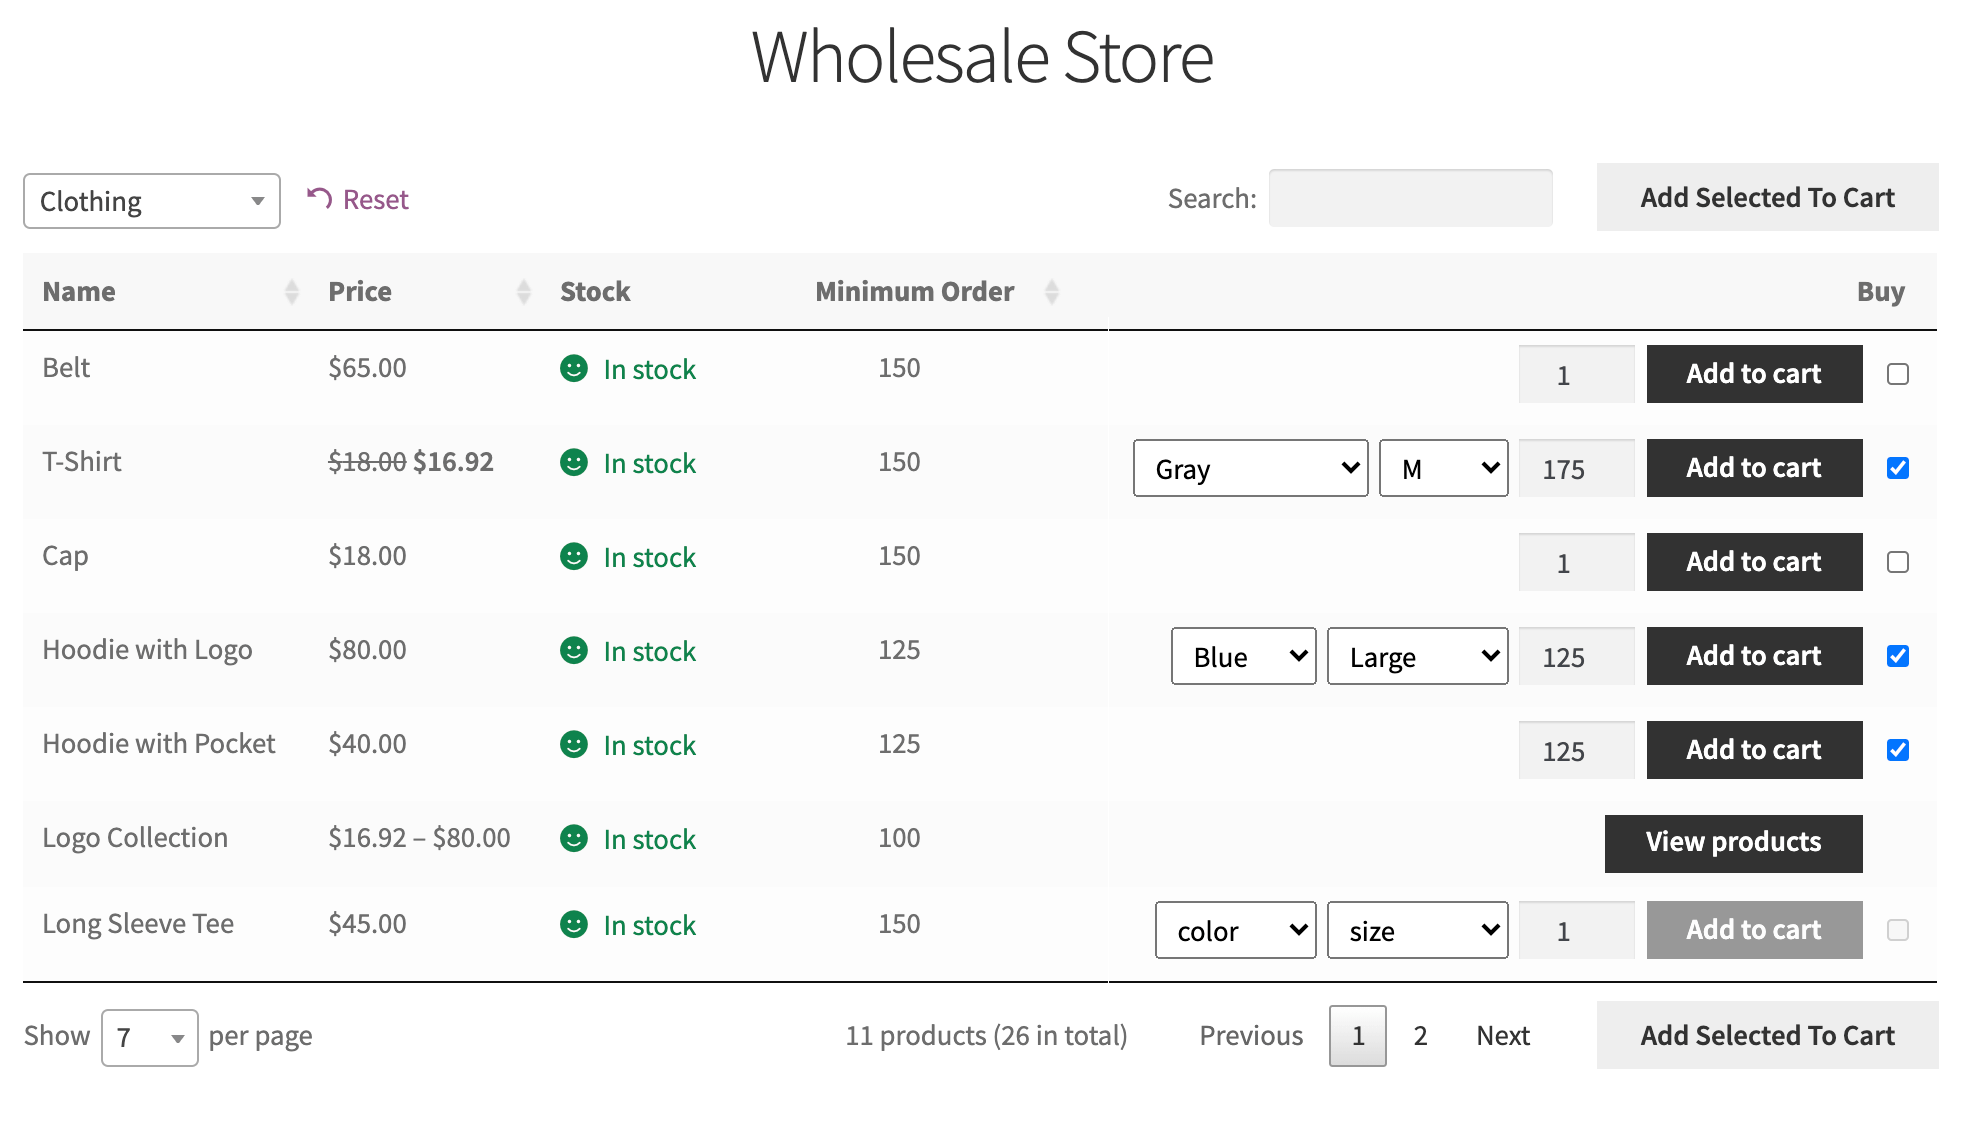
A list of product on a wholesale store built using WooCommerce Wholesale Pro
You can buy it as a bundle with WooCommerce Product Table to display wholesale products in a quick one-page order form designed specifically for the B2B market.
In addition to this, WooCommerce Wholesale Pro offers a range of other wholesale features that can help you enhance your online store.
How Toolset fits into your wholesale site
Toolset lets you create extra fields for storing data about your products. You can then display these in the wholesale order form. The best part is that buyers can filter the order form to find products based on the extra data.
Using Toolset, you can create custom fields to add to your products and custom taxonomies to organize them better. You can also use Toolset to redesign the single product page, making it much more user-friendly for wholesale buyers.
Building a wholesale store
Let’s now see how you can use the WooCommerce Wholesale Pro plugin with Toolset to build a wholesale store in WordPress.
We’ll use the following plugins:
WooCommerce – adding products, storing standard data about each product such as the price and description, and our wider e-commerce functionality such as the ability to take payment online and charge for shipping.
WooCommerce Wholesale Pro – adding a wholesale area to our store, which includes registration and approval, pricing, product visibility, and quick order forms.
Toolset – adding extra fields to store data about your products, such as a wholesale reference number, links to technical downloads, or extra groupings such as Make and Model.
For this tutorial, we’ll assume you have a WooCommerce store set up with some products added to it.
Step #1: Install Toolset
First, install Toolset on your WordPress website if you haven’t done so already. Next, head over to Toolset → Dashboard from the WordPress admin panel and click the Add custom fieldsbutton in the Products row.
Products row with options on the Toolset Dashboard page
You can also add custom taxonomies to products by clicking the Add custom taxonomybutton in the same row..
For those new to building custom stores, you can use custom fields to add meaningful, custom information to your Products. However, if you need to use that information to group products together then use taxonomies instead.
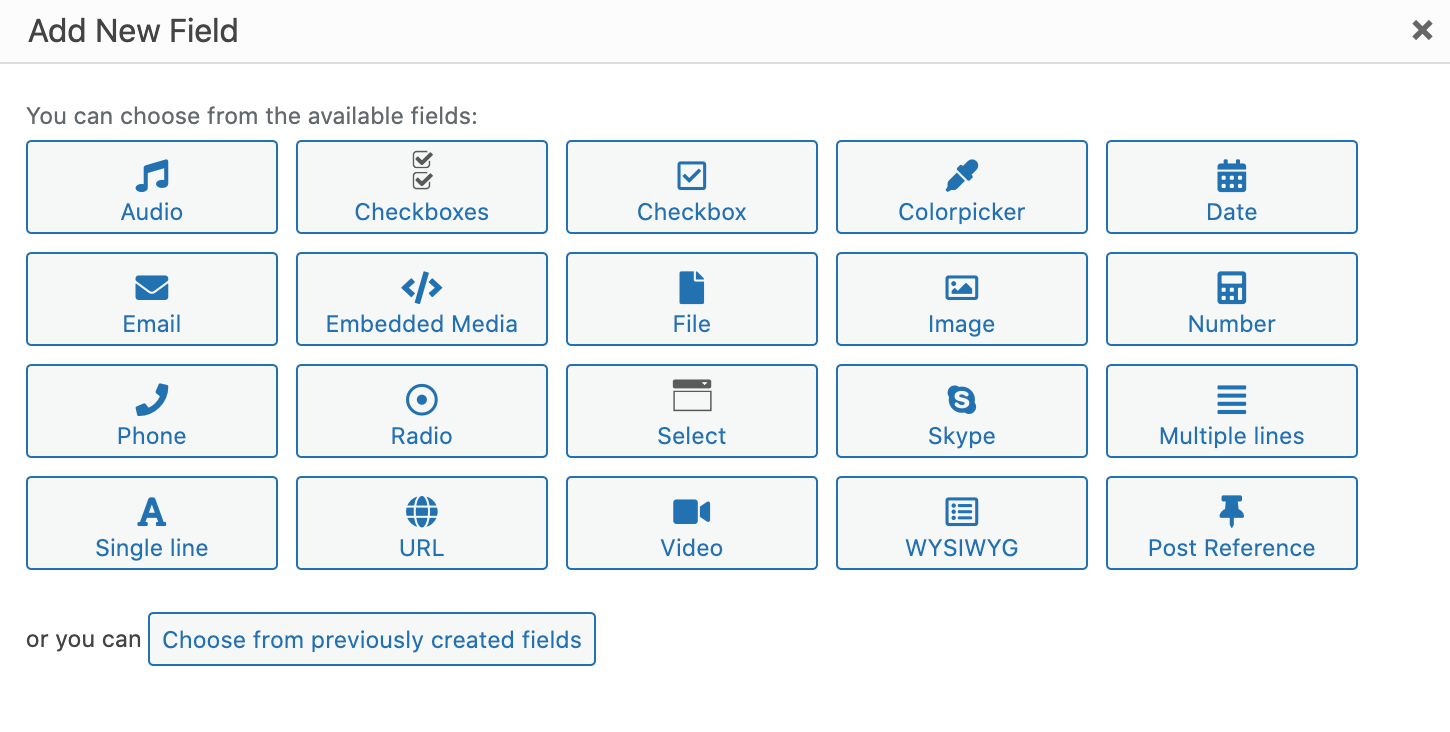
Toolset dialog for adding custom fields
Basically, custom fields are bits of information that are specific to products. Taxonomies, on the other hand, are bits of information that are shared by different products. You should use taxonomies if you want customers to be able to filter by that data.
For example, if you sell wallpapers wholesale, you might consider including a minimum order custom field and a custom taxonomy for “Wallpaper Type”.
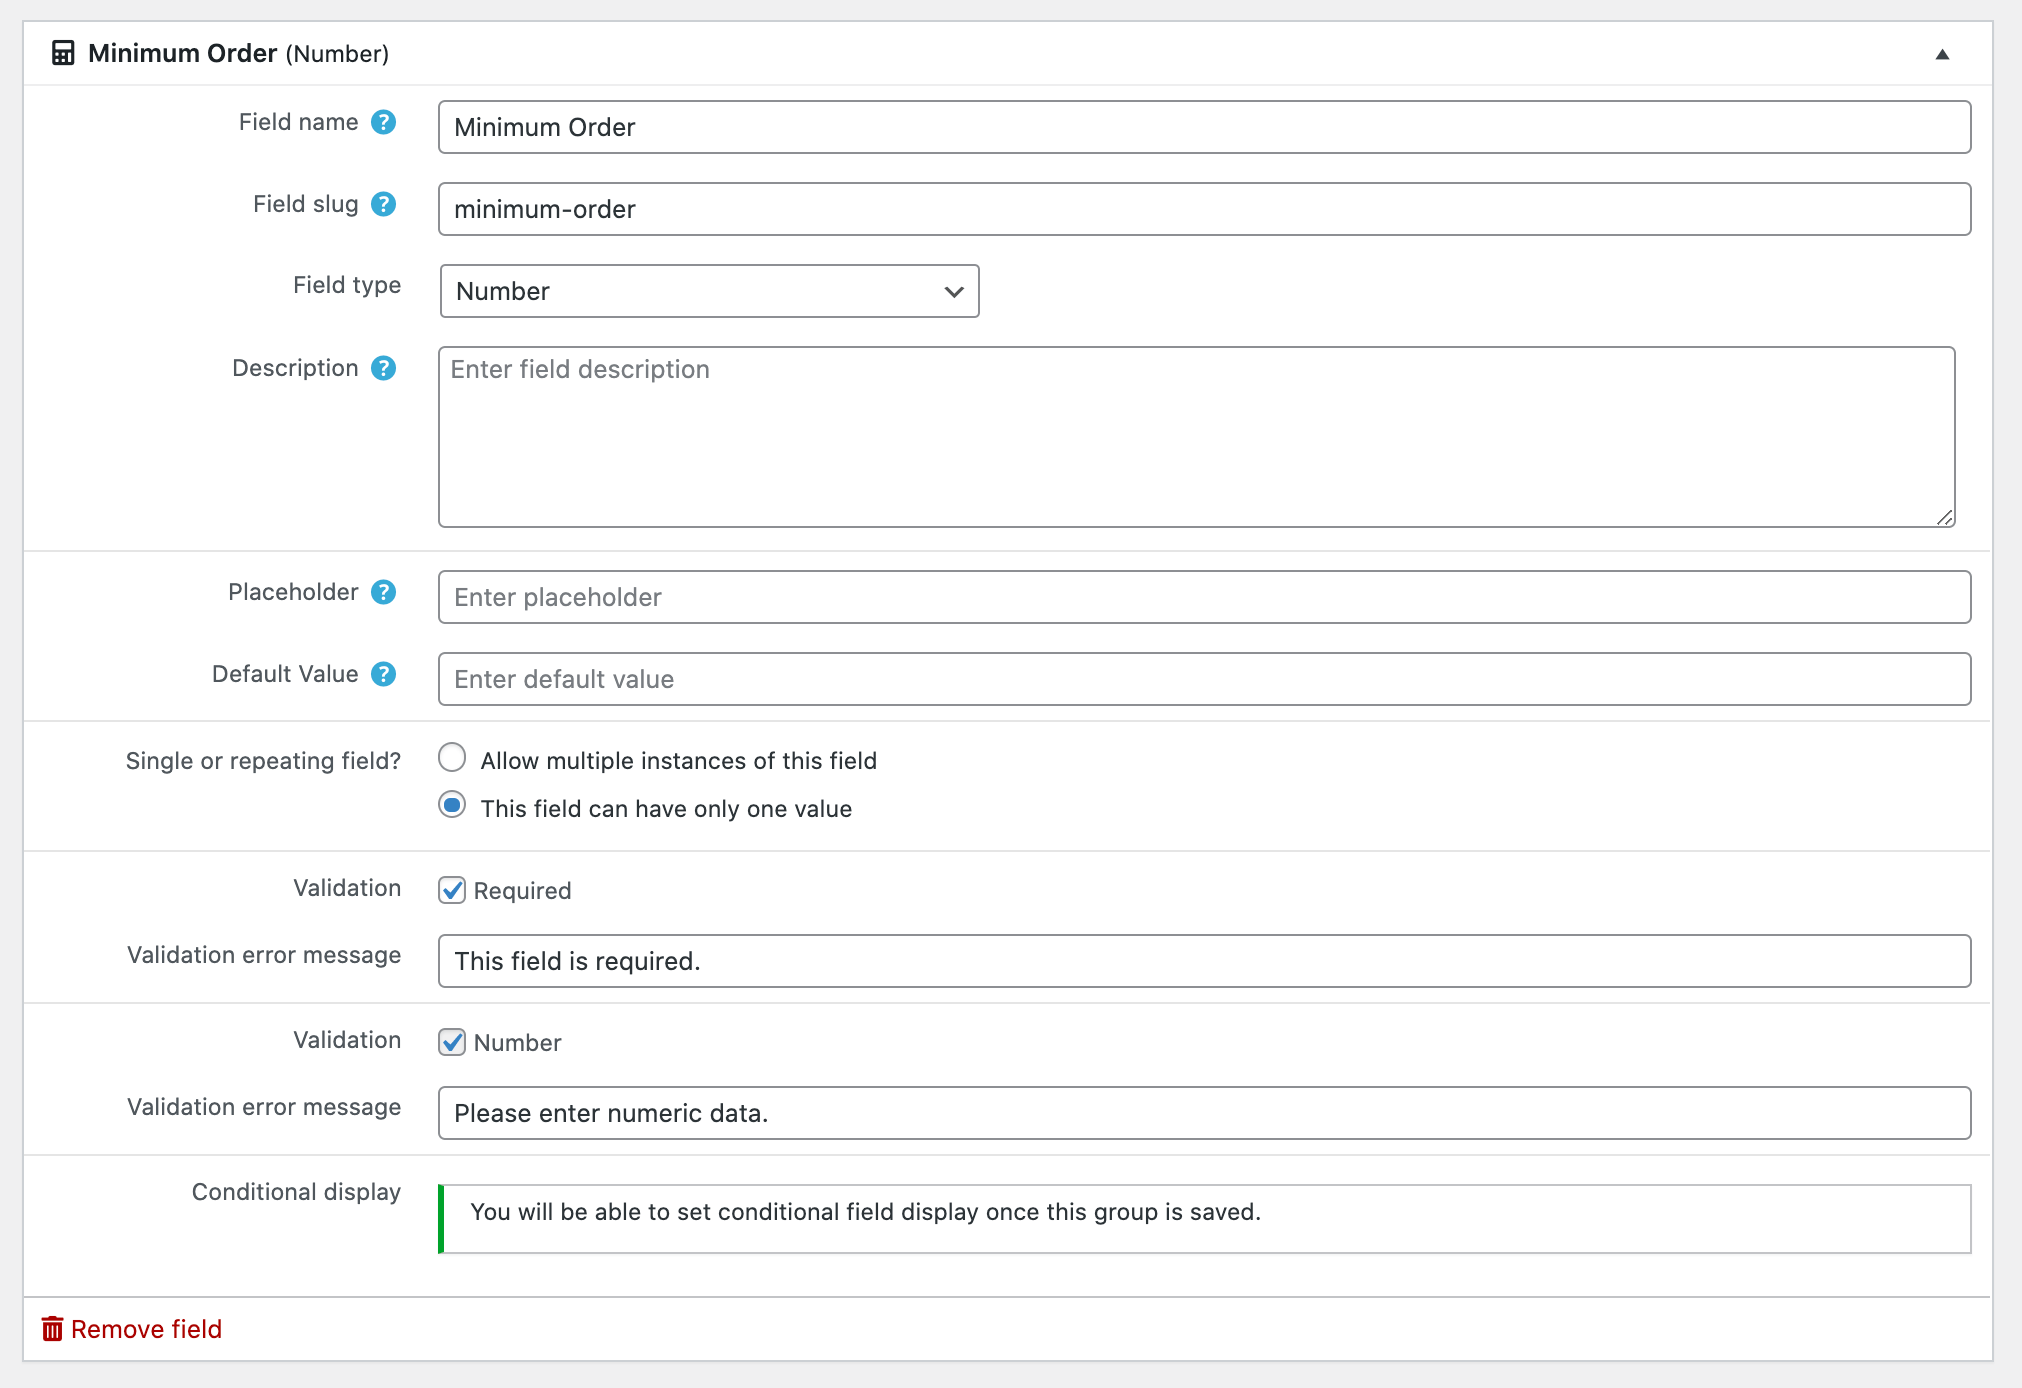
Here’s the dialog for creating a custom field for minimum order:
Options for a single custom field
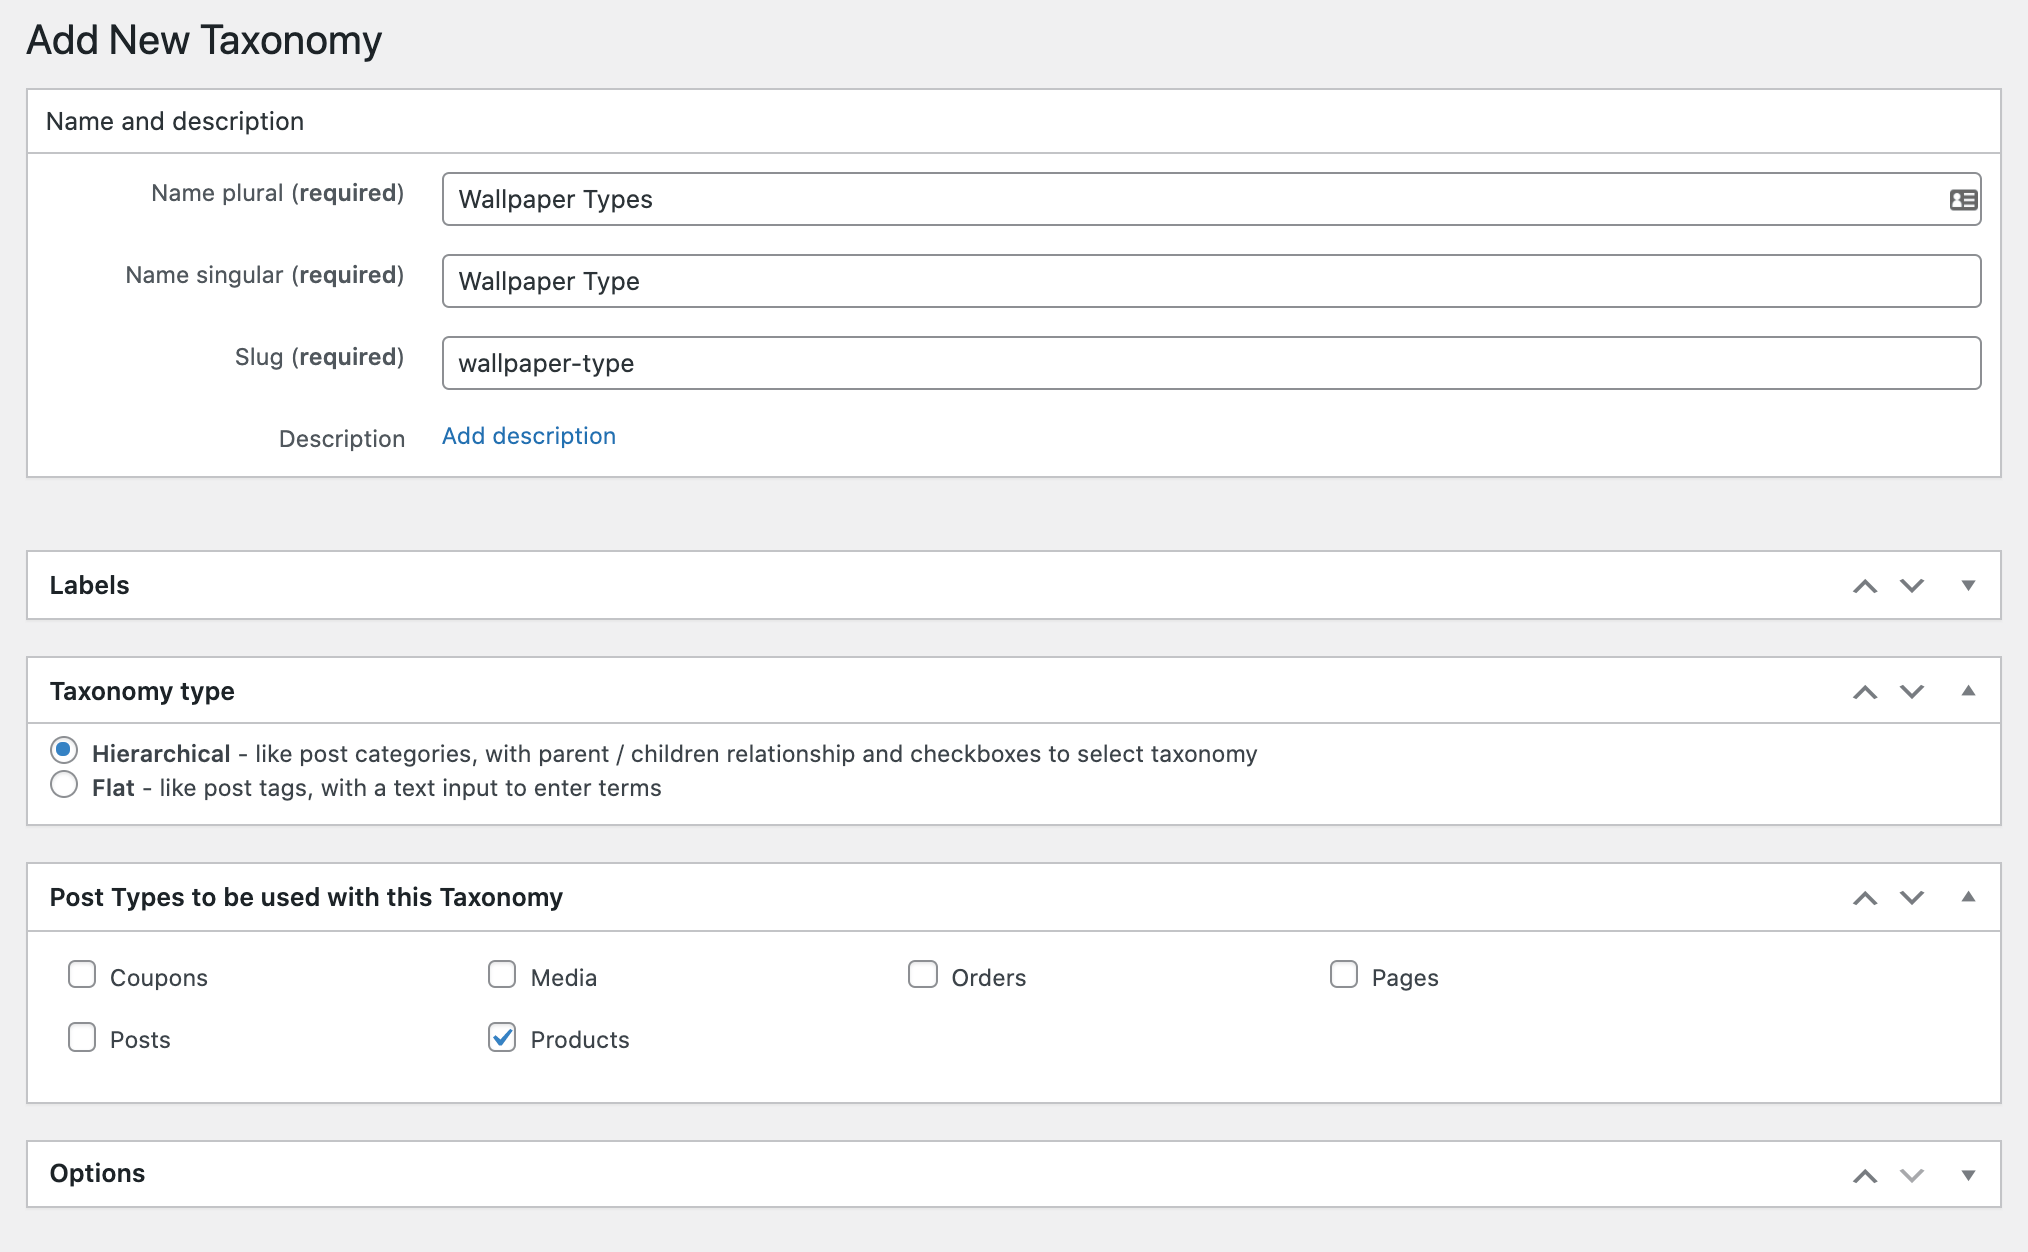
And here’s a dialog for creating a custom taxonomy for “wallpaper types”:
Adding a custom taxonomy to Products
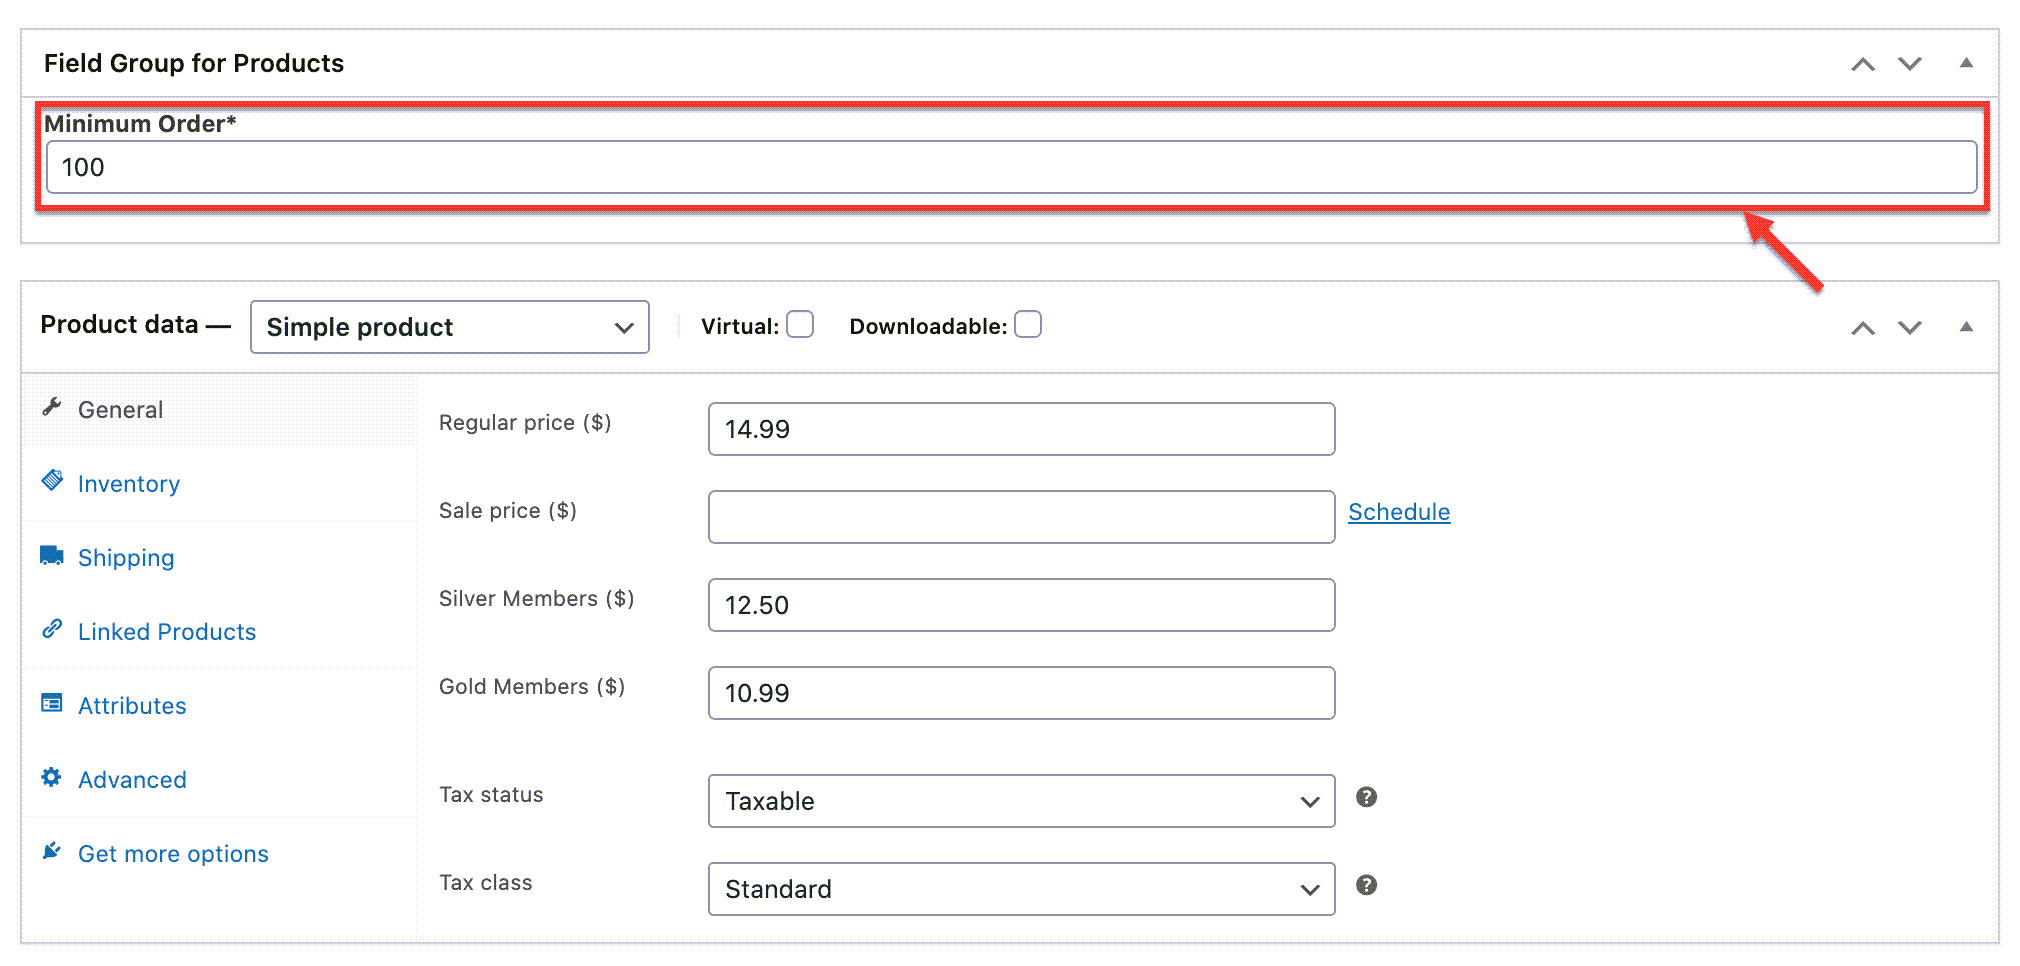
This way, you can specify the minimum order amount for each product you sell. Later, we’ll show you how to display the minimum order on the front-end so customers know the minimum number of units of the product they have to place an order for.
On the back-end, it will look something like this:
An example of a custom Product field when editing a product
Step #2: Install WooCommerce Wholesale Pro
Get the WooCommerce wholesale plugin and install it on your WordPress website. When done, activate the license key you received in the confirmation email to start using the plugin.
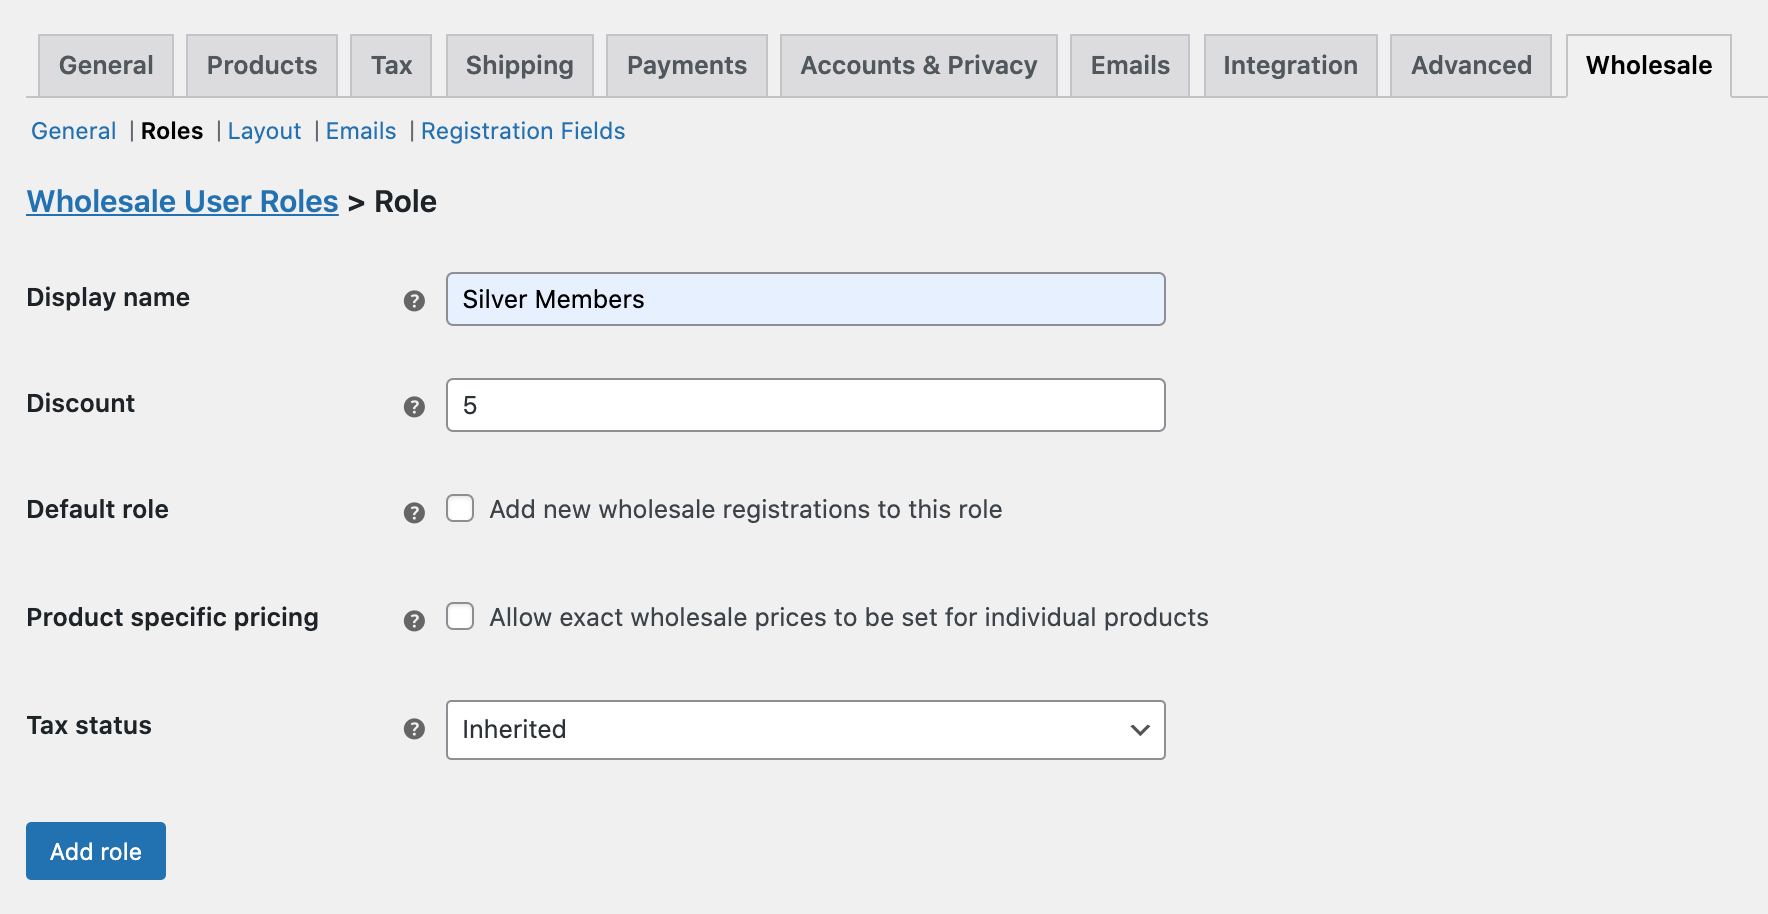
Next, start creating wholesale roles and set pricing for each role. You can do this on a global level, category level, and per-product basis. Head over to the WooCommerce→ Settings page, click the Wholesale tab and then the Roles sub-tab to start creating B2B user roles.
Creating wholesale user roles using WooCommerce Wholesale Pro plugin
You can also set up wholesale registration using the WooCommerce Wholesale Pro plugin. This way, customers can register as wholesale customers directly from the front-end.
Activate the plugin license by heading over to WooCommerce → Settings page, click the Products tab and then the Product tables sub-tab.
You can configure the plugin’s settings from the same screen. We recommend the following settings for wholesale sellers.
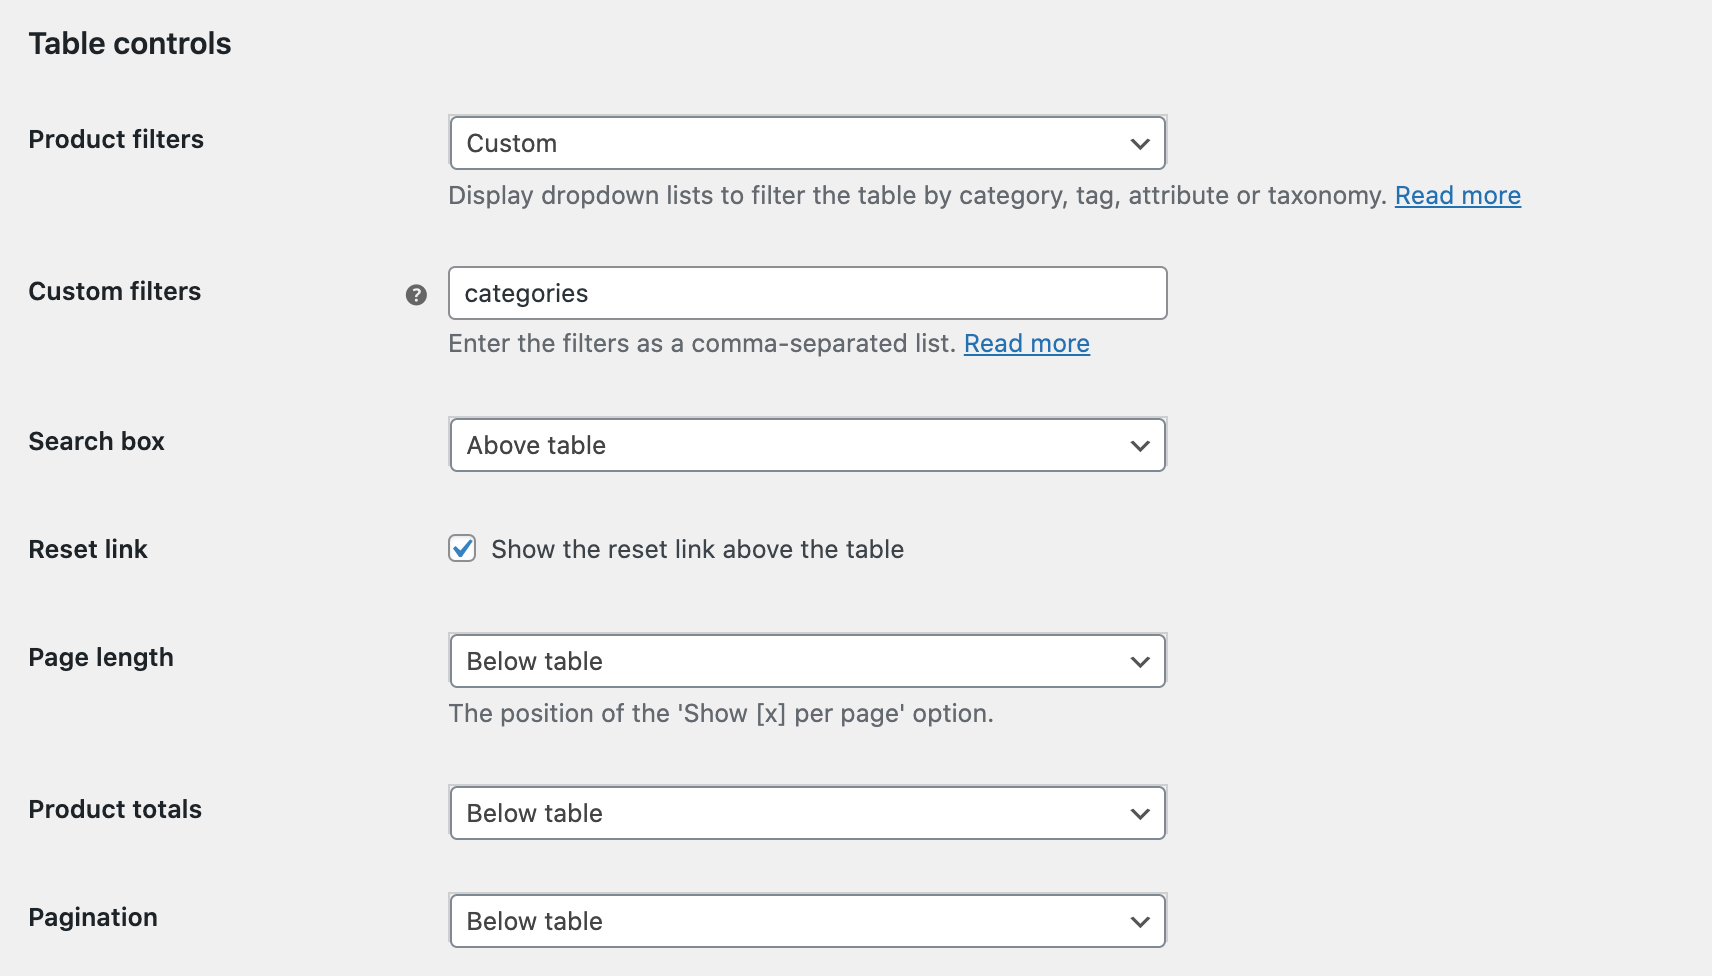
Columns
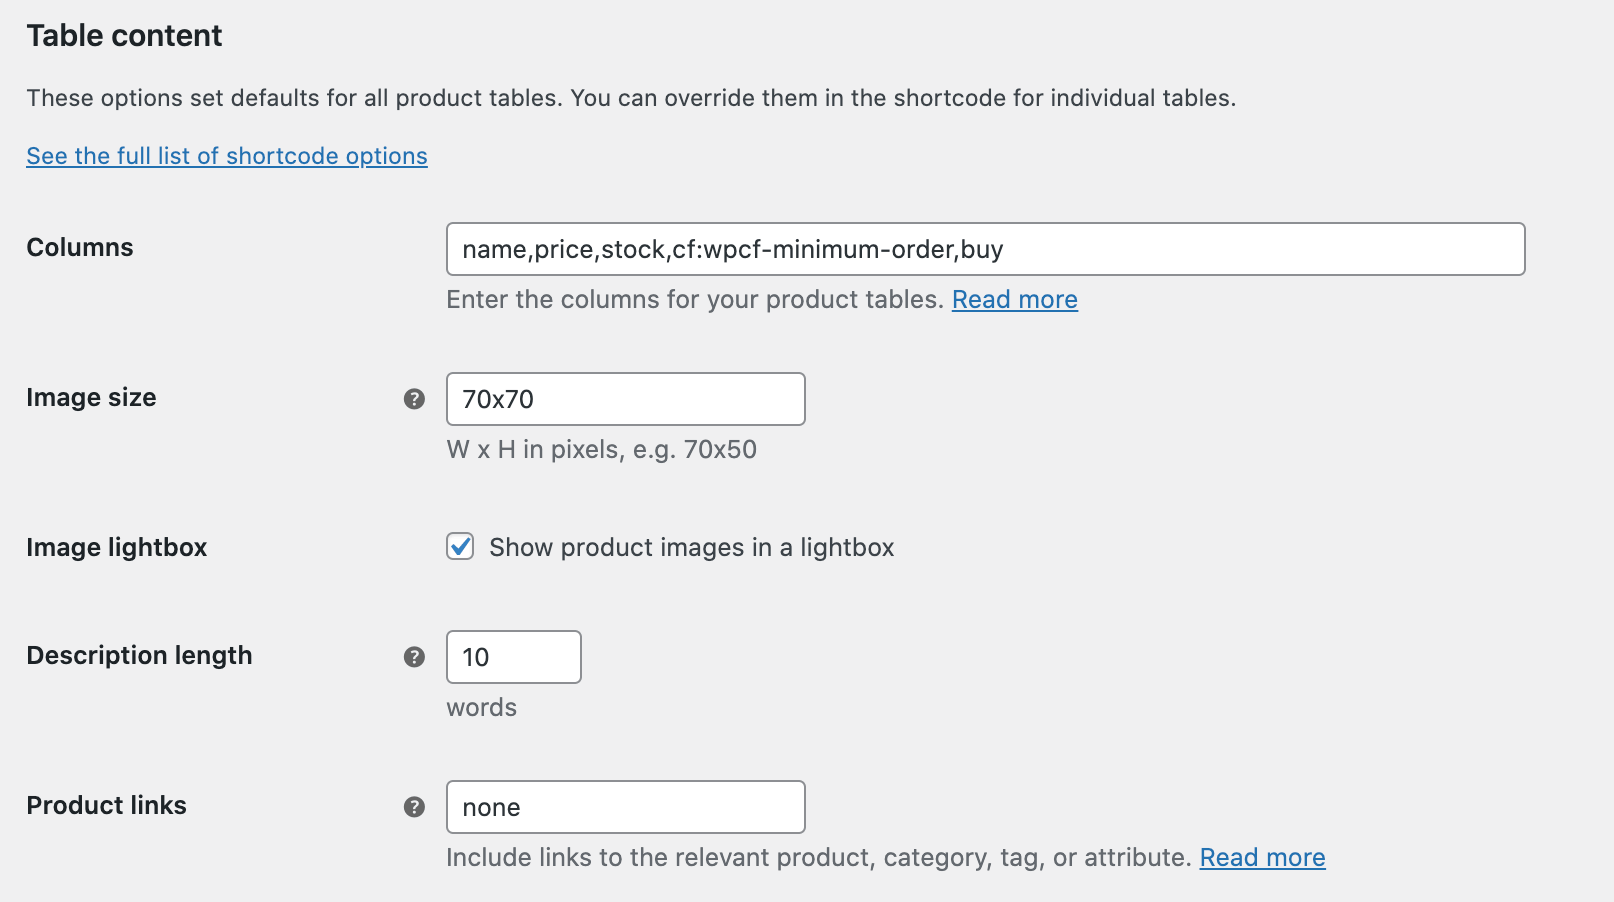
Depending on the types of products you sell, you can display as many columns as you’d like in your order forms. This might include the product’s name, price, stock, and buy buttons. You can also create columns for any custom fields and taxonomies you’ve added to your Products using Toolset.
Options for the WooCommerce Product Table plugin
These are the columns we added: name, price, stock, cf:wpcf-minimum-order, buy.
We added the cf:wpcf-minimum-order to display the column for the “Minimum Order” custom field. We created this custom field in Step #1.
To list Toolset custom fields, use the following convention:
cf:wpcf-custom field slug
Where custom field slug is just that, the slug that you set up for that particular custom field.
If you sell hundreds of products, consider enabling lazy load for optimal performance.
Adjusting the loading options like lazy-load
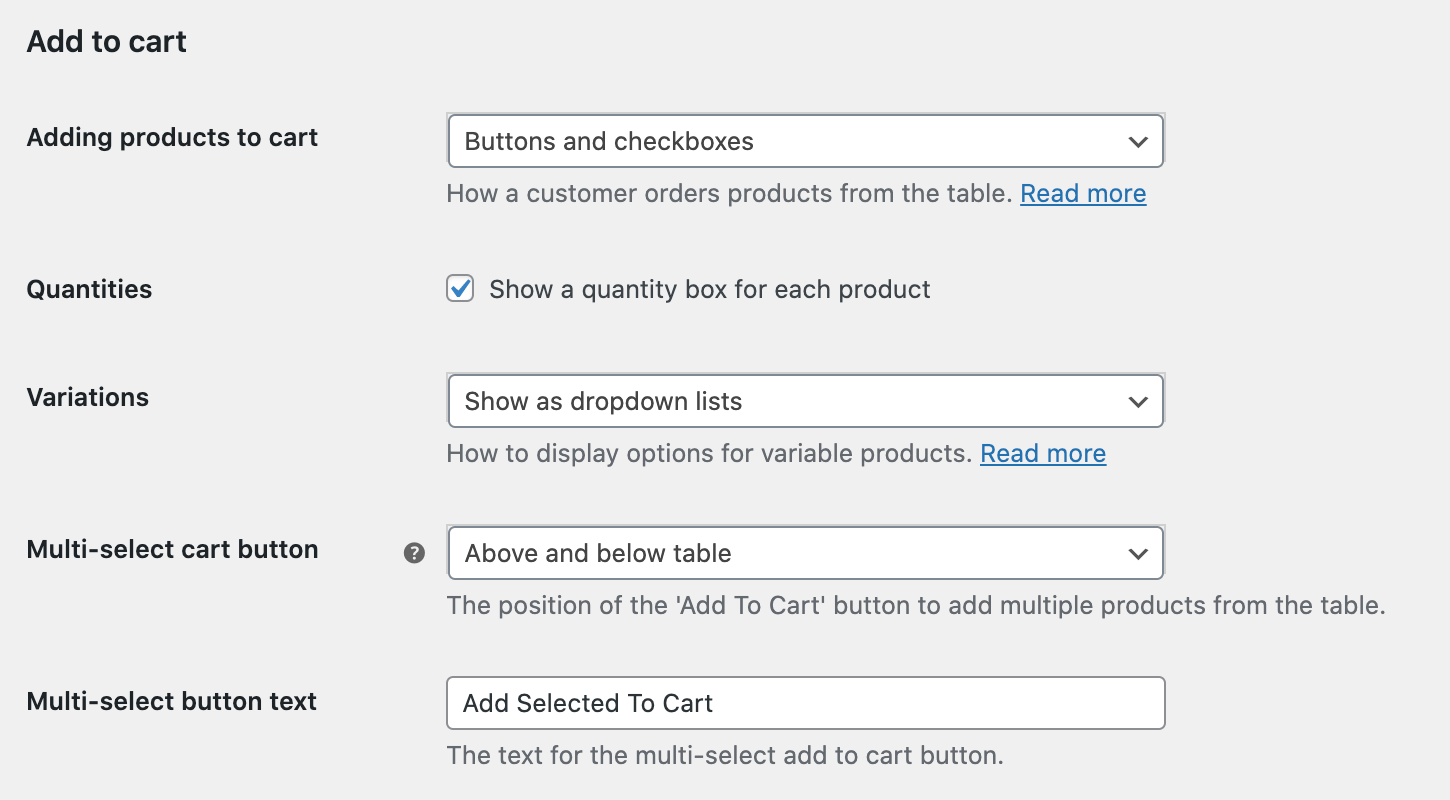
Add to cart
We recommend going with the multi-select checkbox style to facilitate bulk wholesale purchases. For this, set the Adding products to cart field to Buttons and checkboxes.
In addition to this, you should also make sure the checkbox next to the Quantities option is ticked.
In addition to this, you should also make sure the checkbox next to the Quantities option is ticked.
Filters
These are the filters that appear above the order form allowing customers to quickly find the products they’re looking for.
You can show filters based on the columns in the order form. WooCommerce Product Table also lets you create custom product filters. This way, you can create filters for the custom taxonomies you create using Toolset.
Step #4: Enable the wholesale order forms
To enable wholesale order forms on your store, head over to the WooCommerce → Settings page, click the Wholesale tab and then the Layout sub-tab. Next, set the Wholesale store page and Wholesale product category and tag pages fields to Order form layout.
Setting the store, category, and tag pages for wholesale layouts
Finally, click the Save changes button at the bottom of the screen.
That’s it! When you preview your online store on the front-end, the default WooCommerce layout will be replaced with an order form layout.
It should look something like this:
An example of a finished store page after configuring the wholesale options
Build it yourself!
WooCommerce Wholesale Pro and Toolset are perfect for building a wholesale store in WordPress. You can also pair them up with the WooCommerce Product Table plugin to create quick B2B order forms.
It’s the easiest way to build a wholesale store in WordPress that delivers a good user experience to customers. Customers can view all the important information about the products you sell and make informed buying decisions.
Did you ever build a wholesale store? What do you think about the setup we used in this tutorial? We’d love to hear your experience and comments!
After its launch in 2020, Barn2’s WooCommerce Wholesale Pro plugin has quickly grown into one of the most popular solutions for building a wholesale store in WordPress. Let’s see how to use it with Toolset to build a wholesale store. How wholesale stores work Wholesale sites are obviously about Business-to-Business (B2B) transactions. Wholesale buyers aren’t…