How to Group Posts by Category
In this tutorial you will learn how to create a View displaying different categories along with a list of posts belonging to each category.
You will also learn how to apply the same technique for custom posts and taxonomies.
What we plan to achieve
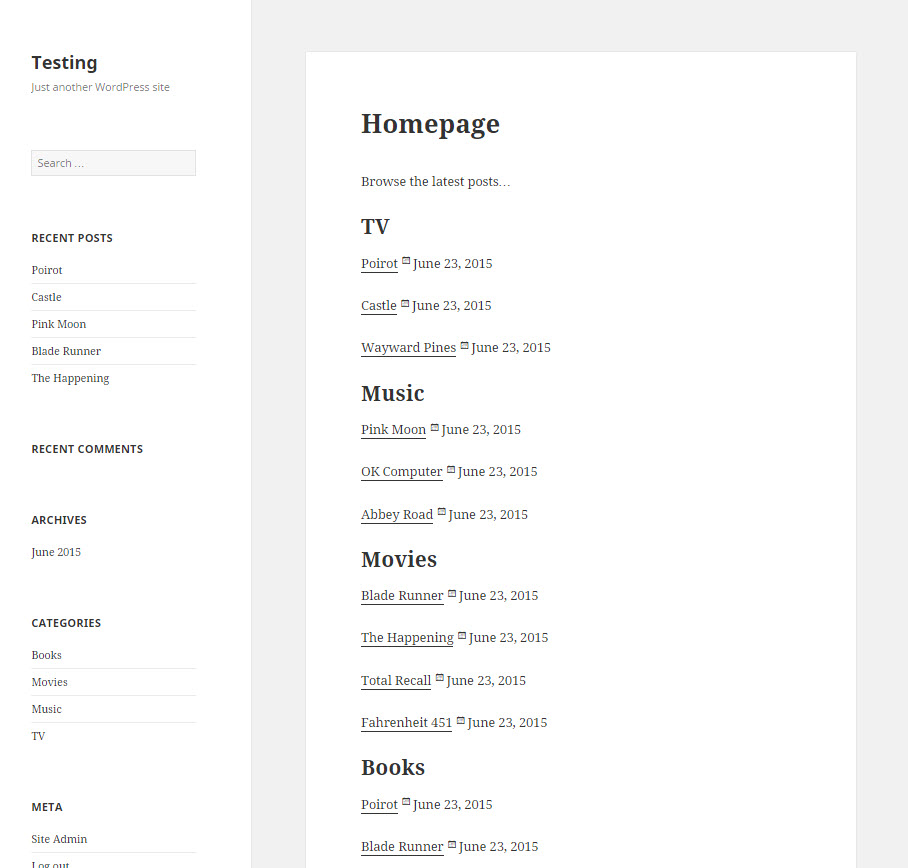
We want our page to display posts grouped by the categories they belong to. The image shows how our page will look after completing the tutorial. The page lists the category names (TV, Music, Movies, etc.), with each category followed by a group of post titles belonging to it.
The idea
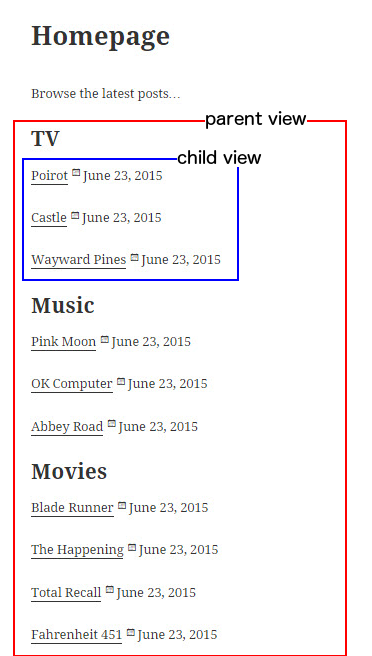
To achieve this, we need two separate Views, one nested in the other:
- Parent View (see the red border in the image): a View listing all blog categories. For each entry, this View displays the following:
- a category name
- a Child View displaying posts belonging to this category
The Parent View will be our main View, and we will add it to our page.
- Child View (see the blue border in the image): a View listing all posts belonging to a specific category only; in our case, it is the category set by the parent View. For each entry, this View displays the following:
- clickable post title
- post date
Steps to follow
Step 1: Creating a Child View
Let’s start by creating a Child View. This View will list posts belonging to a specific category, set by a parameter, which in our case is the Parent View.
- Create a new View and choose Display all results. Let’s call this View “Posts List.”
- In the Content selection section, select the Post types and check Posts from the list below. Your new settings will be automatically saved.
- Scroll down to the Query filter section and click to add a new filter.
- Select by Taxonomies
- Select Categories are: Set by the parent Taxonomy View.
- Click Save.
- Scroll down to the Loop Editor section and click the Loop Wizard. This helps in changing the output style and adding shortcodes.
- On the first screen of the Loop Wizard dialog, select Unformatted and click Next.
- On the second screen of the Loop Wizard, use the Add a field button to add the Post title and Post date. Complete the wizard by clicking Finish.
- The wizard inserted the two fields into the Loop Editor. Feel free to add some custom HTML and CSS markup
- Click Update to save the changes made in the Loop Editor
Well, that’s it for this View! In the next step, we will nest this View into another View.
Step 2: Creating the Parent View
We will continue by creating the Parent View that will list all of the categories, each followed by the posts belonging to it.
- Create a new View and choose Display all results. Let’s call this View “Categories List.”
- In the Content selection section, select Taxonomy and then the Categories from the list below.
- Scroll down to the Loop Editor section and click Loop Wizard.
- On the first screen of the Loop Wizard dialog, select Unformatted and click Next.
- On the second screen of the Loop Wizard, use the Add a field button to add the Taxonomy title and Posts List. Complete the wizard by clicking Finish.
- The wizard inserts the two fields into the Loop Editor. Feel free to add some custom HTML and CSS markup
- Click Update to save the changes made in the Loop Editor
Step 3: Creating a Page to show the results
In the final step, we need to display the results on a page. To do so, create a new page and insert the Parent View in the body content of the page.
You can either choose this View from a list using the Fields and Views button or paste the following shortcode into the body of the page: .
If you go to this page, it should now look something like the following:
You can customize this layout as desired. In this example, we listed the category names, wrapping them in h2 tags, and listed the post links inside a paragraph tag.
Summary
We created a Child View that lists all posts, and added a query filter to it so that it only lists the posts of the parent View. We also created a Parent View that lists all categories and loads the Child View for each category being displayed.
Now, our page shows a list of all categories, as well as all of the newest posts belonging to each category.
Appendix: Applying the same technique for other cases
Before concluding this tutorial, let’s look at two other similar cases of listing posts grouped together in a particular way.
Grouping posts by Custom Taxonomies
Many users may wonder about how to achieve the same result we accomplished in this tutorial, but by using their own Custom Taxonomies and Custom Post Types.
The process is actually identical, with the only two differences being the following:
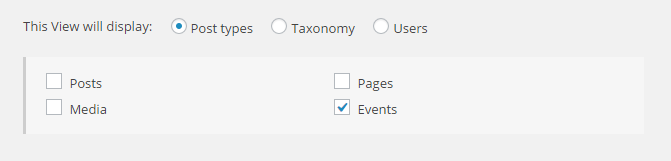
- In the Child View listing all posts, make sure that you select the option to list the posts belonging to your Custom Post Type. In the following image, we used the Post Type called “Events.”

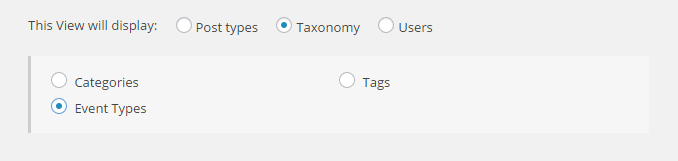
- In the Parent View, make sure you are listing the terms of your Custom Taxonomy. In the following image, we used the Custom Taxonomy called “Event Types.”

Listing Posts grouped by the Authors
A similar result that you might want to achieve is listing posts but grouping them by author name. Again, this process is the same, with only three small differences:
- In the Child View listing all posts, instead of using the Query Filter by the Categories taxonomy, create a filter by Post author and set it such that it uses the Post author is set by the parent View
- In the Parent View, choose to display Users and select the Any role
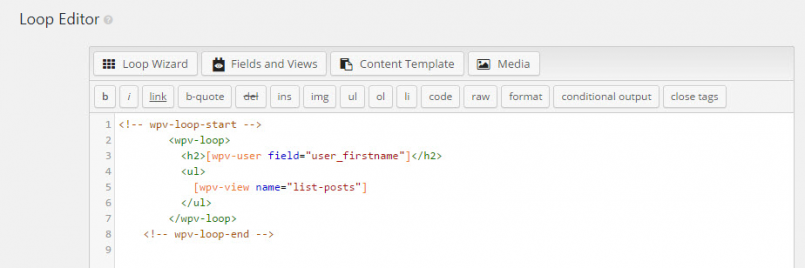
- In the Loop Editor section, insert one of the User Fields in the h2 title tag. We use the user’s first name in the following example: