How to create post relationships between your custom post types and how to display them
As you build your website and your thoughts turn to the content itself, there are two key factors which you will take into consideration once you have written it. How you will manage it and how you will add it to your website.
The first hurdle can be overcome with Toolset and its new post relationships feature – Toolset’s repeatable field groups will make it easier to add content and we’ll look at that in our next article.
Post relationships will help you manage your content by making it easier to connect your custom post types. Therefore, you will not need to create the same piece of content whenever you want to add it onto a new page. Furthermore, post relationships avoid data duplication, meaning you only need to edit a piece of content once for it to change wherever it appears on your website.
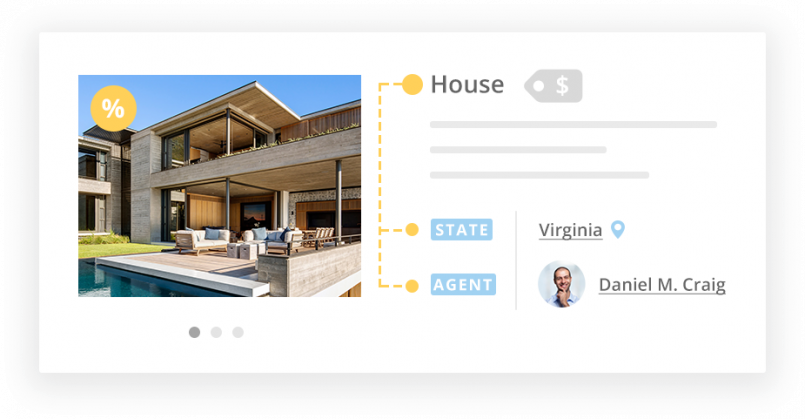
Let’s explore in more detail why connecting your posts in a post relationship is so important and how you actually create and display one using our real estate demo site to build pages for each of our estate agents.
Why it is important to connect your custom post types
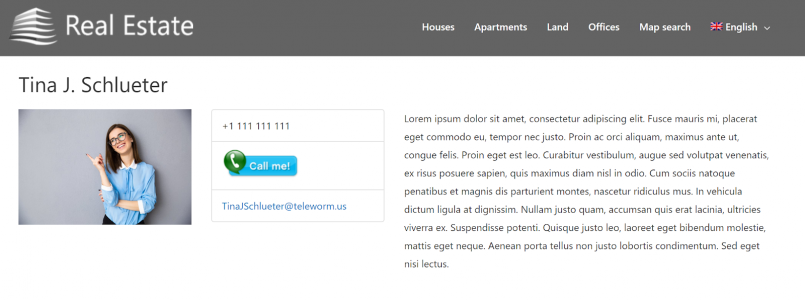
It is only when you actually connect your custom post types do you realize just how easy it makes organizing your content. On our real estate site, we have created two custom post types. We have our “Apartments” post type (for apartments which we are hoping to sell) and our “Agents” post type (for real estate agents to sell our houses). Here is an example of how Tina’s page looks – one of our real estate agents.
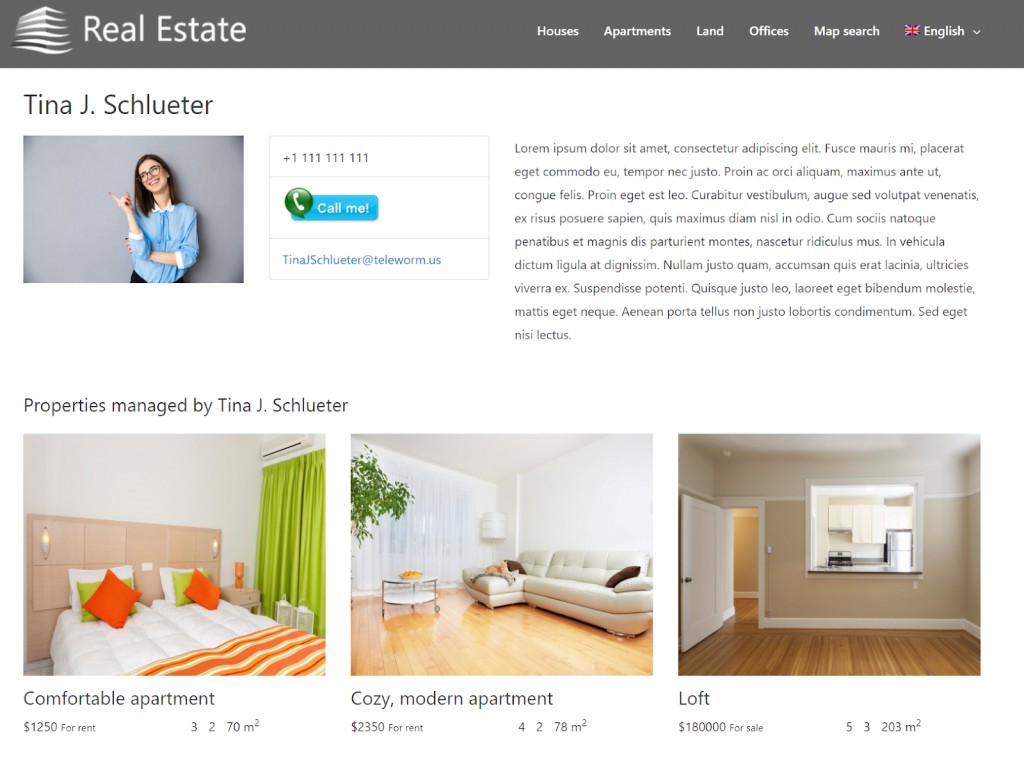
We now want to add on this page the apartments that Tina is currently in charge of selling so that buyers know what Tina can show them:
There are two ways we can do this. The first would be to manually add all of the apartments to Tina’s page below her bio. However, this is an incredibly problematic option. Not only will we have to spend a long time adding each property but the content already exists on our site on our “Apartments” post type. Therefore, we will have unnecessarily duplicated our information.
Fortunately, with post relationships we have a second far more effective option which allows us to connect the apartments with Tina’s post. As a result, the apartments which Tina is in charge of will appear on her page. Let’s look at how we can manage it.
Creating your post relationship
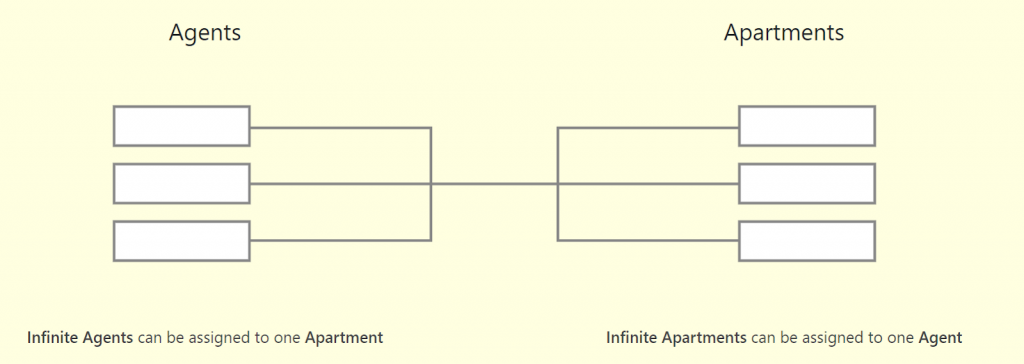
It is easy to build your post relationship by using Toolset’s post relationship wizard. Check out our video guide on how to create post relationships to see how it can be achieved in minutes and without coding. To connect our “Apartments” and “Agents” post types we will create a many to many relationship. Below you can see how the connection looks:
Connecting our two post types
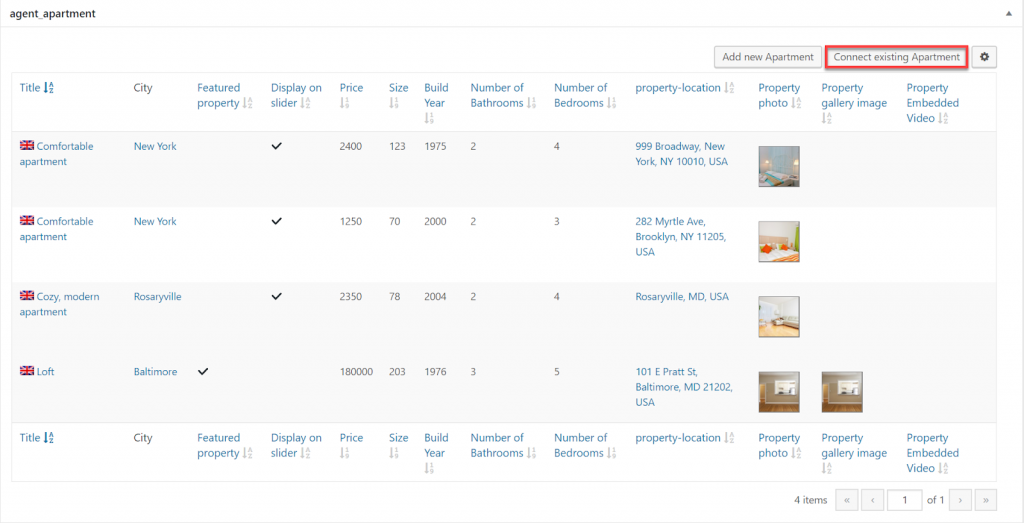
Now we can start to connect the apartments that Tina is in charge of with her “Agents” post. All we need to do to start creating connections is to edit Tina’s post and click on the Connect existing Apartment option. From here we can select the apartments we want to add.
Within a couple of clicks, we have made our connections. Next, we need to display the content on the front-end.
Displaying our post relationships on the front-end
1. In order to display our post relationships on the front-end, we can use Toolset to create a View and display it using Layouts:
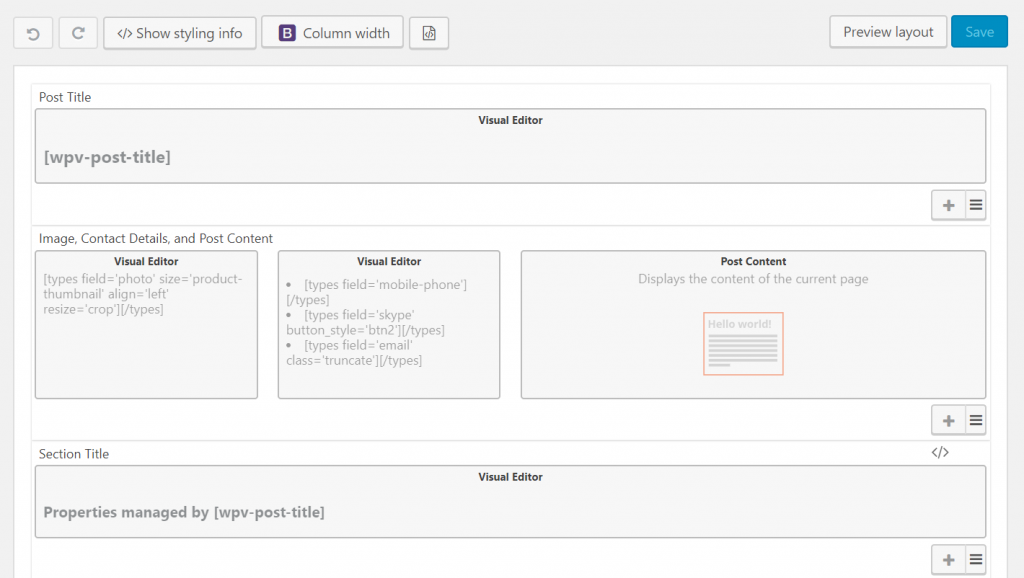
2. When we open our Layouts page for our “Agents” post we can see the Views that we already added before creating our post relationship.
3. Now we need to add a View for our post relationship below these ones to show which apartments Tina is selling.
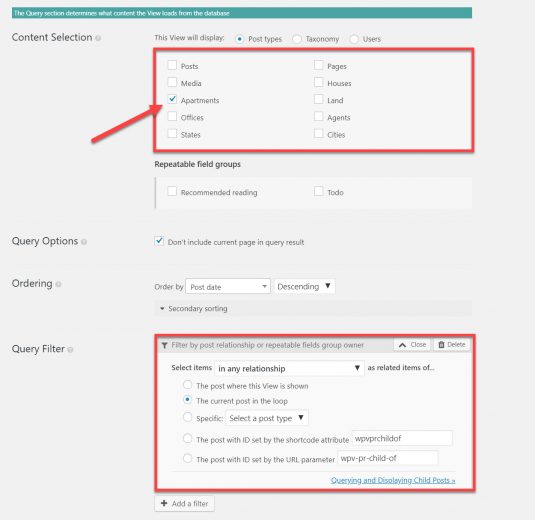
4. While we are editing our View, we need to select which custom post types we want to load. Therefore, we will tick the Apartment box so that only they will be displayed.
5. We want to ensure that only the apartments which are connected with Tina’s post are loaded instead of every single one. This is where we can utilize Views’ Query Filter option.
6. Given that we have only elected to display our “Apartment” post types we can choose to Select items in any relationship to load up every post that’s connected to The current post in the loop (Tina).
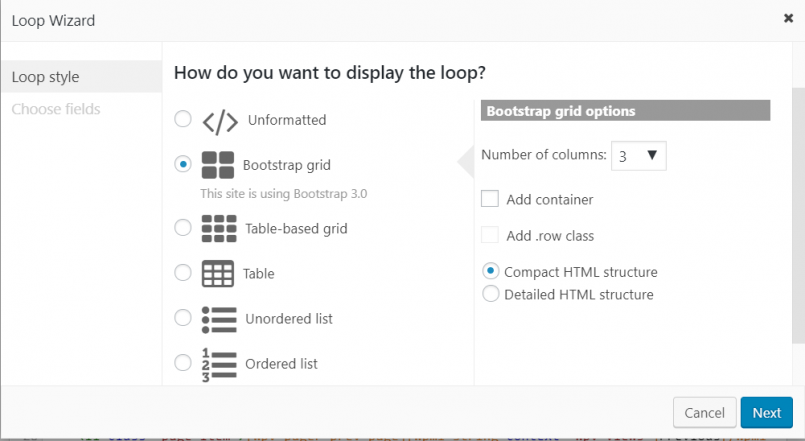
7. Once we have defined our query, we can use the Loop Editor to decide how the results will look and what fields will be displayed. By using the Loop Wizard, we can choose to display the results using the Bootstrap grid style. We will display the results in columns of three.
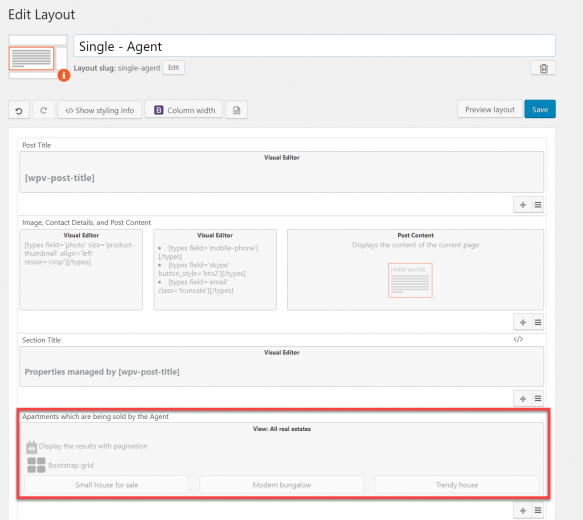
8. We have also added the fields that we want users to see when they look at the apartments which are connected to Tina. Using the Fields and Views option in the Templates for this View section we can add fields such as the price, size and title of each of the apartments. Our View, called “Apartments which are being sold by the Agent” is now at the bottom of our Layout.
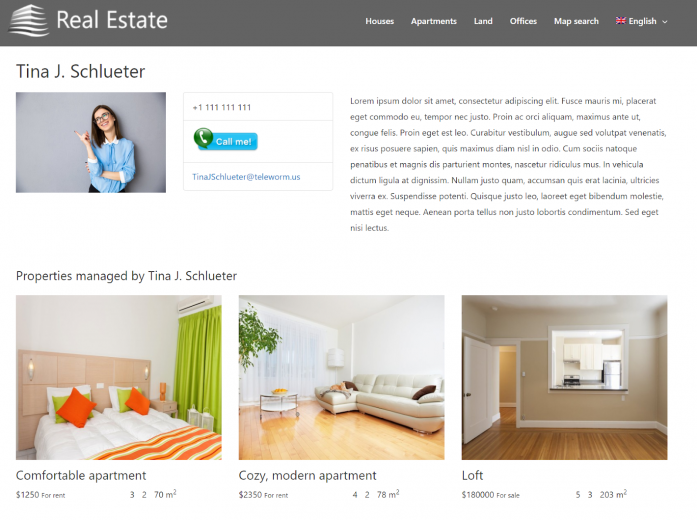
9. Here is how it looks on the front-end.
Now that we can see the apartments which Tina is managing on her post, let’s explore exactly why the post relationship is a great way to connect them.
How post relationships make it easy to add your content
With post relationships we only need to edit our content once for it to appear throughout our website in its new form.
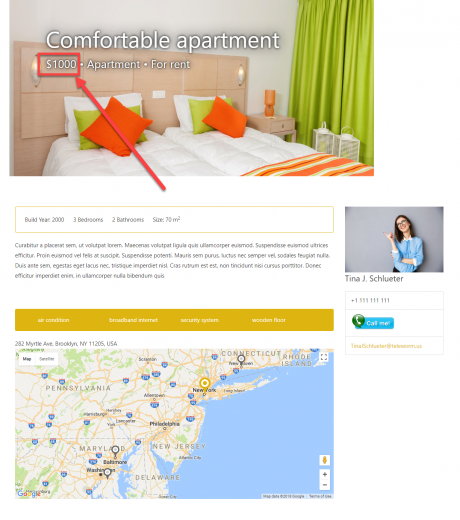
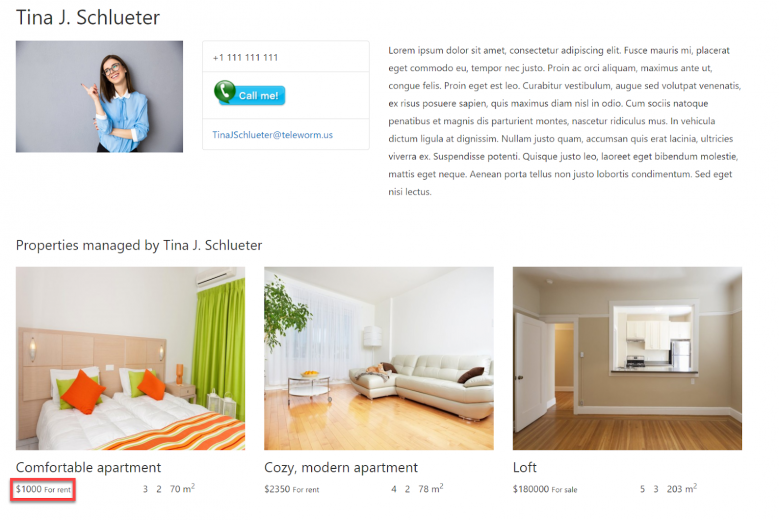
Let’s imagine that we want to edit the price of our “Comfortable apartment.” Without post relationships we would have to edit the price twice – on the “Comfortable apartment” post and Tina’s post as well. However, with our relationship we only need to edit the price once for it to change on both posts.
Post relationships make your life easier when it comes to managing websites with a lot of data. And as you’ve seen, it is simple to create these relationships on the back-end without any complex coding.
Let us know in the comments if you are using posts relationship for some of your projects!
In our next post, we will show you how repeatable field groups will make it even easier to add your content.
Hi Marine,
Good overview of what can be done with the new post relationships feature. One small mistake: where you say Connect existing agent should be Connect existing apartment.
Hello Stephen 🙂 Thanks for catching this, it’s updated.
Happy you like the overview.
Hi guys, great post and yes, incredibly valuable capability for intelligently managing data.
Can you explain any further about the first step where you created the connection between the post types:
“All we need to do to start creating connections is to edit Tina’s post and click on the Connect existing Apartment option. From here we can select the apartments we want to add.”
That’s okay if the numbers are small, but with larger collections this manual method falls apart.
I felt certain you would provide a way to define relationships based on key fields. Is this not the case?
For example, I would want to simply pick the common key fields between agents and apartments and then let the third table be populated automatically.
Suppose I have an existing dataset of 300 Agents, and they all have UID values.
I also have 5000 apartments…and in my old Excel spreadsheet each apartment record (row) also has the UID value of the Agent it was assigned to back in the old days. In other words, UID is a key value shared between the two post types.
Now…I will import these csv files (agents and apartments) into the Toolset CPT I have defined for them, and the UID values for each Agent are stored in their posts, and the reference to that UID is also stored in each row of every Apartment post.
Ok: return to your first step…obviously I want to simply define the query/relationship so that a Toolset View will run any time an Agent post is loaded…the Agent UID value is picked up as a query parameter, and all apartment posts with matching UID values are displayed in a looping display.
My question is…how can this usecase be solved in the Toolset UI?
Hi John! There is no bulk creation of connections available within Toolset UI, each connection needs to be created one by one. However, this is also why the CSV import mechanism was created, please have a look at this doc: https://toolset.com/documentation/user-guides/how-to-import-content-into-wordpress-using-csv/how-to-import-data-from-a-csv-file-using-the-wp-all-import-toolset-types-add-on-plugin/ Hope this helps?
Using MySQL, you can upload the IDs to the wp_toolset_associations table fields parent_id and child_id. You’ll need to add id and intermediary_id fields, too.
Before you import, set up the relationship through Toolset and link at least a couple records. Then use phpMyAdmin for the exact structure of the table.
Thank you for this tutorial. I will be designing a real estate website for a client, so I will most likely do it this way. Does Toolset work fine with the Divi theme?
Thanks Andrej! Toolset works well with Divi yes. You could use both to build your site.
We have a demo site built with Toolset, this may be useful for you to understand the dynamic:
https://real-estate-wordpress.discover-wp.com/
You can access the backend and see how things are built: The custom post types for the listings, the custom search, Google Maps etc.