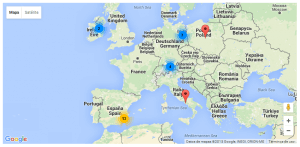
Using Toolset Maps you can group together close-by markers on a map into clusters. Clusters are represented by a single, cluster icon on a map, and when you zoom into the map view, individual markers are shown on the expanded map area.
Toolset Maps also allows you customize the cluster options, for example, how many markers are needed or how close they should be spaced to create a cluster.
By default, clusters are displayed as colored circles with size depending on the number of markers they contain:
- a blue circle indicates less than 10 markers,
- a yellow circle indicates 10 to 99 markers,
- a red circle indicates 100 to 999 markers,
- a pink circle indicates 1000 to 9999 markers,
- a violet circle indicates 10000 markers or more.
Toolset Maps provides a Javascript API to help you set your own styles. Using the API, you can provide your own styles and methods to decide which style will be displayed depending on the number of markers a cluster contains.
Let’s see one such example. We are adding a map to a View, and we want to group the markers on the map into clusters, therefore we first enable clustering on the map shortcode:
[wpv-map-render map_id="map-1" cluster="on"]
The result will be similar to what is shown in the following image.

To define custom styles for the clusters, we will use the function WPViews.view_addon_maps.set_cluster_options() which needs the map ID (for this example, it is map-1) and the styling rules that we want to apply. Therefore we will add this to the Javascript editor of the loop output of the View:
jQuery( document ).ready( function() {
  var options = {};
  WPViews.view_addon_maps.set_cluster_options( options, 'map-1' );
});
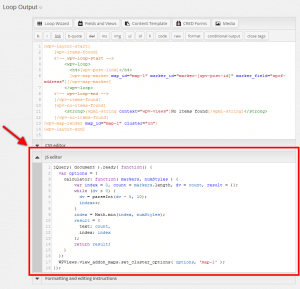
The following image shows the Loop Output section. To add the Javascript, click on the “JS editor” section and enter your JavaScript.
Customizing the cluster styles to be applied
First, let’s assume that we want to use the default styles, but change the number of markers needed to use a given style. To do so, you can use the calculator setting in the options argument:
jQuery( document ).ready( function() {
  var options = {
    calculator: function( markers, numStyles ) {
      var index = 0, count = markers.length, dv = count, result = {};
      while (dv > 0) {
        dv = parseInt(dv - 5, 10);
        index++;
      }
      index = Math.min(index, numStyles);
      result = {
        text: count,
        index: index
      };
      return result;
    }
  };
  WPViews.view_addon_maps.set_cluster_options( options, 'map-1' );
});
Doing so will display the blue circle for less than 5 markers, the yellow circle for 5 to 9 markers, the red circle for 10 to 14 markers, the pink circle for 15 to 19 markers, and the violet circle for 20 or more markers.
The calculator option is a callback function that takes two arguments:
- markers is an array containing the marker objects that belong to the present cluster.
- numStyles is the number of registered styles for markers (default value is 5).
The callback function decides which style index will be applied, from 1 to numStyles, and returns an object result containing the corresponding index and the text that will be shown in the cluster image (by default, the number of markers it contains).
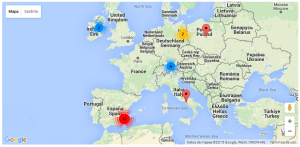
The result will resemble something like this:
Applying custom styles to the clusters
If you want to use the same calculator method but provide your own styles, you will need to use the styles setting in the options argument:
jQuery( document ).ready( function() {
  var options = {
    styles: [
      {
        'url': 'http://url/to/your/images/image-1.png',
        'height': '35',
        'width': '35',
        'textColor': '#333'
      },
      {
        'url': 'http://url/to/your/images/image-2.png',
        'height': '45',
        'width': '45',
        'textColor': '#333'
      },
      {
        'url': 'http://url/to/your/images/image-3.png',
        'height': '55',
        'width': '55',
        'textColor': '#333'
      }
    ],
    calculator: function( markers, numStyles ) {
      var index = 0, count = markers.length, dv = count, result = {};
      while (dv > 0) {
        dv = parseInt(dv - 5, 10);
        index++;
      }
      index = Math.min(index, numStyles);
      result = {
        text: count,
        index: index
      };
      return result;
    }
  };
  WPViews.view_addon_maps.set_cluster_options( options, 'map-1' );
});
Here, styles is an array of an object, each of them being a complete set of rules for the cluster style:
{
  'url': 'http://site.com/img.png', // URL of the image to be used in the cluster, required
  'height': '30', // Height of the image in pixels, required
  'width': '30', // Width of the image in pixels, required
  'textColor': '#ccc'// Hex color of the text displayed inside the cluster, optional
}
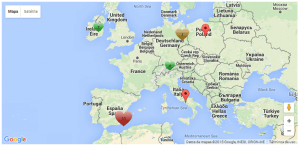
The following image displays the front-end result of the customization applied to the example.


