Hi,
I created a custom field as "data-picker" associated to the post type "product".
I can set many date beacause is a multiple field.
For example I set:
"1-11-2018" and "25-12-2018"
I'm also create a booking form using CRED which create a new post "my-orders"
I need to associate only one of these date to the post "my-orders"
I'd like to put a select in the booking form where will be displayed both the date and I can choose just the one I want to associate to the my-order post.
How can I do? Maybe a shorte code?
The slug of the datapicker field is "wpcf-partenze"
Thank you
Hi,
I assume we are talking about a multiple instance date field "partenze"
There isn't such a built-in feature within one multiple instance field, you can only display date-picker in date field.
You might consider other workarounds, for example, create another single instance date field "specific-partenze", use it to associate to the my-order post, display it in the post form, so your user can also choose the specific date value in the field "specific-partenze".
Hi,
Yes it is a multiple instance date field "partenze"
Your proposal is not the right solution for me.
I set the date using the data-picker in the backend when I create the new product.
When in the frontend an user choose a date he cannot use a datapicker.
The best way is to use the value of the date I set in the backend to popolate the option of the select field in the form in the frontend.
To reach the value of the date I set a code like this:
function select_partenza($atts){
global $post;
static $i = 0;
$a = shortcode_atts( array(
  'format' => 'U'
  ), $atts );
$date_partenza = get_post_meta( $post->ID, 'wpcf-partenze', true );
return date($a['format'],$date_partenza);

}
add_shortcode('select_date', 'select_partenza');
the problem is how to use this value in a select filed in the frontend in my "booking form" to allow the user to select the only he want.
And, of course, save this date selected in the custom post "my-orders" meta.
For example something like this:
[cred_field field="[select_date format='j F Y']" value='' urlparam='' select_text='Quanti adulti?' class='form-control' output='bootstrap']
I can share with you private information for more details, maybe could be more clear
OK, please provide your website credentials, describe details for how and where you want to display the the select, screenshot will help. thanks
I may not describe clearly.
I need to know how and where do you want to display the "select field in the form in the frontend", please take a screenshot for what you are going to achieve, I need to test and check if it is possible within Toolset plugins. thanks
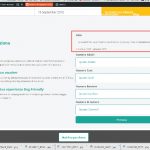
Ok, I attached a screenshot to show you where tje select field should be displayed.
In few word, by the backend (using the data-picker) I set many date which rappresent the avaibility date for me
By the form the user in frontend select which date (of which are available) is interested to.
Thanks for the details, in your case, you can use a generic radio field to display the field, I have setup a demo in your website.
1) Create a custom date field "prefer-date" to store the user prefer date value:
versteckter Link
2) Create a content template "product-partenze" to output the "partenze" date field value as JSON format:
versteckter Link
[wpv-for-each field="wpcf-partenze" start="1" end="1"]{"value":"[types field='partenze' style='text' format='U'][/types]","label":"[types field='partenze' style='text' format='j F Y'][/types]"}[/wpv-for-each]
[wpv-for-each field="wpcf-partenze" start="2"], {"value":"[types field='partenze' style='text' format='U'][/types]","label":"[types field='partenze' style='text' format='j F Y'][/types]"}[/wpv-for-each]
3) Edit the post form "Booking Form":
versteckter Link
display the generic radio field, use above content as options:
[cred_generic_field type='radio' field='wpcf-prefer-date']
{
"required":0,
"default":["111"],
"persist": 1,
"options":[[wpv-post-body view_template="product-partenze" id="$current" suppress_filters="true"]]
}
[/cred_generic_field]
Then test it in front-end:
versteckter Link
After user submits the form, the date value will saved into custom field "prefer-date"
Thank you, it works great1
Just to know, can you explain me this solution?
In partucual the details of content template what are refering to?
Hi,
I'm trying to do the same process with another field which is not a date but a simple single line field and it is part of a repeatable group. The field slug is field "room-internal-name"
1) as you I create a custom single line field "offered-room"
2) I create this content template
[wpv-for-each field="wpcf-room-internal-name" start="1" end="1"]{"value":"[types field='room-internal-name' style='text'][/types]","label":"[types field='room-internal-name' style='text'][/types]"}[/wpv-for-each]
[wpv-for-each field="wpcf-room-internal-name" start="2"], {"value":"[types field='room-internal-name' style='text'][/types]","label":"[types field='room-internal-name' style='text'][/types]"}[/wpv-for-each]
3) Set this code in the form
          	<div class="form-group" id="select-number-field">
		<label>Room</label>
[cred_generic_field type='radio' field='wpcf-offered-room']
{
"required":0,
"default":["111"],
"persist": 1,
"options":[[wpv-post-body view_template="room-quote" id="$current" suppress_filters="true"]]
}
[/cred_generic_field]
But I'm not able to see the field and the options in the frontend form.
What could be the problem?
For the question "In partucual the details of content template what are refering to?"
It is using Views shortcode [wpv-for-each] to output the multiple instance field value into JSON format data, the first item displays without comma, other items display with comma.
More help:
https://toolset.com/documentation/user-guides/views-shortcodes/#wpv-for-each
I assume the original question of this thread has been resolved:
https://toolset.com/forums/topic/select-date-from-data-picker/#post-1128010
For other new questions please check the new thread:
https://toolset.com/forums/topic/display-a-multiple-instance-text-field-as-radio-field-in-the-post-form/
My issue is resolved now. Thank you!


